Page 1 of 2
First Piston Cannon
Posted: Thu Dec 20, 2007 11:12 pm
by IlovePVC
Posted: Thu Dec 20, 2007 11:16 pm
by jon_89
Looking good.

have you shot it yet? what are your dimensions?
Posted: Fri Dec 21, 2007 12:38 am
by qbnbountyhunter
Clean and simple. I like that you utilized useless house hold item into a piston

Posted: Fri Dec 21, 2007 1:11 am
by SpudUke5
Thats called "overkill" when it you use something in excess when you dont need it, like you piloting that with a 1 inch pvc ball valve, when it can be piloted with a 3/4 inch modded sprinkler valve and would give better performance as in quicker piloting times.
Having a modded sprinkler valve will not only be egronomical, (Yes, i did steal that word from someone on this forum
) but also more efficient because you are wasting less air on piloting with a lesser flow area.
But depending on you pilot area, a 1 inch ball valve might be just enough to pilot it. But the smaller you make you pilot area, the less air being wasted and better performance comes out of it. Also you would be able to pilot it with a schrader.
But it is nice for a first piston valve.
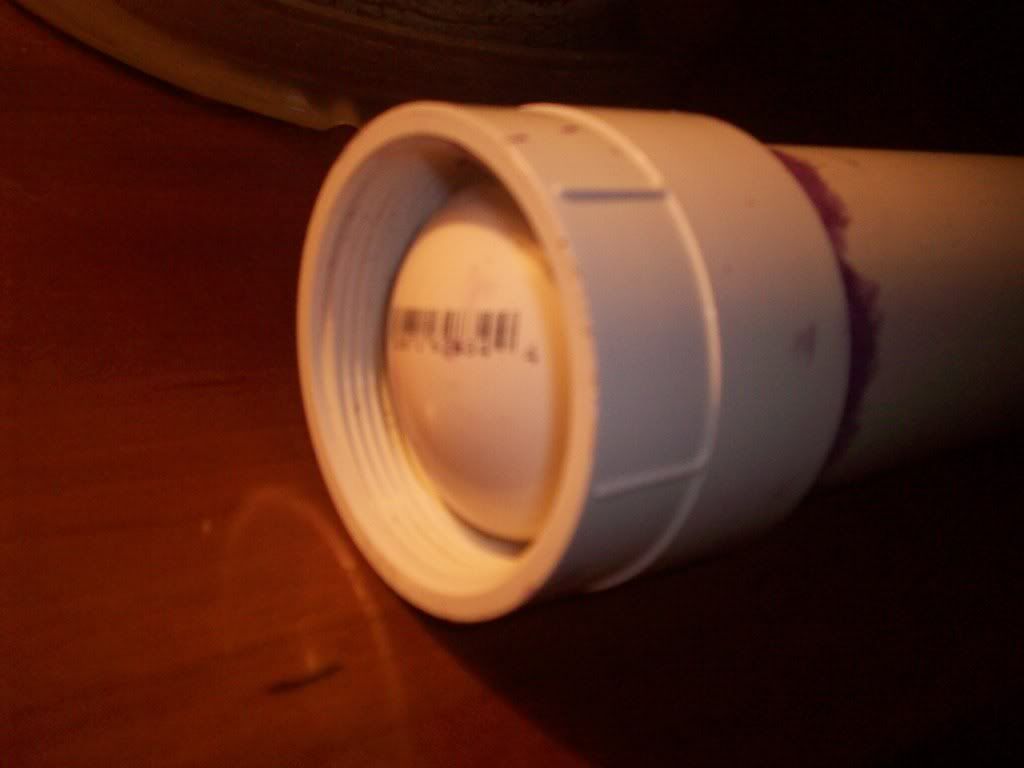
EDIT: Ahh, i found something!! 8) I dont think that cleanout cap is nsf-pw (pressure rated) better change that.
Posted: Fri Dec 21, 2007 1:17 am
by Killjoy
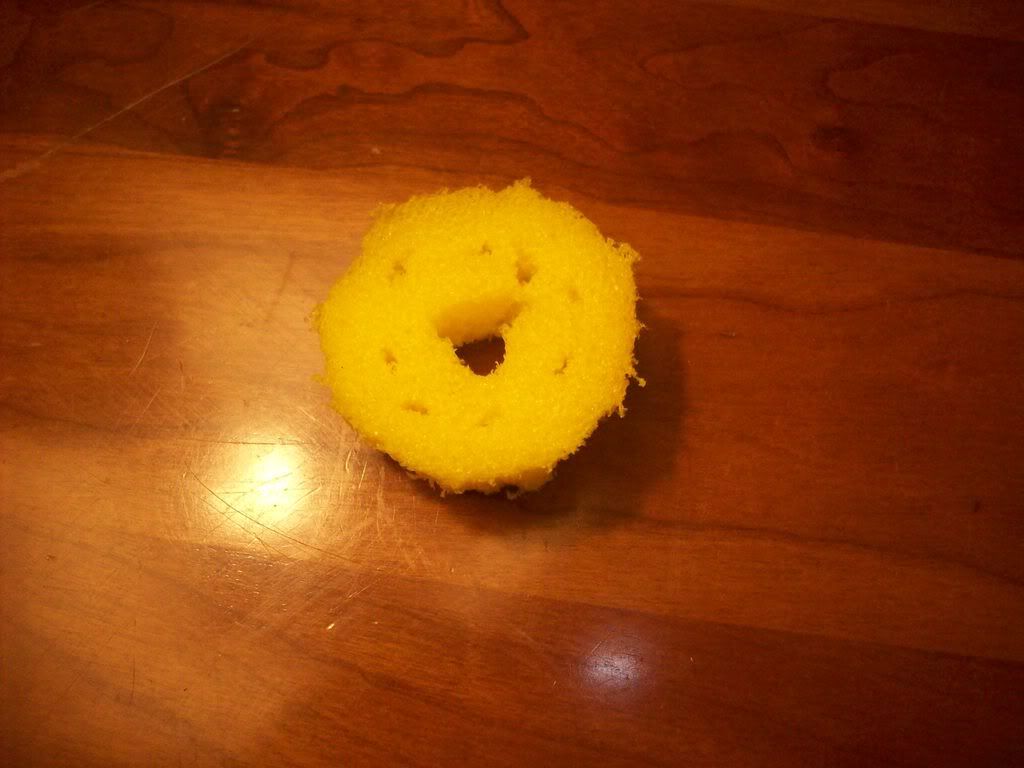
That looks good. Your bumper is actually quite inovative and unique to the best of my knowledge, very cool.
It should work fine with a 1" ball valve, though you could upgrade to a modded sprinkler valve but I'm not sure If the performance gains would be very great. Its your choice though.
Posted: Fri Dec 21, 2007 1:40 am
by MrCrowley
Not too bad, not bad at all. It's a good feeling when it finaly works isn't it

Good thing you didn't use a blowgun, unless your JSR there is no way you will pilot that thing effeciently with a blow gun, a 1/2" ball valve is a minimum pilot valve you'd want.
Posted: Fri Dec 21, 2007 2:09 am
by jackssmirkingrevenge
MrCrowley wrote:your JSR there is no way you will pilot that thing effeciently with a blow gun, a 1/2" ball valve is a minimum pilot valve you'd want.
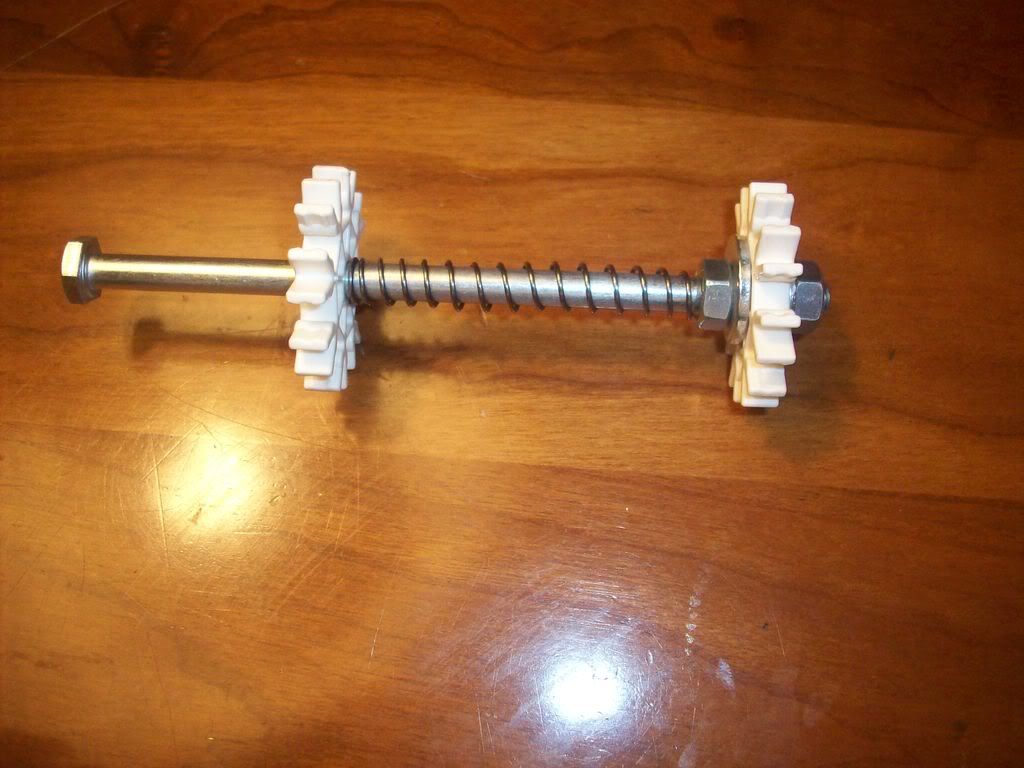
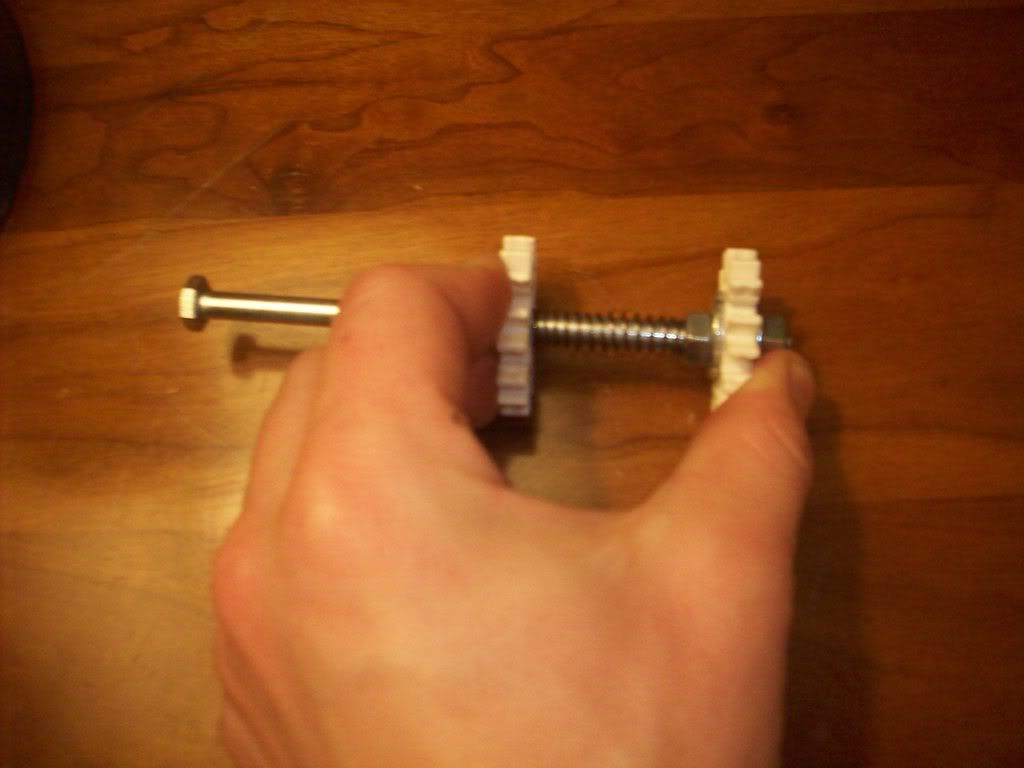
Aside from the issue of pilot volume, the fact that the piston contacts with the bolt is a potential source of stress on the endcap - if i were you I would eliminate it completely, if you're filling flow the back then the piston will be blown forward by the airflow and still seal adequately, so the spring is unneccesary. You could also cut down on pilot volume by attaching the ball valve directly into the endcap, and putting your schrader elsewhere
Other than that it should work well enough, good luck and be sure to post some damage pics/video
Posted: Fri Dec 21, 2007 9:18 am
by IlovePVC
jon_89 wrote:Looking good.
have you shot it yet? what are your dimensions?
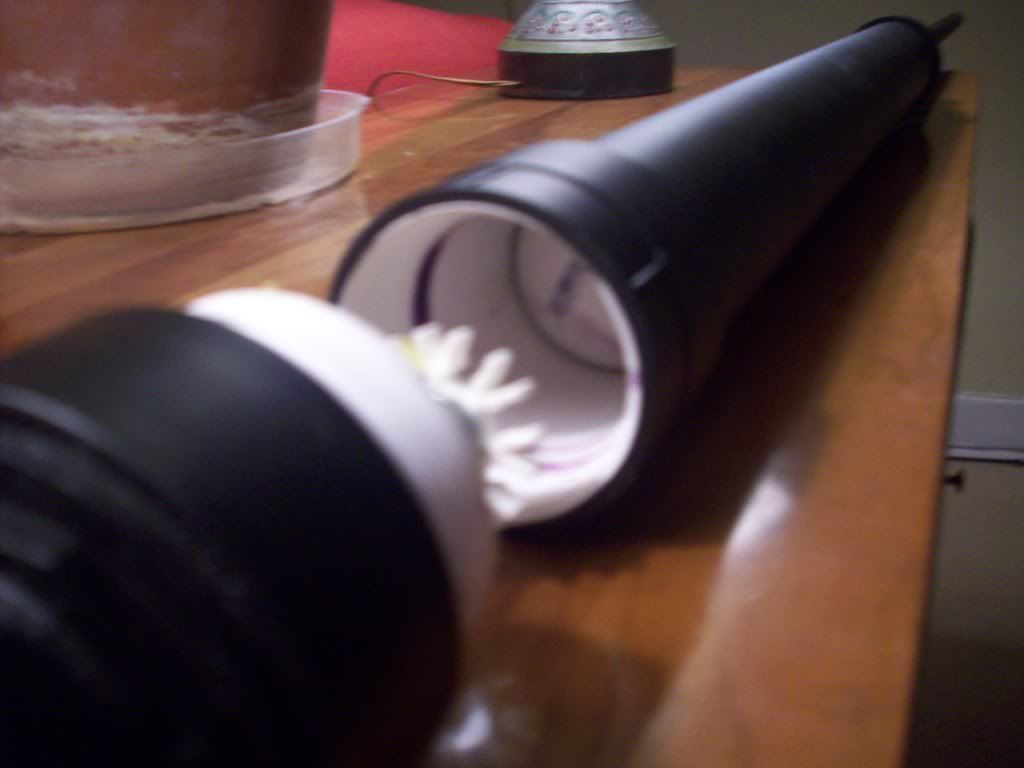
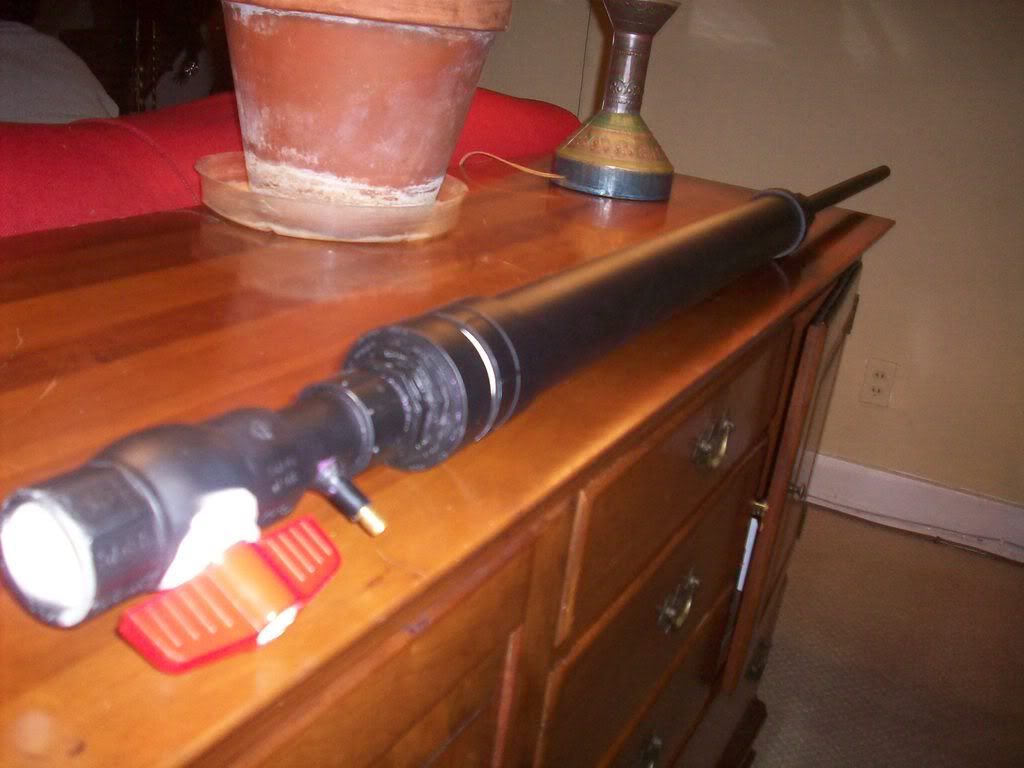
The chamber is a little less than 3ft of 2" sch40, and the barrel inside is almost 5 ft of 1/2" The whole thing is a about 5' 6" long
LikimysCrotchus5 wrote:Having a modded sprinkler valve will not only be egronomical, (Yes, i did steal that word from someone on this forum
) but also more efficient because you are wasting less air on piloting with a lesser flow area.
EDIT: Ahh, i found something!! 8) I dont think that cleanout cap is nsf-pw (pressure rated) better change that.
I just used the ball valve because I found it lying around my house and didn't feel like spending too much on this cannon (remember, I didn't think it would work.) Plus, I live in the city so it's not easy to find a place that sells sprinkler valves. I usually end up ordering them online, and this started off as more of an experiment than a full blown project.
When you say cleanout, do you mean the 2" male? If you do, then it is pressure rated, it said it on the box.
Posted: Fri Dec 21, 2007 3:54 pm
by SpudUke5
Well usually a cleanout means the cap and the part that connects to the gun because usually the cap is sold with the part that connects to the gun. And if one is dwv, then most likely the other will be.
But sorry to misjudge, i was just looking out for a fellow member.
Posted: Fri Dec 21, 2007 8:57 pm
by Model12
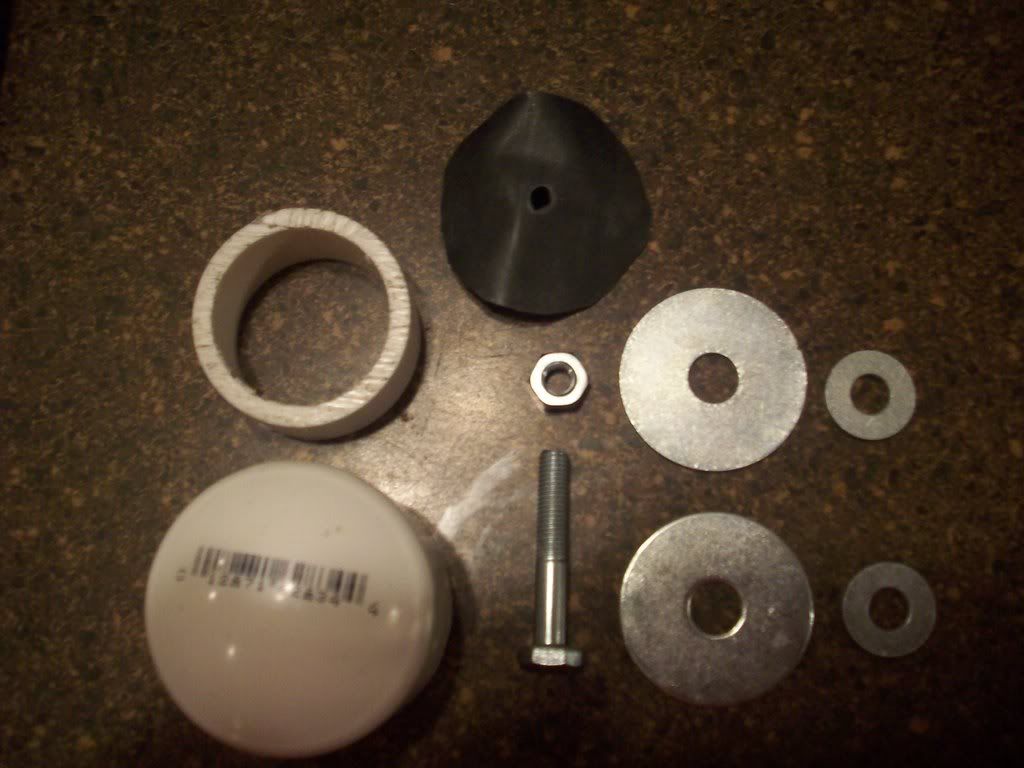
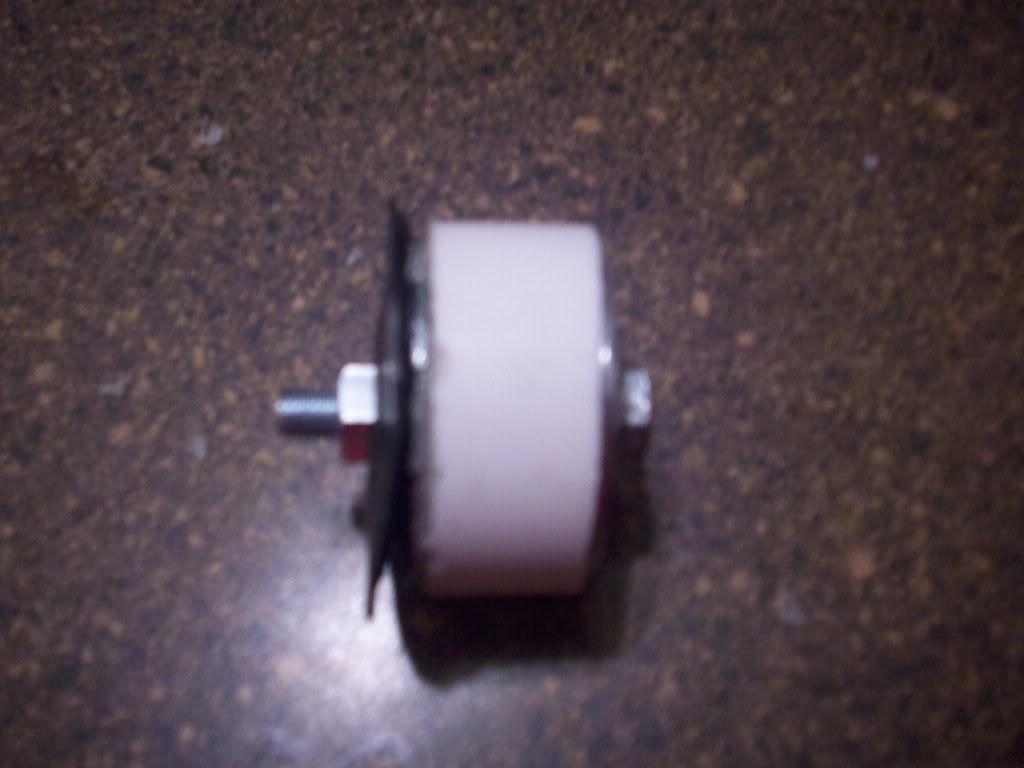
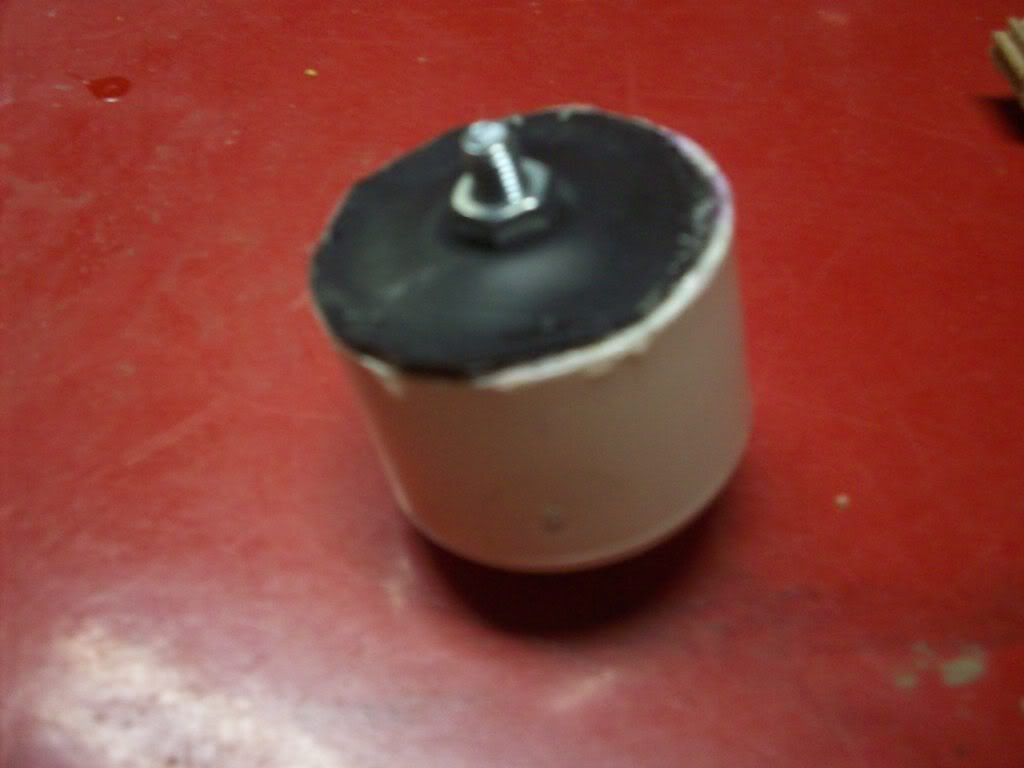
What did you use for the front of the gun? Id like to see a picture of that, and also the spring action and bumper in the gun. Did you use a washer and everything on both knex pieces I cant really tell? I ask cause im getting the parts to make pretty much this same gun tomorrow.
Posted: Sat Dec 22, 2007 4:42 pm
by IlovePVC
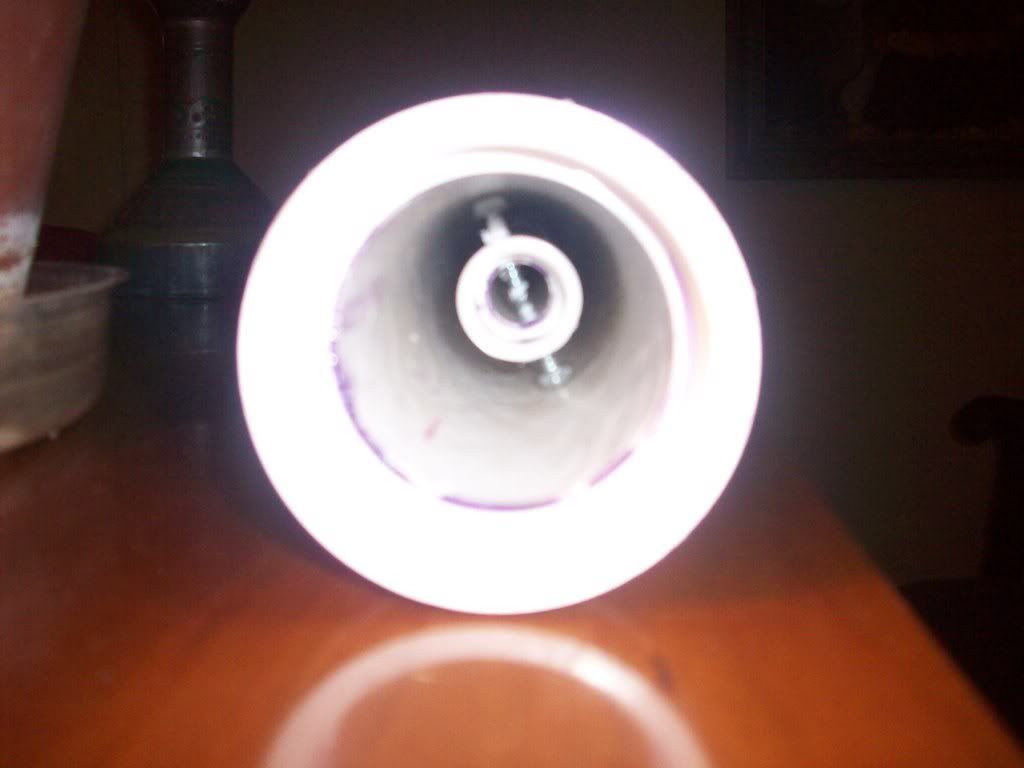
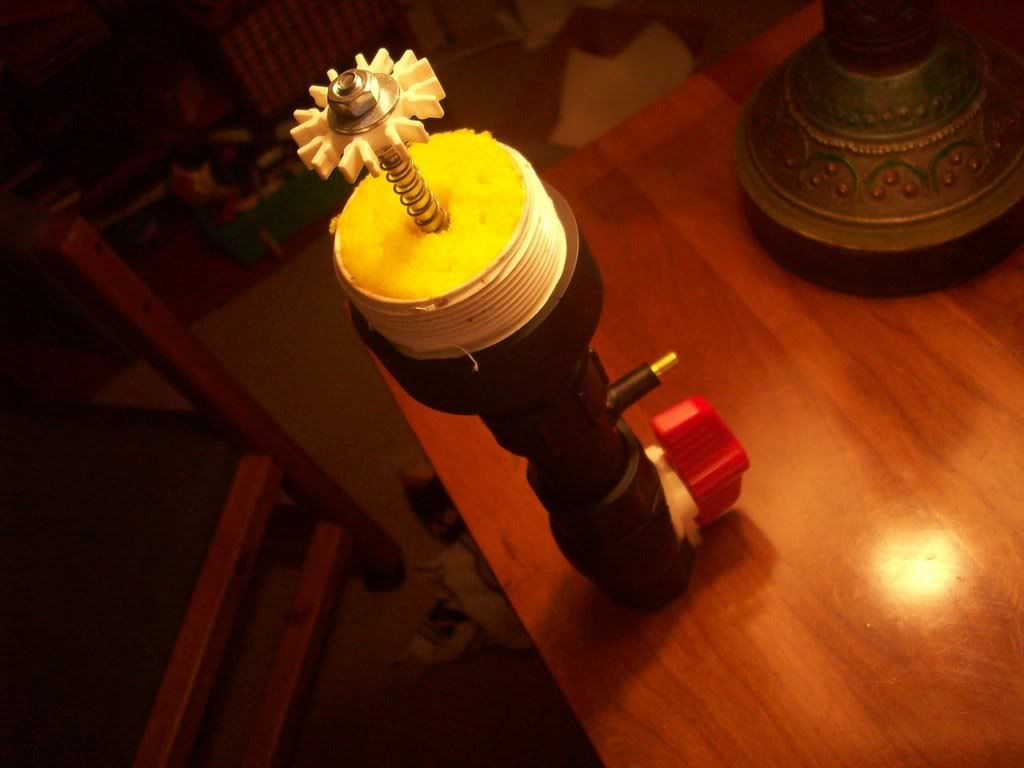
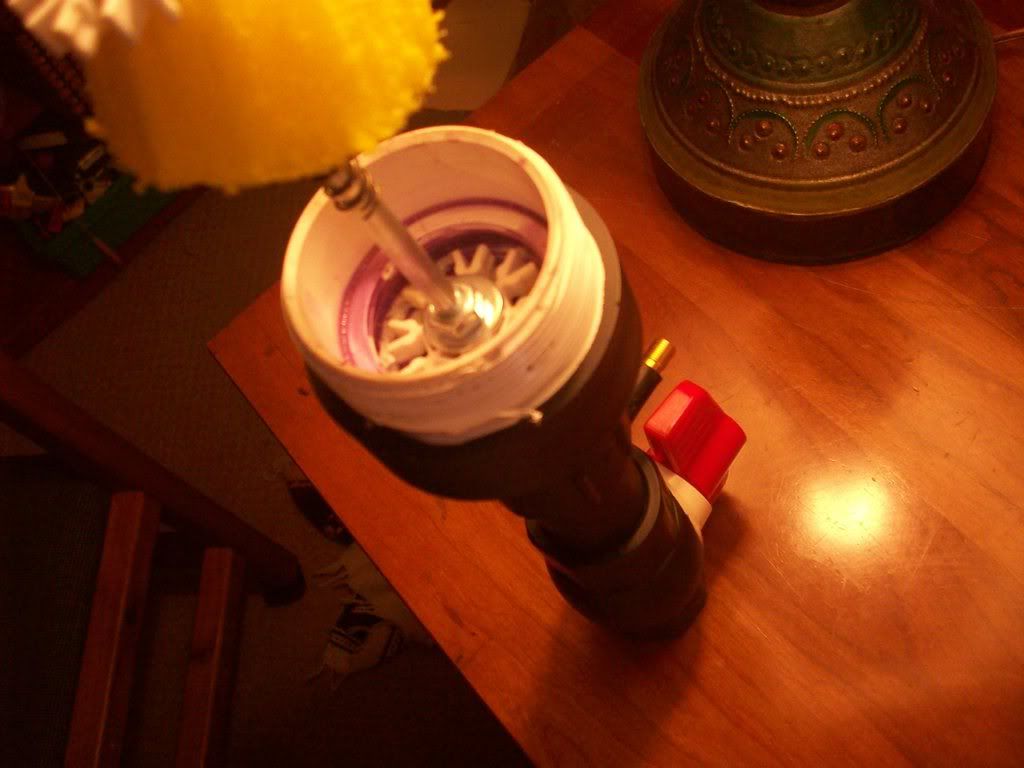
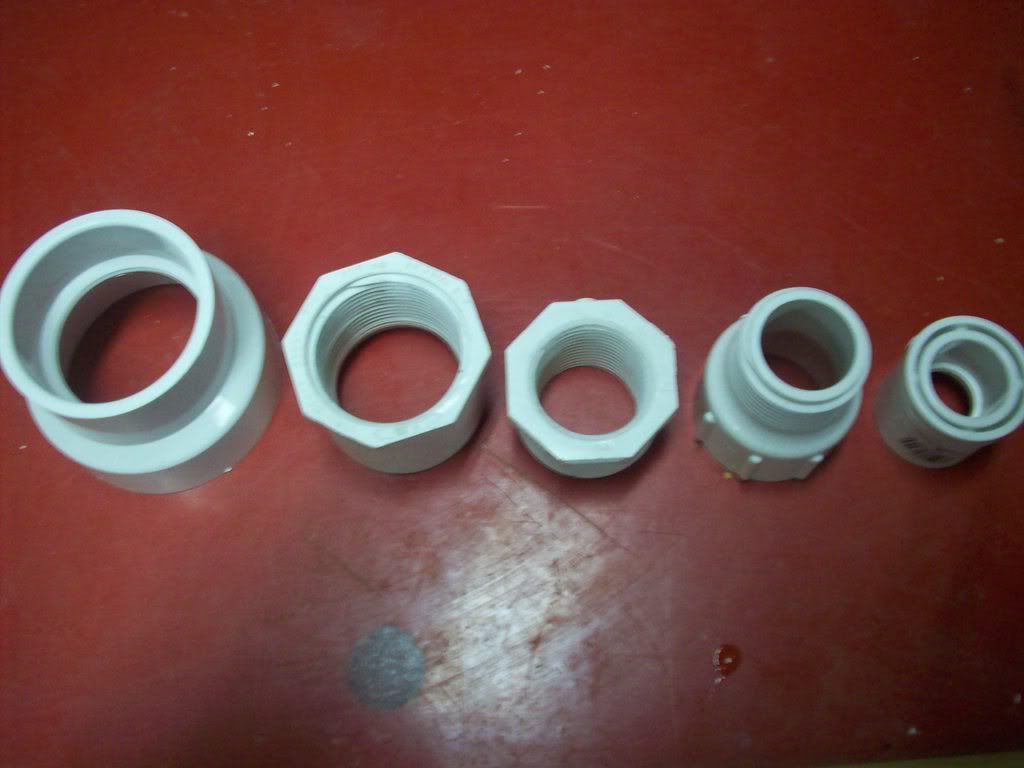
These pieces are from left to right: 2" to 1 1/2" reducer, 1 1/2" flush to 1 1/4" threaded bushing, 1 1/4" threads to 1" threads, 1" male, 1" flush to 1/2" flush bushing. Usually for threads you would use teflon tape but I cemented most of the threads because I'm not planning on taking it apart. The barrel goes through the 1" to 1/2" bushing.
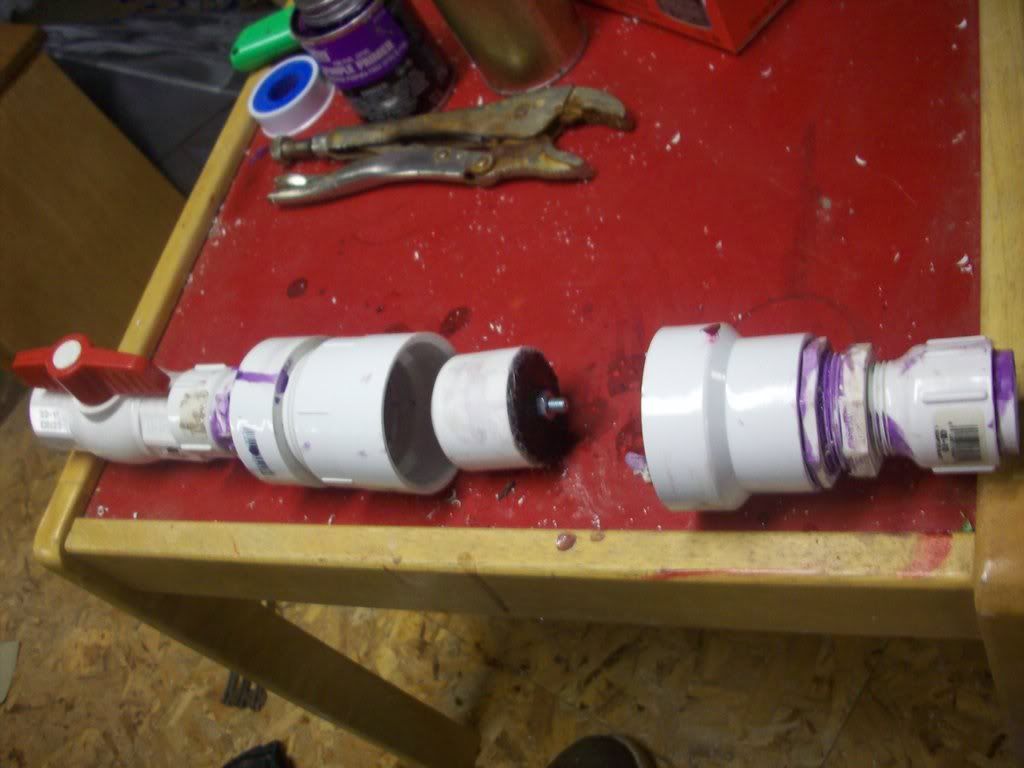

Be careful not to cement the barrel at first. I had to push it out of the opposite end of the chamber to get the screws (that hold it in the center) in it and then I had to make sure that it wasn't too far away that it wouldn't be reached by the piston and the spring mechanism. Go back to the top and check out the picture of the spring mechanism. In the picture it's shown upside-down. My explanation should help you.
Posted: Sat Dec 22, 2007 9:47 pm
by cwazy1
mnone of those pictures work.
Posted: Sat Dec 22, 2007 10:06 pm
by Maniac
yea they dont work now for some reason except one.
I had look at it before though and i liked a lot. from what i can remember
Posted: Sat Dec 22, 2007 10:09 pm
by Novacastrian
I get eight that work, the rest don't.
Looks good.
Posted: Sun Dec 23, 2007 2:59 pm
by cwazy1
i cant see any of the pictures