Update 8/6/08 Damage pics and VIDEOS (yeah!) on page 5
Posted: Wed Apr 09, 2008 7:54 am
UPDATE: 7/25/08 New pics on page 4 (primer stage)
I took my canon to the lake house last weekend to see how far I could shoot a potato out into the lake from the deck. My dad has been waiting to shoot this thing as well. I was also excited becuase my Dad has a beefy air compressor so I could finally crank the this up to 120 psi (valve is rated at 150 psi).
I didn't have a barrel support on the orignal design and I think I stuffed the potato in too tight, becuase when I shoot it the Barrel broke off at the sprinkler valve. It was a clean break and I didn't get hurt. The potato shot a good 200+ feet. Not bad for a 20" barrel.
Originally I glued the threads on the valve so we bored out the broken pipe and threads on the vavle and glued the barrel back in. I should have added a longer barrel but i'm going to make another cannon very soon, so I just decided to leave this on as is.
I added a barrel support this time around (actually my Dad did it while he was on vacation last week, that was cool) so the barrel is a lot more stable now.
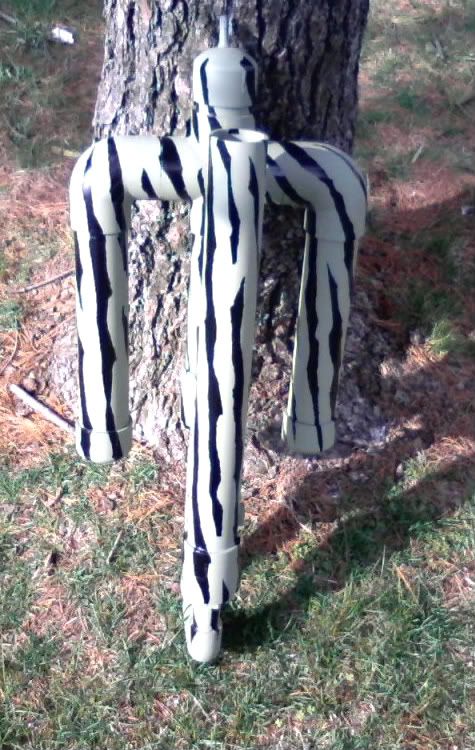
Since the paintjob got messed up fixing the gun and the barrel supports where unpainted. Ive decided to give it a new paintjob. I'll post picks when it's done.
Finished, MORE pictures on PAGE 4
<a href="http://s273.photobucket.com/albums/jj23 ... 081720.jpg" target="_blank"><img src="http://i273.photobucket.com/albums/jj23 ... 081720.jpg" border="0" alt="Photobucket"></a>
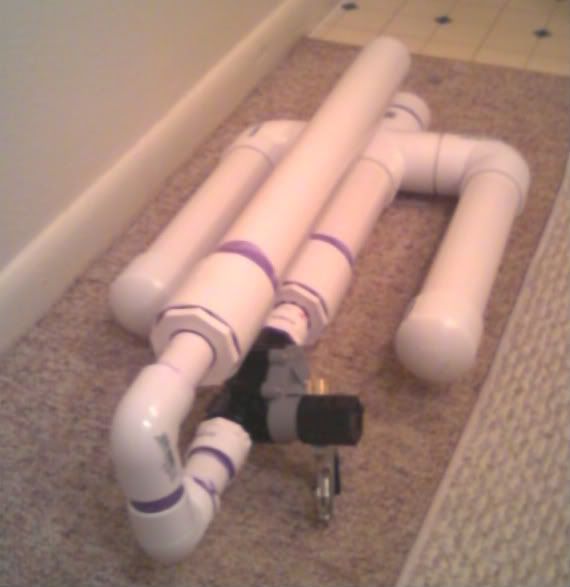
I give you the CROSSBOW. The barrel is 20" and the air chamber is 60". We will see how this affects the power. This gives me a 3:1 ratio.
<a href="http://s273.photobucket.com/albums/jj23 ... 81800a.jpg" target="_blank"><img src="http://i273.photobucket.com/albums/jj23 ... 81800a.jpg" border="0" alt="Photobucket"></a>
I want more power...need help.
My first test fire was nothing short of, lets see how to put it..........uhhhh PATHETIC I Want more POWER!!! I can't really change the design becuase everything is glued solid. I can however expand the air chamber very easily. Here is my idea for expanding the air chamber. Will this design work or will the performance still be in the toilet? The first design looks goofy it would be in the shape of an "S" . The second option I think would look pretty cool with three air chambers underneath the barrel, I don't know how it would perform though ?
<a href="http://s273.photobucket.com/albums/jj23 ... 080932.jpg" target="_blank"><img src="http://i273.photobucket.com/albums/jj23 ... 080932.jpg" border="0" alt="Photobucket"></a>
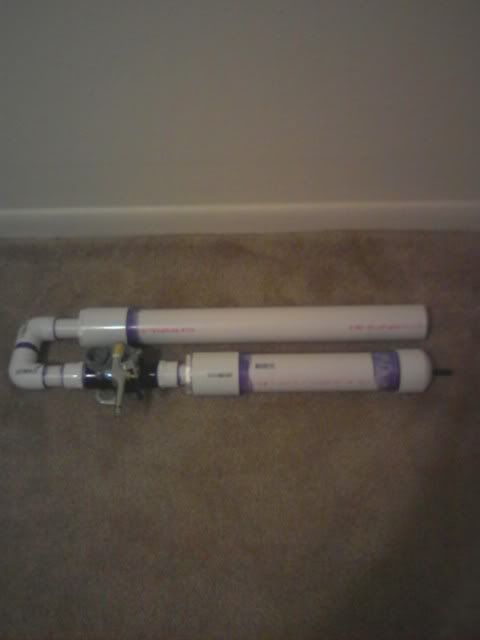
Ok, here it is! First off the primer job sucks, but I'm painting it sometime this week. I just haven't decided what color. I plan to use this for paintball as a "one shot" grenade launcher or grape shot device. I haven't had a chance to chrono it to see if it will be safe or even have enough power to shoot enough paintballs far enough to be effective. I can always expand the air chamber later for more power. I used a cp-100 rain bird for the valve and it seems to work ok. No damage pics yet.
I live in an apartment complex and cranked it up to about 50 psi last night and it was really LOUD when I let it go among the buildings. I want to crank it up to 90 psi, but I need a better gauge, my wimpy tire gauge only goes to 50 psi so I didn't want to risk over filling it.
The air chamber is 12" long and the Barrel is 20". I hope the wimpy air chamber will be enough. I know it's not a 1:1 ratio, but I tried to make it as compact as possible. It's a little bigger than I like, but this should work great for castle games.
Everything is sch 40 pvc. This site was great for doing research. So many designs to choose from. There are some amazing cannons on here. Enjoy the pictures.
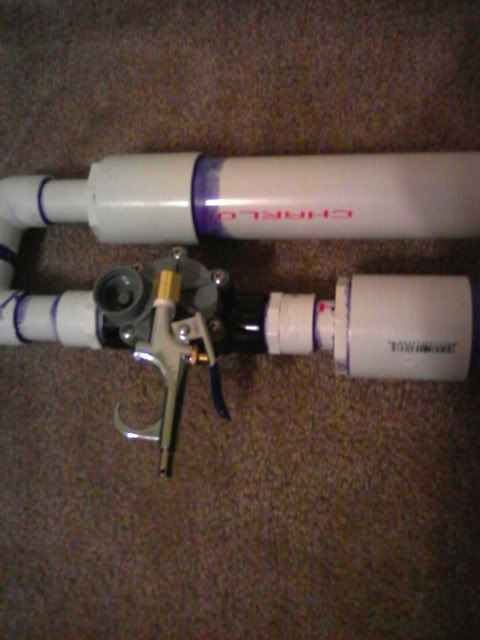
I forgot to add I would like to try and make a safety. (like on a gun, so it doesn't accidentally fire) Anyone have a picture of something that works??? I just thought I could use some hose with a small ball valve between the valve and the blow gun. In theory that should work, yes ????
<a href="http://s273.photobucket.com/albums/jj23 ... 2002-1.jpg" target="_blank"><img src="http://i273.photobucket.com/albums/jj23 ... 2002-1.jpg" border="0" alt="Photobucket"></a>
<a href="http://s273.photobucket.com/albums/jj23 ... 82002a.jpg" target="_blank"><img src="http://i273.photobucket.com/albums/jj23 ... 82002a.jpg" border="0" alt="Photobucket"></a>
I took my canon to the lake house last weekend to see how far I could shoot a potato out into the lake from the deck. My dad has been waiting to shoot this thing as well. I was also excited becuase my Dad has a beefy air compressor so I could finally crank the this up to 120 psi (valve is rated at 150 psi).
I didn't have a barrel support on the orignal design and I think I stuffed the potato in too tight, becuase when I shoot it the Barrel broke off at the sprinkler valve. It was a clean break and I didn't get hurt. The potato shot a good 200+ feet. Not bad for a 20" barrel.
Originally I glued the threads on the valve so we bored out the broken pipe and threads on the vavle and glued the barrel back in. I should have added a longer barrel but i'm going to make another cannon very soon, so I just decided to leave this on as is.
I added a barrel support this time around (actually my Dad did it while he was on vacation last week, that was cool) so the barrel is a lot more stable now.
Since the paintjob got messed up fixing the gun and the barrel supports where unpainted. Ive decided to give it a new paintjob. I'll post picks when it's done.
Finished, MORE pictures on PAGE 4
<a href="http://s273.photobucket.com/albums/jj23 ... 081720.jpg" target="_blank"><img src="http://i273.photobucket.com/albums/jj23 ... 081720.jpg" border="0" alt="Photobucket"></a>
I give you the CROSSBOW. The barrel is 20" and the air chamber is 60". We will see how this affects the power. This gives me a 3:1 ratio.
<a href="http://s273.photobucket.com/albums/jj23 ... 81800a.jpg" target="_blank"><img src="http://i273.photobucket.com/albums/jj23 ... 81800a.jpg" border="0" alt="Photobucket"></a>
I want more power...need help.
My first test fire was nothing short of, lets see how to put it..........uhhhh PATHETIC
<a href="http://s273.photobucket.com/albums/jj23 ... 080932.jpg" target="_blank"><img src="http://i273.photobucket.com/albums/jj23 ... 080932.jpg" border="0" alt="Photobucket"></a>
Ok, here it is! First off the primer job sucks, but I'm painting it sometime this week. I just haven't decided what color. I plan to use this for paintball as a "one shot" grenade launcher or grape shot device. I haven't had a chance to chrono it to see if it will be safe or even have enough power to shoot enough paintballs far enough to be effective. I can always expand the air chamber later for more power. I used a cp-100 rain bird for the valve and it seems to work ok. No damage pics yet.
I live in an apartment complex and cranked it up to about 50 psi last night and it was really LOUD when I let it go among the buildings. I want to crank it up to 90 psi, but I need a better gauge, my wimpy tire gauge only goes to 50 psi so I didn't want to risk over filling it.
The air chamber is 12" long and the Barrel is 20". I hope the wimpy air chamber will be enough. I know it's not a 1:1 ratio, but I tried to make it as compact as possible. It's a little bigger than I like, but this should work great for castle games.
Everything is sch 40 pvc. This site was great for doing research. So many designs to choose from. There are some amazing cannons on here. Enjoy the pictures.
I forgot to add I would like to try and make a safety. (like on a gun, so it doesn't accidentally fire) Anyone have a picture of something that works??? I just thought I could use some hose with a small ball valve between the valve and the blow gun. In theory that should work, yes ????
<a href="http://s273.photobucket.com/albums/jj23 ... 2002-1.jpg" target="_blank"><img src="http://i273.photobucket.com/albums/jj23 ... 2002-1.jpg" border="0" alt="Photobucket"></a>
<a href="http://s273.photobucket.com/albums/jj23 ... 82002a.jpg" target="_blank"><img src="http://i273.photobucket.com/albums/jj23 ... 82002a.jpg" border="0" alt="Photobucket"></a>