Page 1 of 1
Damage inc.(first piston valve!)
Posted: Sat Sep 05, 2009 8:24 pm
by geardog32
so this is my first piston valve cannon, and i must say WOW! my first pneumatic cannon was a sprinkler valve cannon, and it was pretty powerful but does not compare to this thing. i am going to try to take it out before i have to go back to school and get some video of it in action.
edit:fixed title to avoid confusion sorry to disappoint.
Specs:
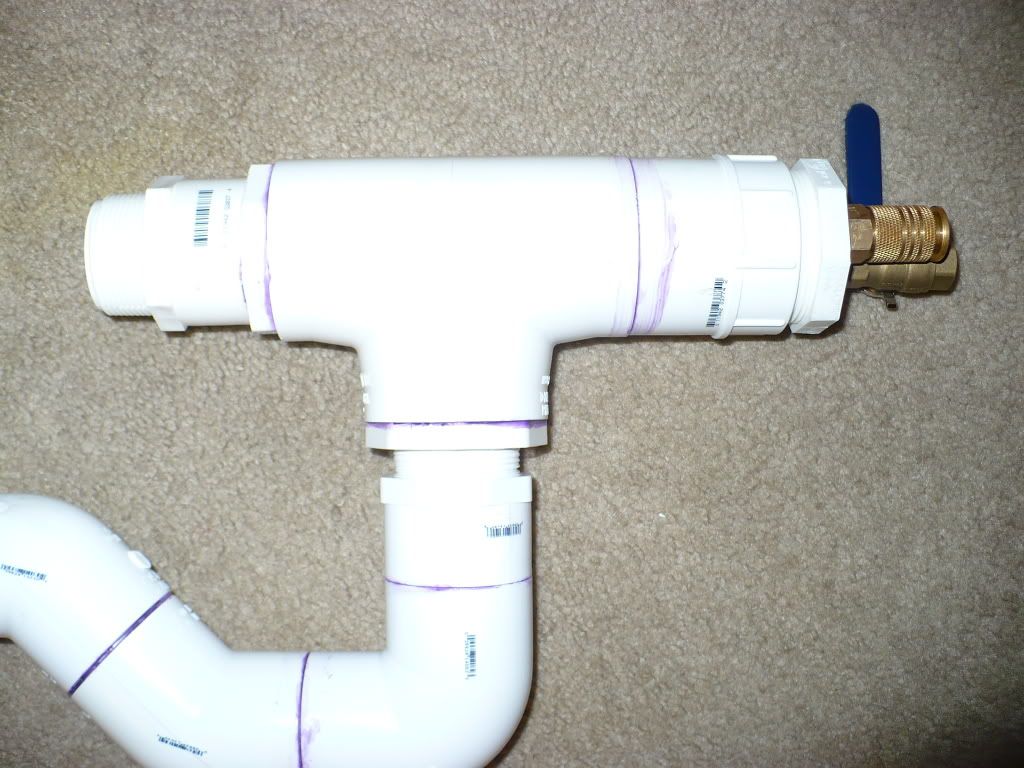
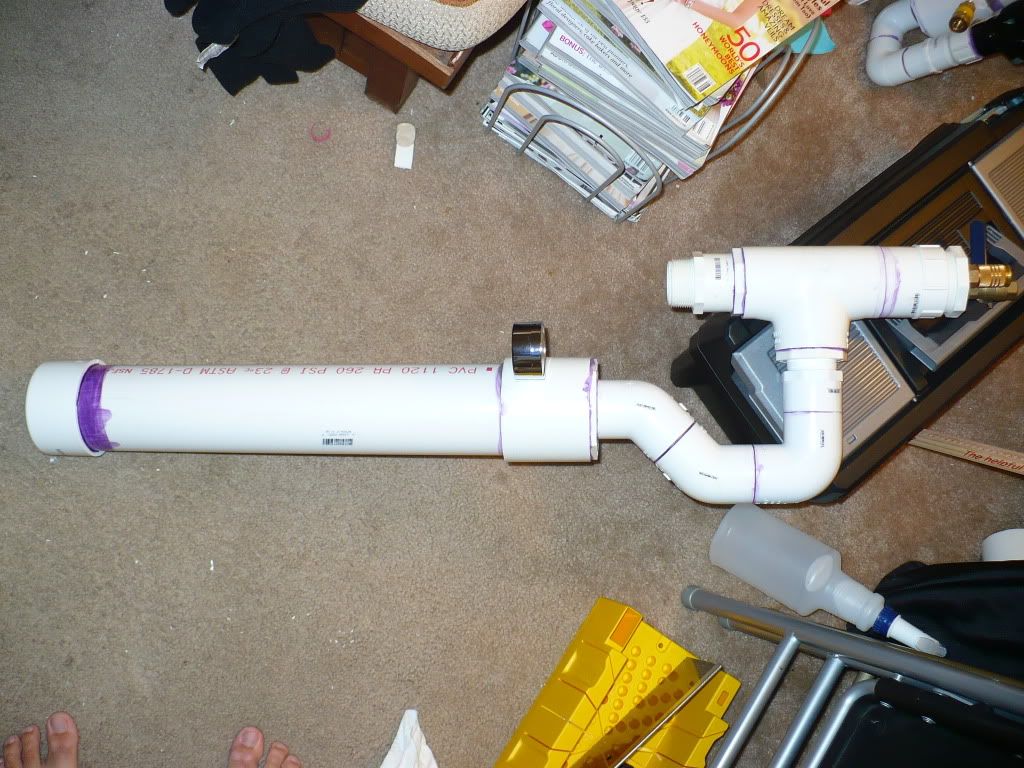
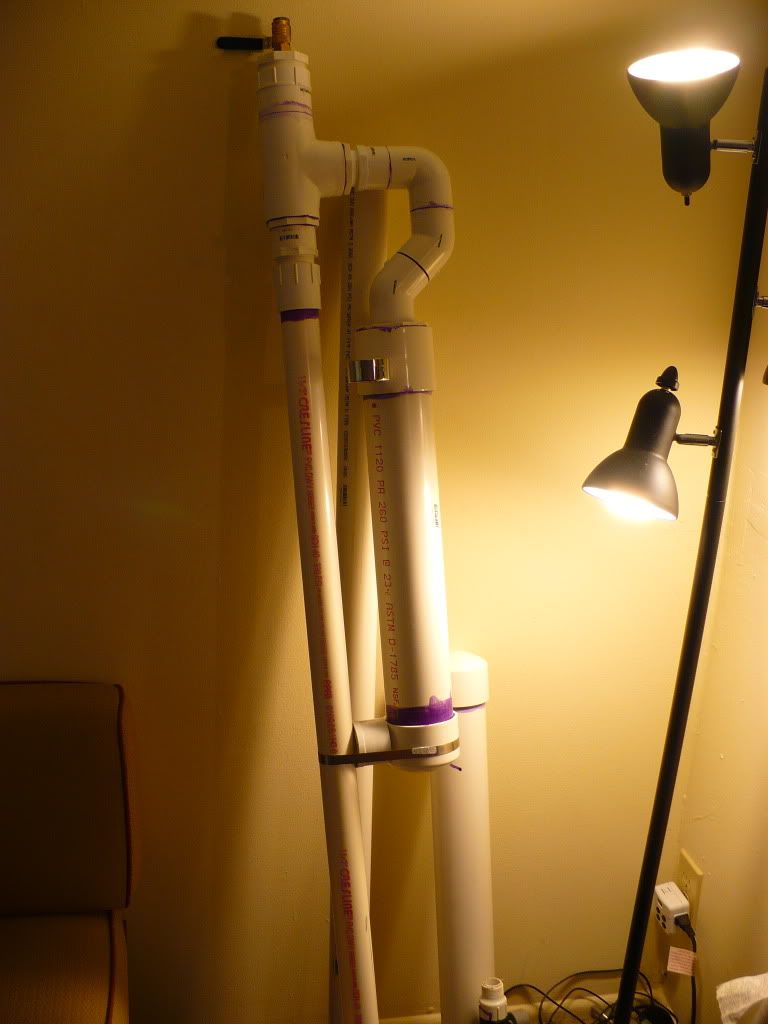
Chamber: 20" X 3"
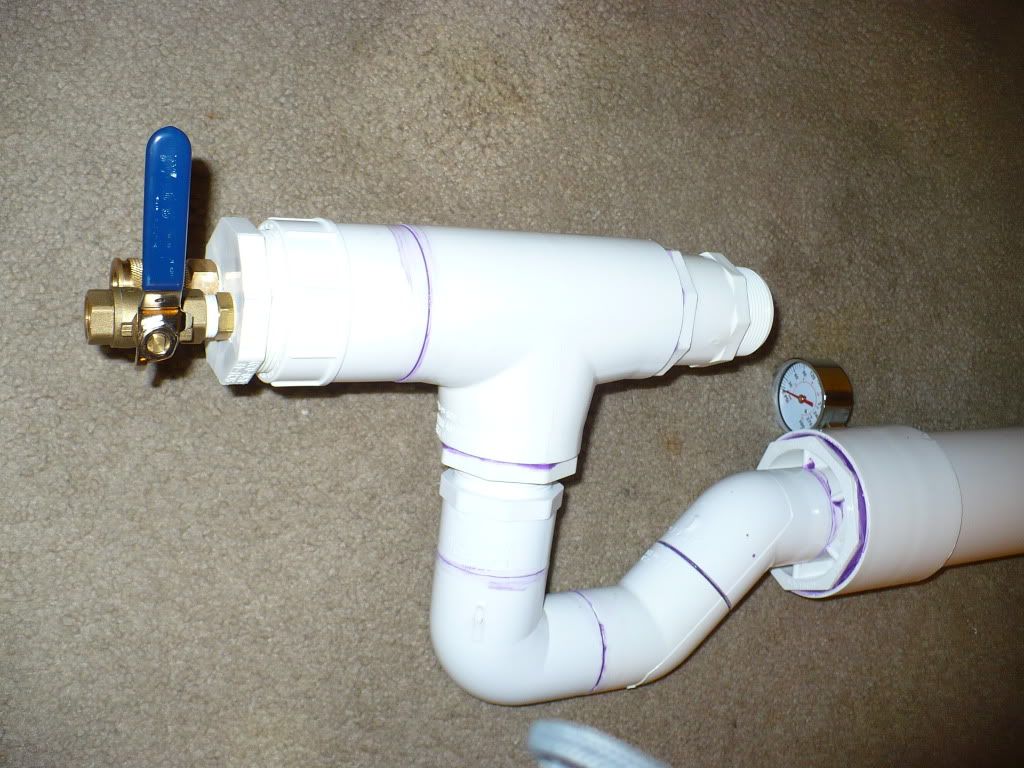
Valve: 2 inch T. 1.5 inch porting, 3/8 ball valve pilot
Barrel: right now its only a 1.5" X 48"
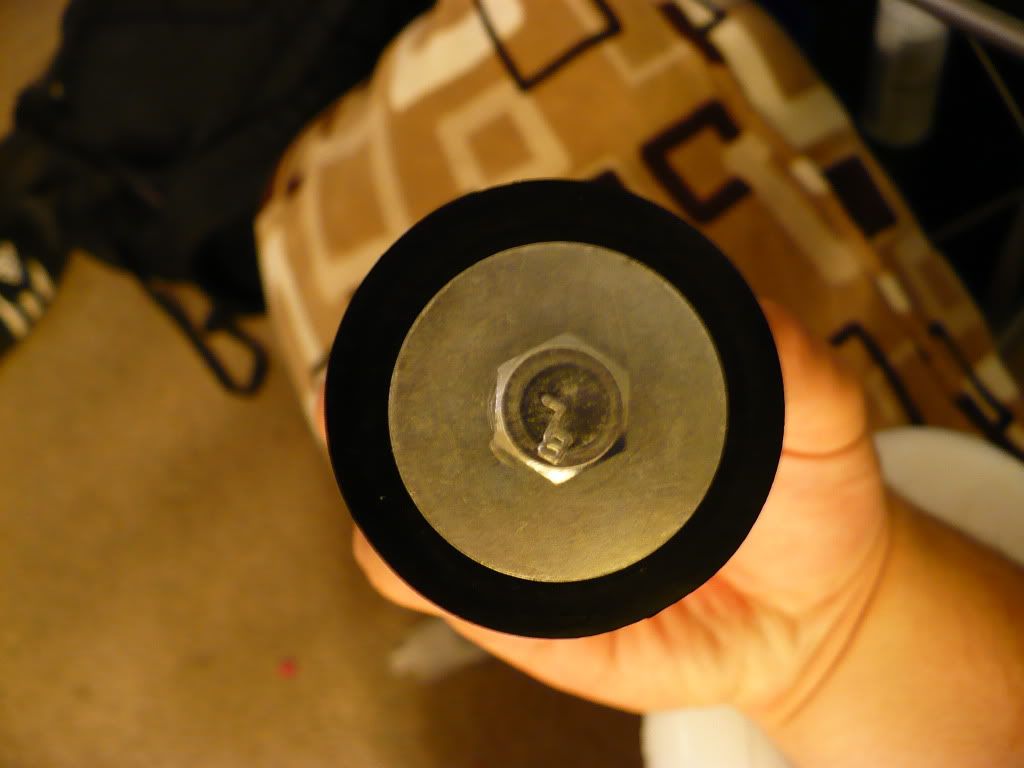
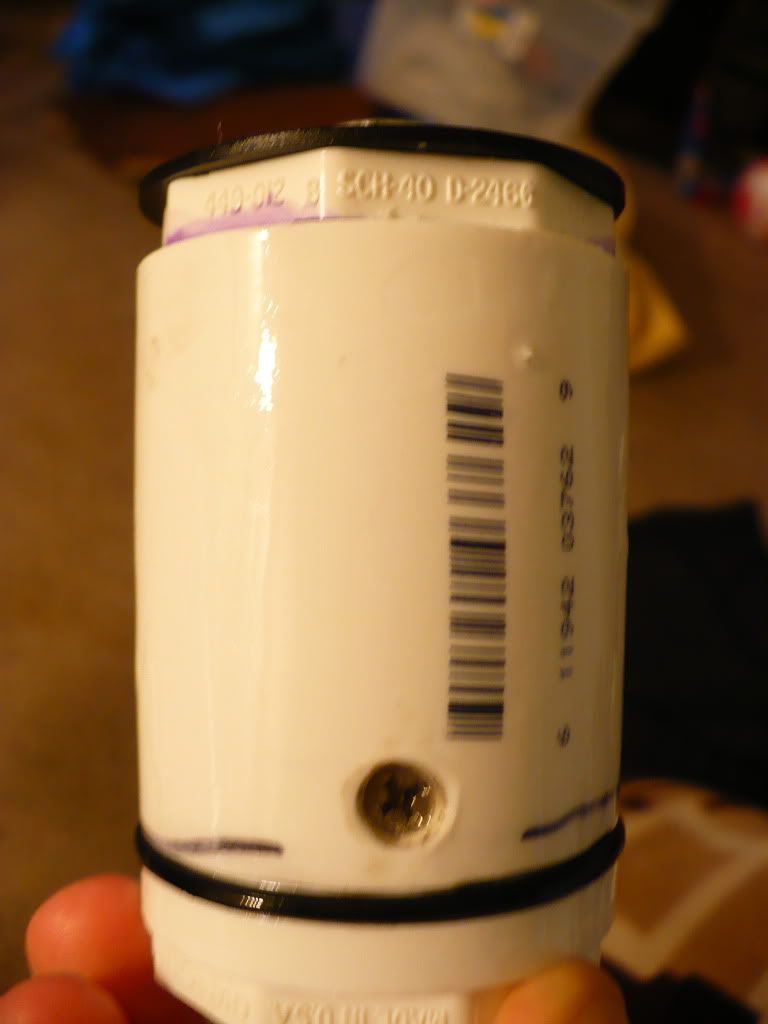
Piston:1 1/4 coupling, o ringed, and built in check valve.
Sealing face: rubber washer

Posted: Sat Sep 05, 2009 8:28 pm
by twizi
nice cannon u should get some good data/recoil/hearing protection
happy rag
Posted: Sat Sep 05, 2009 8:29 pm
by tghhs
WOW....
THIS IS AWESOME!
Good job, the asthetics are very nice, i find some pvc cannons just lack it but this is well cool.
I'm thinking of making something similar so thanks for the reference

BTW dammage PICS!!!!!

hahahaha every spudders faviourte
Posted: Sat Sep 05, 2009 8:35 pm
by twizi
what presure if below 200 then sprinkler for better pilot
Posted: Sat Sep 05, 2009 9:06 pm
by geardog32
sorry for the topic title, the name of the cannon is Damage inc.(dorky i know) i will get some damage pictures though in the near future. and thank your for your comments. will fix the title too
twizi wrote:what presure if below 200 then sprinkler for better pilot
so far i have not taken it past 100 psi and do not plan on taking it much further. as for piloting i could not see it improving much more considering the piston has an o ring and a built in check valve. i also spent a long time working the ball valve to loosen it up for quick turning. i was considering a sprinkler to pilot in the beginning but i wanted to keep it cheap. i also didnt care for how the sprinkler looks on the back of a piston valve. i may use a spring to actuate the ball valve in the future.
Posted: Sat Sep 05, 2009 9:23 pm
by Ragnarok
twizi wrote:nice cannon u should get some good data/recoil/hearing protection
?damage pics?
'fer cryin' out loud.
Is this the way this forum is going? A completely cursory (and essentially useless) nod to praising the builder, then shoving unspecific advice at them, then demanding "damage pics" in
size 24 font? And all of it badly spelt and without a single capital letter?
Posting such a short and hopelessly generic response would be thought of as nigh-on an insult on some forums, and the increasing number of such things does little for what already scarce motivation I have to put my future creations on the site.
Take a point about the cannon you like. Even if it's something someone else has already pointed out, it's better than writing a post that could probably fit 90 other topics. In such a case, it will no longer sound like you're hyper and trying to get your post count up.
~~~~~
Anyway, to actually provide a post of a little more worth...
A respectably neat build mate, you've obviously put in the time to get it done properly (almost textbook in fact, with the use of the proper parts and gauge fitted through two layers).
At that size, 100 psi should still give it real punch, but I don't think you need worry about 120 or so, if you have the facilities for such. More than that would only risk trouble, because too much pressure in large pistol valves can be more trouble than it's worth.
I say that at least partly because I'm a little concerned about the relatively frail piping between the piston valve and chamber taking the brunt of recoil, but provided you've keep the barrel strapped down properly, that shouldn't be too much of a concern at sensible pressures. Equally though, don't clamp the barrel so hard as to distort it.
The pipe marking and primer discolouration would inspire me to paint it (of course, if I were making it), but if you're not overly fussed about the cosmetics, then fair enough.
Anyway, I say, call your cannon what you like, provided it's not actually vulgar or excessively cliché. (Quote marks in the title might help avoid further confusion.)
Posted: Sat Sep 05, 2009 9:32 pm
by twizi
i dont care about my post count
i just meant that he made a great cannon and that we would like damage pic and i stuck it in 24 font to say that we really want damage pic witch is a good thing
Posted: Sat Sep 05, 2009 9:49 pm
by Ragnarok
Whatever you think twizi, it's not half as respectful as if your response doesn't sound like it could be copy-pasted into the next topic that comes along.
Anyway, even with your addiction to damage pictures, it doesn't take much more effort to ask "Do you have any damage pics?" which is not only more polite, it sounds far less like a spoilt child.
Posted: Sat Sep 05, 2009 9:56 pm
by twizi
thanks ragnarok back on topic whats your bumper looks like it could be slowing flow from pilot but i cant see from the pic
Posted: Sat Sep 05, 2009 10:07 pm
by geardog32
thank you rag your post are always full of knowledge and elegant proper speech. and twizi dont feel to bad i have no hard feelings here, i will try to get some damage picks going for you.
As for paint i have considered painting it along with my other cannon. i have not decided on a color or scheme yet though. black is ok but i feel boring and over used and camo is for hunting. I'm thinking i might do a mix of bright and dark colors along with some stencil work. we'll see how it goes during my days off.
Posted: Sat Sep 05, 2009 10:11 pm
by geardog32
twizi wrote:thanks ragnarok back on topic whats your bumper looks like it could be slowing flow from pilot but i cant see from the pic
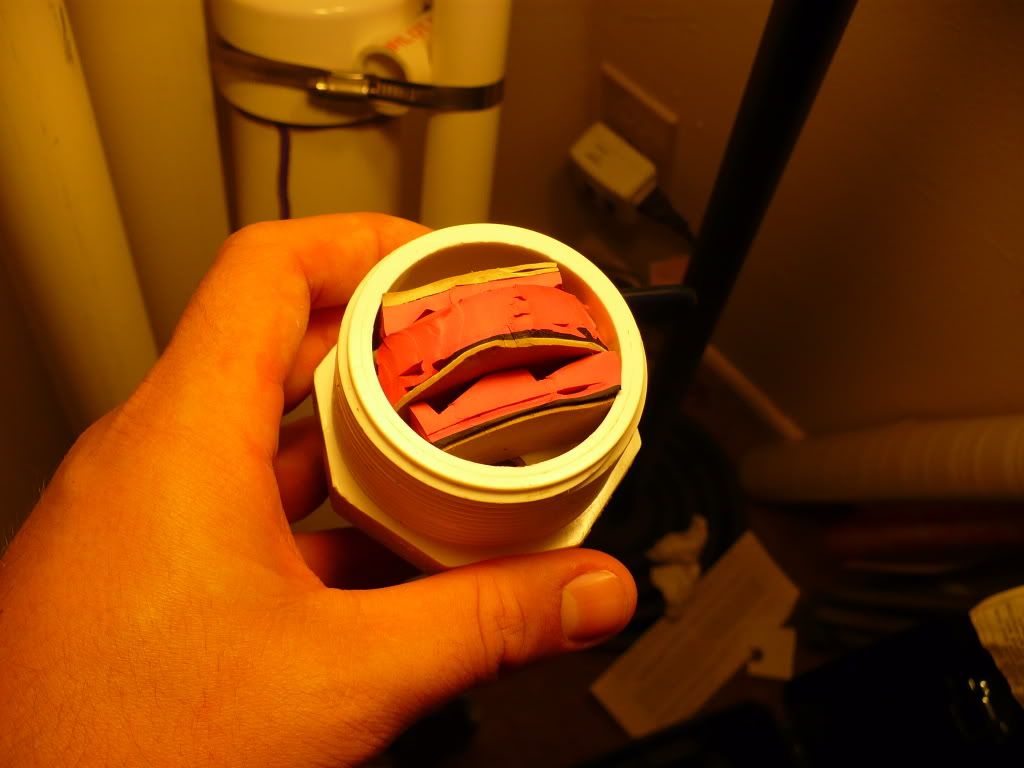
the bumper is made from the rubber sole on some old rubber rainboots my girlfriend was going to throw away. i originally had a piece of foam as the bumper but was getting sucked up against the pilot valve and stopping the flow. the rubber bumper i have on it now has part of it cut away so that it is not flat against the pilot valve.
Posted: Sat Sep 05, 2009 10:14 pm
by inonickname
Twizi doesn't spam half as much as me

I like it. It's all done by the book and quite well. The only thing I could think of changing would be to have a female thread inside the tee rather than a male one outside. I'd assume the ballvalve is an adequate pilot seen as the piston is o-ringed. A 1" or even 3/4" sprinkler valve would offer a little improvement though.
Posted: Sat Sep 05, 2009 10:29 pm
by Technician1002
geardog32 wrote: i originally had a piece of foam as the bumper but was getting sucked up against the pilot valve and stopping the flow. the rubber bumper i have on it now has part of it cut away so that it is not flat against the pilot valve.
It's a good idea to put a hole through the bumper so the air has an open path through the bumper. All my bumpers are washer shaped.
Posted: Sat Sep 05, 2009 11:26 pm
by King_TaTer
As others have said, good build. The classic 1 1/4" coupling piston is always a win. I hope to build one eventually.
I would also change the way your bumper is placed. You could do what Tech said and cut two holes in one or two of the slices and it would make piloting quicker I imagine.
I could go on but it's not necessary. Good build once again and hope to see some video.
Posted: Sun Sep 06, 2009 2:18 pm
by geardog32
yeah the bumper has room for improvement. really the center piece of rubber is the bumper and the two side pieces are just to keep it in place. i think i might cut the side piece over the pilot and glue it to the center piece to get better flow. i might replace the rubber all together because when i fire it i can feel and hear the piston come back and then bounce forward again. is this a bad thing?