Page 3 of 6
Re: Full Auto 50
Posted: Wed Mar 12, 2014 6:06 am
by jackssmirkingrevenge
kustomkb wrote:It sure is! I pulled it apart to look at honing the bores a little and while checking the fits I realized I have made a shock absorber :violent1:
I did exactly the same with my first blow-forward bolt

Thanks Poland Spud, for the time to create/ post your design drawing, but I am not sure I follow...
Basically the maroon piston blows back, firing the ball in the barrel (not shown) and then eventually moves back far enough to allow a fresh ball to be loaded into the barrel. As drawn, it would probably jam though

Thanks again for everybody's input. I know when a guy shows up, who hasn't paid his dues, and says "Hey everybody, help me design a cannon" it's tough to get behind him. That is why I started to build before asking questions. To show I am serious. I only just found the "useful links and information" post. I feel a bit silly for not reading more before diving in...
Your machining skills are definitely a saving grace
.
Re: Full Auto 50
Posted: Wed Mar 12, 2014 7:25 am
by POLAND_SPUD
Basically the maroon piston blows back, firing the ball in the barrel (not shown) and then eventually moves back far enough to allow a fresh ball to be loaded into the barrel. As drawn, it would probably jam though
Yes that's the idea
Though I'd probably just attach the bolt to an air cylinder and cycle it using a solenoid DCV. In which case you can forget about having an unbalanced bolt. Just build an air cylinder operated version of technician's QDV design and voila - instant high efficiency semiauto.
Re: Full Auto 50
Posted: Wed Mar 19, 2014 10:54 pm
by kustomkb
Thanks again for the input and advice! I'll have to digest all of that.
For now I've got to plod along;
Munitions Factory;
Cut a slice of PEX and turn a tip;
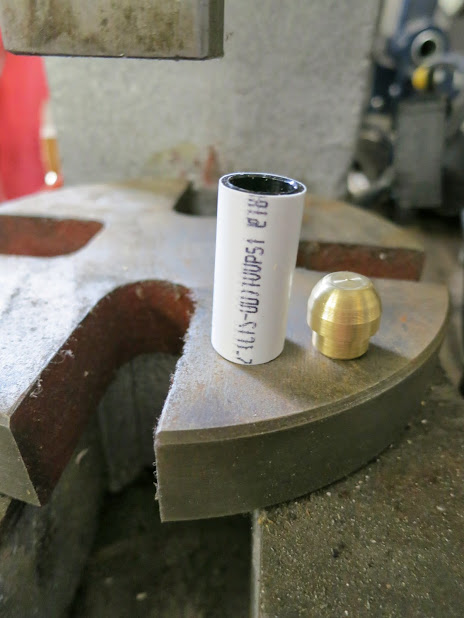
Press tip into PEX;

Shove the round through the El-presto-changeo;
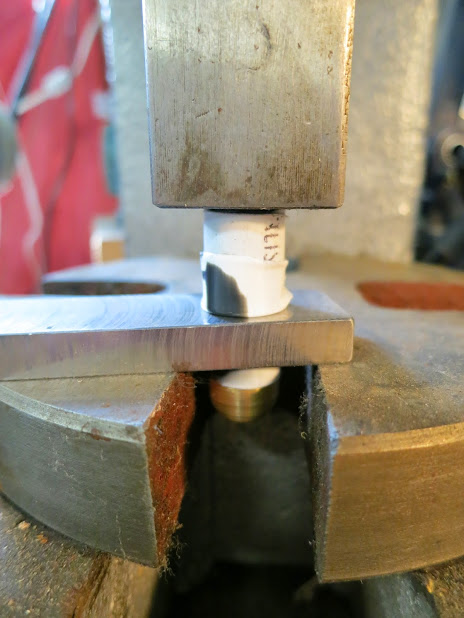
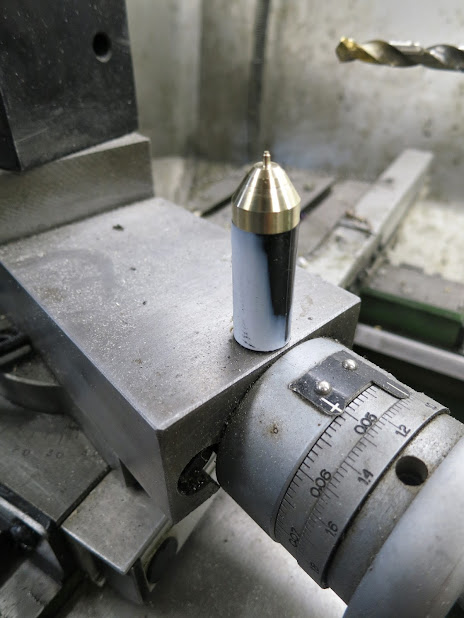
Fresh round, neatly shorn and perfectly sized for my barrel;

Here is another. I left the tit on the end, just for you, dart guy;
And here we are, successfully through, 1/2" plywood. A good feeling indeed.
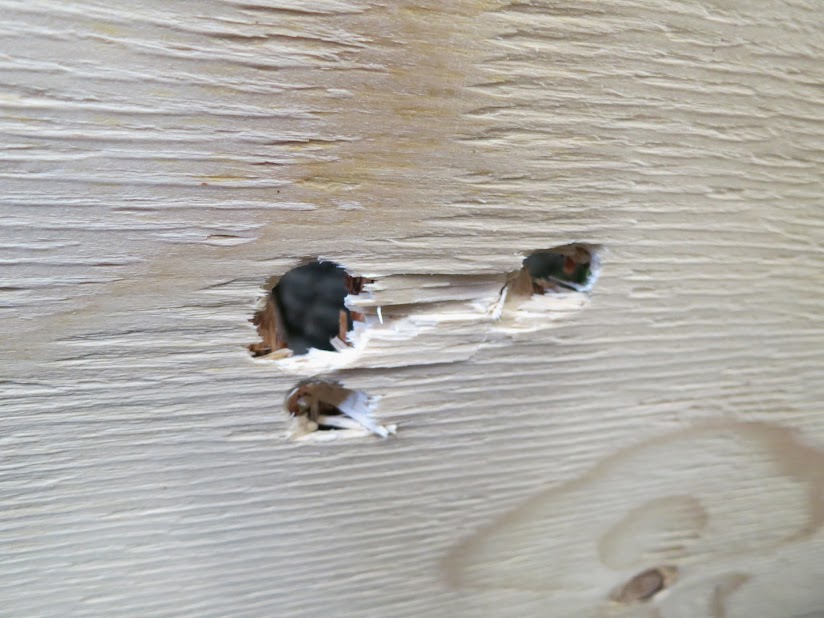
And the ubiquitous exit wound;
The larger hole had several rounds pass through it and all of the rounds showed no significant signs of wear, after going through the plywood several times. Recycling at it's finest. (The brass and PEX were headed for the scrap bin too!)
So what do you guys think of this approach;
Have fun at the range!
KB
.
Re: Full Auto 50
Posted: Thu Mar 20, 2014 6:03 am
by wyz2285
I hope the valve is not as simple as drawn

also I wouldn't place the pop off valve so close to my ear
or at least put a suppressor around it.
Re: Full Auto 50
Posted: Fri Mar 21, 2014 5:47 am
by jackssmirkingrevenge
oh fap fap fap!
Love the projectile sizer.
Remined me of this for some reason


Re the new design, is there part of your piston you forgot to draw?
Re: Full Auto 50
Posted: Fri Mar 21, 2014 12:45 pm
by kustomkb
Oh JSR.... Tisk Tisk.
I hope the valve is not as simple as drawn
also I wouldn't place the pop off valve so close to my ear
or at least put a suppressor around it.
Re the new design, is there part of your piston you forgot to draw?
Good point about the pop-off in your face...
Yeah, uh, no, that was just a general arrangement, yeah....
Here I've added a support guide for the valve. I drew the valve with a tapered seat and matching bevel in the valve body, as I do for the intake and exhaust valves on my model engines. Will this work?
Thanks.
Re: Full Auto 50
Posted: Fri Mar 21, 2014 9:12 pm
by dart guy
try making a controlled expansion round with a soft metal (copper, lead, or of the like) with a tip that is brass or steel, my friend works here and he showed me these cool bullets that end up having a huge expansion,
http://www.lehighdefense.com/index.php/ ... ammunition i think you should try making one of the tips like that and shoot it at somthing like a couple blocks of wood, its not meant to penetrate through it is to cause massive dammage, like your design though, now if you could build a saboted dart that is relatively front heavy...
Re: Full Auto 50
Posted: Sat Mar 22, 2014 2:59 am
by dajoro
@dartguy-I belive you have just written the longest sentence ever written.

@kustomkb - Yes to everything ! I'd buy one of those pvc swager tools for those slugs too! Is that allowed?
Re: Full Auto 50
Posted: Sat Mar 22, 2014 4:22 am
by Brian the brain
In your last design ...what is that paintball bottle doing?
Filling the pilot area??
Or is it meant to be a reservoir?
I can't see the piston popping in a design like that.
Re: Full Auto 50
Posted: Sat Mar 22, 2014 4:25 am
by jackssmirkingrevenge
kustomkb wrote:Here I've added a support guide for the valve. I drew the valve with a tapered seat and matching bevel in the valve body, as I do for the intake and exhaust valves on my model engines. Will this work?
Not quite getting how it's supposed to work, it does not appear to make sense as an exhaust valve. Maybe I'm not looking at it right.
Re: Full Auto 50
Posted: Sat Mar 22, 2014 9:38 am
by kustomkb
@dartguy;
Thanks for the ideas.
@dajaro;
I thought about PEX plugs, but not sure what you mean by pvc swager, do you mean PEX crimper?
@Btb, JSR,
Yeah the bottle was meant to be a reservoir, but a bit of a moot point now. I feel like a bit of a simpleton and obviously rushed to throw together some garbage without any proper thought. I've got a lot going on right now. Obviously the cylinder will pressurize and only leak from the pop-off valve....
Back to the cave... After some more painting and trim and diapers and dishes and work and raking leaves and .....
KB
Re: Full Auto 50
Posted: Sat Mar 22, 2014 10:11 am
by wyz2285
What they all meant, and what I meant is as the way it is, the piston won't open when the pop off goes off.
This will work (I think, just a quick paint work but you get the idea):
Edit: it will work but the way you draw it, once you screw in the bottle it will start firing, and your trigger is useless
So, for the bottle mounting, don't drill it through to the piston housing, instead drill a hole at 90º, connect it to the input port on your grip with a paintball hose (or whatever you like, for low pressure high flow, a shop compressor hose maybe better). Then it will work just fine when you press the trigger.
Re: Full Auto 50
Posted: Sat Mar 22, 2014 12:47 pm
by kustomkb
Thanks wyz,
The bottle is not meant to be an air supply but just a means to;
-increase the volume of air going to the projectile
-by enlarging the chamber volume, delaying the time it takes to reach full pressure, decreasing the ROF.
Edit:
Okay, instead of being a whiny little b@#h, I've pulled myself up the bootstraps and have found some time to do a little reading.
I believe I know where I'm going wrong and will post another revision when I find some time.
Cheers.
Re: Full Auto 50
Posted: Sat Mar 22, 2014 2:47 pm
by wyz2285
In that case you only need to alter the piston as the way I draw, but due to the position of the bottle and the shape of the piston, still not an optimal design, the piston support restrict the flow from the bottle. I'd move back the piston support as much as possible and make a "sharp" piston head so it short of guide it self to seal.
A quick model, not to scale nor exact shape, that's up to you.
Re: Full Auto 50
Posted: Sat Mar 22, 2014 3:54 pm
by kustomkb
Thanks for taking the time to post that.
My realization was that the -air in- had to be ahead of the valve. I was thinking of extending a tube to move the seal face, but your approach may be easier to make.
Thanks!