Page 1 of 2
All Steel 2" Piston Valve
Posted: Mon Jun 14, 2010 9:39 pm
by Northir
Hey guys been a while but im trollin and lurkin around again, So Im goin for 500psi or more on this build, ive got most of my pieces together but i dont think i can get 500PSI with a plastic Sprinkler valve, was trying to think of what to use for my pilot release, Ideas?
i have a 1" Ball on hand but not sure if it will be fast enough and was thinking if yall had a better idea, id like to get as much pressure as i can, on another note, ideas on a GB barrel, something in Metal, i know Techie has an idea
Posted: Mon Jun 14, 2010 9:59 pm
by Gun Freak
Use a QEV for exhaust, they can take the pressure.
In the Wiki, there is a page on GB barrels, I know there is a metal one but I can't remember it ATM.
You put this is the showcase BTW....

Posted: Mon Jun 14, 2010 10:05 pm
by Technician1002
A close ratio valve does not require a fast pilot. The valve will remain closed until most of the pilot pressure is gone and then it POPs open. Go listen to the sound of my Mouse Musket 80 PSI sound and analyze the Audacity waveform.
If you look at the pre pop event, you will see the hiss of a slowly opened 1/4 inch ball valve. The noise amplitude builds from low to high as the valve opens, then drops in volume as the pilot pressure drops, then the valve pops open in very little time. A 1/2 inch or 1 inch metal ball valve will work just fine.
Edit, I reviewed my file notes, that 80 PSI shot was with a blowgun squeezed gently, not a ball valve. The 30 PSI shot is a ball valve shot.
At that pressure you will want o rings on the piston and a very small eq port. At that pressure a large volume of air can get through a small port in little time..
Download my 80 PSI sound recording and load it into Audacity to view the volume of the pilot noise prior to the shot. You can see it ramp up, then diminish just before the main piston opened.
You can easly see the piston opening was very quick in relation to the slow trigger event.
I have not played with a metal GB barrel. Sorry, I would have to research that myself before having an answer.
Posted: Mon Jun 14, 2010 10:24 pm
by Northir
Nice, maybe ill try the 1" Ball, i may have to look into a Brass nipple then, the one i have isnt entirely smooth, also in showcase caus when im done ill edit the first post

, if someone still wants to move it their more than welcome to, ill post my valve in a little bit when i take pictures
Posted: Mon Jun 14, 2010 10:29 pm
by mobile chernobyl
for a metal golfball barrel - I am using 1.5" sch10 SS. The wall thickness will vary from manufacturer to manufacturer, but the stuff I have is amazing. 1 small square of shopping bag plastic makes for air tight wadding.
I did have another 5' length of the exact same material from another manufacturer, however the wall thickness on that material was too great and the golf ball would only fit with heavy force being applied to it.
For the second barrel - my 10X hybrid would easily produce enough force to push it out of the barrel, but the issue with having wall contact on spherical objects is that it will most likely induce a spin on the ball, one that is unpredictable and undesired for distances over 10meters lol.
So I prefer having the barrel that fits the golf ball with a super thin wadding for sure - it will allow the ball to leave the barrel spin free until acted upon by outside forces, not already with a spin imparted by the barrel.
Posted: Mon Jun 14, 2010 11:07 pm
by Technician1002
Northir wrote: i may have to look into a Brass nipple then, the one i have isnt entirely smooth,
At the pressure you are talking about, it may pay to figure the force on the piston, the force on the piston seat, the area of the piston seat, and the punch through force required for your seal material.
In other words, at 500 PSI on a 2 inch piston, it will work like a hydraulic press on a rubber cutting punch most of the time. You may want to rethink your materials for the pressure involved. A wider valve seat is highly recommended unless you are planning on punching GB diameter rubber wheels out of your piston face.

Posted: Tue Jun 15, 2010 11:13 am
by auxiliary
Do this to solve your problem:
Posted: Tue Jun 15, 2010 11:30 am
by Technician1002
I did that on one of my earlier launchers. Between 80-100 PSI the pressure on the barrel seal o rings tend to lift out of the groove and as the piston exits the barrel, the o ring in a vain attempt to maintain contact with the barrel wall due to air pressure simply removes the o ring and launches it. This is the primary reason my current cannon has bars extending past the barrel seal. It is there to keep the o ring in place.
As an alternative, ( this is why it is there by the way ) use a wide valve seat like is used in the Mouse Musket. A coupler is placed on the outside of the barrel and both are cut even. This provides a larger surface area for the valve to sit on instead of a narrow edge. On the Mouse Musket, the O ring is recessed behind a lip to prevent the air from lifting it out of the groove. It is also embedded in caulk.
On paper the above looks good, but in use they tend to launch the o ring out the barrel. That was one of my many early failures and a learning experience. Many of these early learning experiences led to the design of the Mouse Musket.
Been there done that.

It was a 1 inch that launched the ring, many times.
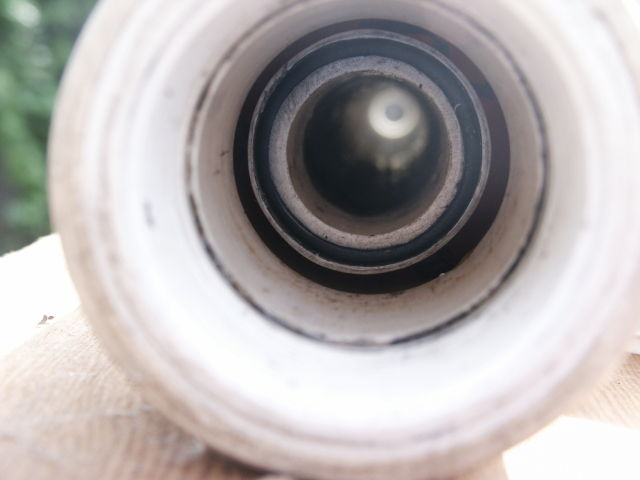
Edit, added a view of the valve seat in real life. 1 inch barrel, 1 inch coupling on the outside of the barrel with an o ring embedded in a hand carved groove between them. Tested to 150 PSI. Piston OD is 1.5 inch.
Posted: Tue Jun 15, 2010 12:19 pm
by Gun Freak
Tech, would adding an o-ring on the seat and using a rubber sealing face on the piston be better than just the o-ring on the seat?
Posted: Tue Jun 15, 2010 12:25 pm
by Technician1002
I'm not sure, never tried it. Both seal fine by themselves. I used the embedded o ring to get past the problems of peeling the seal off the piston and reduce the mass of the piston for lighter faster operation. Success was in evidence when the short launcher launched a 25 cent gumball through a sheet of plywood.
The o ring is embedded in caulk. To make it flat, plastic wrap was placed over it and the barrel was stood on end on a flat surface so the caulk would cure with the face of the o ring flat and true. It worked very well. The face of the pistons (broke many) were then lapped flat in a valve grinding operation so they too were flat and true. This made getting an initial seal to hand pump it much easier. The sealing surfaces met true.
The last replacement piston, the HDPE piston had the face turned true on the drill press. Photo of the procedure is in the second set of photos in the Mouse Musket thread. The cutting tool mounted in the drill press vise was slid under the piston carving a new true face on it.
Posted: Tue Jun 15, 2010 12:37 pm
by Gun Freak
Cool, I might have to try it. What did you use to hand-grind the groove between the coupling and pipe seat?
Posted: Tue Jun 15, 2010 12:54 pm
by Technician1002
I used a small round file to cut a groove in the outside of the barrel while the barrel was longer. I carved out the inside end of a coupler with a pocketknife and cut the coupler in half. I slid the half coupler on the barrel to check progress often and stopped when it fit over the o ring on the barrel. The coupler position was marked. The o ring was removed, then the coupler was slid back. The barrel was cut using the coupler as guide. The coupler was glued in position. Caulk was added so air could no lift the ring. The ring was stuffed in (narrow gap into the groove) and set to cure as mentioned after wiping off caulk that squished out.
The end of the barrel is about the full diameter where it was cut. Behind the end it is thinner for the groove. Only 2/3rds of the ring thickness shows. Part of the ring is covered by the barrel as shown in my drawing. I did not want any way for that ring to blow out.
Edit added drawing of the cross section of the Mouse Musket seal to show the groove on the outside of rhe barrel.
Posted: Tue Jun 15, 2010 5:29 pm
by saefroch
On paper the above looks good, but in use they tend to launch the o ring out the barrel. That was one of my many early failures and a learning experience. Many of these early learning experiences led to the design of the Mouse Musket.
Been there done that. It was a 1 inch that launched the ring, many times.
I was just thinking of improving my current pneumatic by using a front o-ring seal... then saw that. So... would caulk or tar alone work as a seal against steel? Or would I need to embed an o-ring into the caulk or tar?
Posted: Tue Jun 15, 2010 6:01 pm
by Technician1002
I have not tried sealant alone, so I do not know.
For higher pressure, a tube of rubber can be used to reduce the chance of blow out. It would be like a short piece of hose in place of an o ring.
Air conditioning service hoses use this kind of seal. Note the seal shape.

Posted: Fri Jun 18, 2010 5:52 pm
by Northir
Well, it seems i cant find a source for 500 PSI
so ill have to settle with 150-200, at any rate i have my valve all finished just working on my piston, going to use a example i saw a while back, had 2 o rings and a kind of check valve in it, ball bearing with a spring and a gasket i believe, and a wood tree post was the best thing i could come up with without any HDPE ,i think is what its called, and i dont have a drill press either
, i have some Uni-Strut if anyones made a tripod with it id like to see how ya did it as i think this build is going to weigh a bit