My new piston launcher and some ideas...

Hey guys, this is my newest launcher. It fires and works well after remaking the piston about 5 times over the last few days. The pilot hiss is a little long before the launcher goes off so here is my idea: In the attached picture there is a copper tee made of brazed pieces to connect the schrader to the piston housing and blowgun - I was considering filling it and a few other peices with epoxy and then drilling a much smaller tunnel through the epoxy in the effort to reduce pilot vol. what do you guys think? also, any additional advice is much appreciated regarding sights, stock design etc. The launcher has a .5 inch barrel right now 42 inches long, the chamber is 1 inch copper I think 18 inches long. The rest is .5 inch peices other than the brass tee which is 3/4 inch. the out put and chamber side of the brass tee are sweat fitting adaptable with the piston housing side being threaded. Lowes had a closeout on them from 9.00$ down to 1.50$ The piston is epoxy, with a bolt going through that attaches a sealing face and a rear homemade rubber gasket 'pusher'. My track pump goes up to 200psi.
- Attachments
-
-
mark.f

- Sergeant Major 4


- Posts: 3627
- Joined: Sat May 06, 2006 11:18 am
- Location: The Big Steezy
- Has thanked: 52 times
- Been thanked: 53 times
- Contact:
The epoxy idea sounds like it would work, although you should drill the tunnel large enough so that flow isn't restricted before the blowgun. Have you modified the blowgun? It will improve flow as well, shortening the actuation time.
You could also replace that 3/4" nipple going into the tee with a shorter hex one.
Good job, though. You should definitely look at using higher pressures. I joined the fridge compressor bandwagon a while ago and haven't looked back.
You could also replace that 3/4" nipple going into the tee with a shorter hex one.
Good job, though. You should definitely look at using higher pressures. I joined the fridge compressor bandwagon a while ago and haven't looked back.
-
jackssmirkingrevenge

- Five Star General

- Posts: 26179
- Joined: Thu Mar 15, 2007 11:28 pm
- Has thanked: 543 times
- Been thanked: 321 times
Nice. Some comments:
- does the epoxy piston run in a copper tube? I find that they rarely tend to be perfectly round, not the best idea.
- why the heavy nuts hanging off the piston, extra weight which slows it down.
- consider adding a Schrader valve to the blowgun outlet, with the stem valve removed. That way you can fill through the blowgun and save the extra pilot volume.
- a QEV is quite cheap
hectmarr wrote:You have to make many weapons, because this field is long and short life
Thanks for the responses! I have modded the blowgun a little, it is a very cheap one as taking it apart revealed a plastic valve, suprised that it doesnt leak under 200+psi. The piston rides in a brass coupling but in an effort to get the thing to fire I was continually messing with these epoxy pistons and the bolts ( i think) are squeezing the epoxy slighty as to alter its shape to fit tighter in the sleeve. I cant seem to cast an epoxy piston with close enough toloerances to function properly without the nuts and bolt.I am considering casting one out of jb weld. I looked into the fastenal QEVs but I had read several posts suggesting that their performance was not as good as a diy piston. This whole gun was actually built from change i found in my car and center console lol. About 75$ including epoxy. Jack I am mainly shooting nail darts, coned ball bearings and grease ports, and cast wax slugs with metal scraps mixed in, not idea on fps, but I put a nail dart through 1.25" of plywood at 80 psi a few min ago.
-
jackssmirkingrevenge
- Five Star General
- Posts: 26179
- Joined: Thu Mar 15, 2007 11:28 pm
- Has thanked: 543 times
- Been thanked: 321 times
You must be doing it wrong. If only there was some sort of tutorial that could help you out...RBurke83 wrote:The piston rides in a brass coupling but in an effort to get the thing to fire I was continually messing with these epoxy pistons and the bolts ( i think) are squeezing the epoxy slighty as to alter its shape to fit tighter in the sleeve. I cant seem to cast an epoxy piston with close enough toloerances to function properly without the nuts and bolt.I am considering casting one out of jb weld.
*gasp*
http://www.spudfiles.com/forums/making- ... t8919.html
Depends on the DIY piston... In this case, no offense to your endeavors, but a QEV would be miles ahead in terms of performance.I looked into the fastenal QEVs but I had read several posts suggesting that their performance was not as good as a diy piston.
hectmarr wrote:You have to make many weapons, because this field is long and short life
heh, i just cast another piston, hopefully it turns out better than my last one... Has anyone taken a muzzle loader and turned it into a breech loader to measure the performance drop offs? Also, brazing copper is a poor method of joining pipes as the temps required anneal the rigid tubes and turn them soft.
So I remade the epoxy piston... I think that the quality of the epoxy isn't very good because after casting it again leaked air past the piston and exhausted out the pilot. So I carved an oring groove in the piston and it works except for this: it now goes off twice and sometimes 3 times on holding the blow gun trigger down. I dont currently have a spring or bumper behind the piston. 3 shot burst is cool, but given its a muzzleloader... and ideas what the prob is? Does the multiple burst count as honking?
-
Brian the brain

- Moderator


- Posts: 3496
- Joined: Mon Dec 05, 2005 2:06 am
- Location: Holland
- Been thanked: 3 times
The pilotvalve is not able to dump the pilotvolume fast enough.
Use a bigger pilotvalve ( ballvalve) or reduce the pilotvolume.
You could fill up most of that Tee with epoxy.
Just keep enough room for the piston to move back and keep a channel open for the blowgun and fillvalve.
The channel to he fillvalve could be very small, the one to the blowgun should be big enough to allow maximum flow through the blowgun, but no more.
Gun Freak wrote:
Oh my friggin god stop being so awesome, that thing is pure kick ass. Most innovative and creative pneumatic that the files have ever come by!
Can't ask for a better compliment!!
Oh my friggin god stop being so awesome, that thing is pure kick ass. Most innovative and creative pneumatic that the files have ever come by!
Can't ask for a better compliment!!
-
jackssmirkingrevenge
- Five Star General
- Posts: 26179
- Joined: Thu Mar 15, 2007 11:28 pm
- Has thanked: 543 times
- Been thanked: 321 times
You should be looking at this sort of epoxt for proper casting: http://www.ebay.com/itm/EPOXY-RESIN-MAR ... 41408e25c7
Does the one you're using set hard like glass or is it soft and spongy?
Something else you might want to consider:
http://www.ebay.com/itm/Bored-Rubber-Bu ... 3cce135b14
Does the one you're using set hard like glass or is it soft and spongy?
Something else you might want to consider:
http://www.ebay.com/itm/Bored-Rubber-Bu ... 3cce135b14
hectmarr wrote:You have to make many weapons, because this field is long and short life
It sets hard, but it seems to shrink slightly during the curing process. I built a kayak last summer with West Marine epoxy, but I can't find the hardener so I have been trying to cheat and use Loctite 5 min epoxy. You get what you pay for I guess. I filled the copper tee with epoxy, now I have to find the proper bits to drill it out. Which reminds me - pardon my lack of knowledge about the proper terms but> Upon taking apart the blowgun to modify it, I noticed the inner 'sleeve?' has a small hole in the side - is that the hole where the air gets exhausted? Even after filing its still kinda small. Is that the size hole I should tunnel in the epoxy to get max flow to the blowgun? Thanks for you guys patience!
-
jackssmirkingrevenge
- Five Star General
- Posts: 26179
- Joined: Thu Mar 15, 2007 11:28 pm
- Has thanked: 543 times
- Been thanked: 321 times
That seems to be your problem.
I started out using this stuff, expensive but top quality: http://www.westsystem.com/ss/ is it the one you meant?


Even a slightly open 3/4" ball valve gives much better flow than a blowgun.
I started out using this stuff, expensive but top quality: http://www.westsystem.com/ss/ is it the one you meant?
Pretty much... or consider replacing the blowgun with a ball valve. With a bit of ingenuity you can come up with a trigger shaped handle, have a look at what Brian had done here:Upon taking apart the blowgun to modify it, I noticed the inner 'sleeve?' has a small hole in the side - is that the hole where the air gets exhausted? Even after filing its still kinda small. Is that the size hole I should tunnel in the epoxy to get max flow to the blowgun?
Even a slightly open 3/4" ball valve gives much better flow than a blowgun.
hectmarr wrote:You have to make many weapons, because this field is long and short life
Sweet pistol, looks like something Blackbeard would carry! Thanks for all the help everyone, I got the launcher all sorted out, no leaks. Also, modding the blowgun and reducing the pilot vol. were great advice! Thanks for all the help! Onto the launcher's furniture... Ill post a vid or some damage pics later after my neice finishes her nap. Seems very accurate with the 42" barrel, even launching produce - Shame I'm gonna have to cut it down a bit - Id like an approximately 48" launcher with stock.
Hey guys, just wanted to post an update on the launcher. I have my sister's 2 year old living with me now so my access to my power tools is limited. I have roughed out the stock and begun work on a high pressure pump a la Gippetto's design. Hope you can give me some more constructive critiques! I have tee-nuts which will replace the temporary screws and nuts, which will allow for 1 tool breakdown capability. Also, gun is currently 5 feet long...
- Attachments
-
-
-
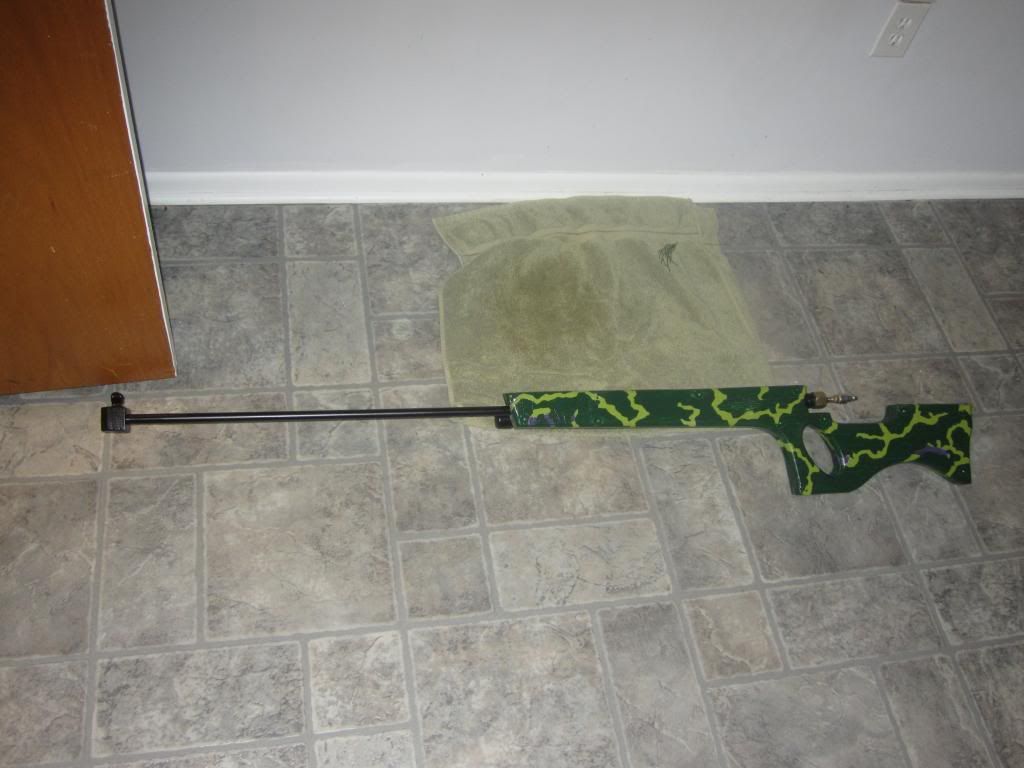
Just an update on the piston launcher. Got some paint on the thing and it looks kinda scary, in a bad way I fear. Still have to rig an adjustable rear sight. I have switched over from sprayable lubrication in my gun and pump to 5w20 motor oil, seems to work much better in the pump and helps the piston seat on the barrel nicely too. Anyway, the eyesore:


-
jackssmirkingrevenge
- Five Star General
- Posts: 26179
- Joined: Thu Mar 15, 2007 11:28 pm
- Has thanked: 543 times
- Been thanked: 321 times
Very smart ... Needs a scope And bipod though
hectmarr wrote:You have to make many weapons, because this field is long and short life