mattyzip77 wrote:Hmmmm, looks like you took all of the parts from a supah valve and put them in another tee..... Very cool upgrade though!!
No I made all the parts at my work. A supah valves internals would not work with my 4" tee because the supah valve is based on a 3" tee with 2" ports, I did make them nearly identical though. The supah valve is a well engineered valve so I figured I would just copy it.
Posted: Thu Feb 28, 2013 7:04 pm
by mattyzip77
You shouldnhave went with less screws holding that back cap in. Why so many?? 8 would have been plenty. This is where my supah valve broke due to all these screws.... Still nice thiugh...
Posted: Fri Mar 01, 2013 10:39 am
by Technician1002
My design allows for an 1" of piston movement which should be more than sufficient according to my fellow engineers.
One comment on your piston movement distance. The engineers are correct if they are going on the minimum cross sectional area of an open valve based on 1/4 the valve seat diameter. As long as the valve to piston gap has the same area as the valve outlet orifice, you should be good to go.. if you are working with water that does not compress.
Due to speed of sound, and turbulence through the valve, there will be a pressure drop through the valve. With air the pressure drop = expansion of the volume of air.
In the above scenario, air passing the gap between the piston and valve seat results in a pressure drop. If water, about 1/2 the pressure difference between chamber and valve seat and the other half from valve seat into the barrel, but your volume has EXPANDED due to pressure drop. This reduces the total amount of flow that can enter the barrel due to higher volume and lower pressure in that area.
By having the valve open slightly larger, you can reduce the pressure drop, velocity, and turbulence in the gap between the piston and valve seat. This results in Higher pressure of air entering the barrel and the air is entering the barrel at higher pressure due to the higher pressure and at lower turbulence.
I generally design so the piston as it plows into the bumper compressing it moves about 1/2 the valve seat diameter, so for a 3 inch orifice, about an inch and a half. It is ok to have less gap after the piston starts to return from the bumper. You want insane acceleration at the beginning of projectile movement in the barrel.
Pass this note to your engineers.. See if they can shed anymore insight on this. One inch will still give fantastic flow, but why limit it when you don't need to. Use a good bumper for a proper deceleration distance to keep forces minimum on plastic parts. Without one, the piston will hammer it's way out the back.
Posted: Sun Mar 10, 2013 5:39 pm
by Velospud
check this video out she is a beast
Posted: Sun Mar 10, 2013 5:52 pm
by Velospud
mattyzip77 wrote:You shouldnhave went with less screws holding that back cap in. Why so many?? 8 would have been plenty. This is where my supah valve broke due to all these screws.... Still nice thiugh...
(1500LBF on end cap)/(8 screws * 1/8" wide screw *.25" thick pvc tee) = 6000psi, I think pvc can handle 11000 psi in a shear application
8 screws would give me just under a safety factor of 2, but I still didnt trust it lol. yes I agree will definitely go with less screws next time.
Posted: Sun Mar 10, 2013 10:49 pm
by mattyzip77
Velospud wrote:
mattyzip77 wrote:You shouldnhave went with less screws holding that back cap in. Why so many?? 8 would have been plenty. This is where my supah valve broke due to all these screws.... Still nice thiugh...
(1500LBF on end cap)/(8 screws * 1/8" wide screw *.25" thick pvc tee) = 6000psi, I think pvc can handle 11000 psi in a shear application
8 screws would give me just under a safety factor of 2, but I still didnt trust it lol. yes I agree will definitely go with less screws next time.
Dont know where you got those numbers but 11000 psi seems a little or actually alot far fetched....
Posted: Sun Mar 10, 2013 11:31 pm
by Velospud
mattyzip77 wrote:
Velospud wrote:
mattyzip77 wrote:You shouldnhave went with less screws holding that back cap in. Why so many?? 8 would have been plenty. This is where my supah valve broke due to all these screws.... Still nice thiugh...
(1500LBF on end cap)/(8 screws * 1/8" wide screw *.25" thick pvc tee) = 6000psi, I think pvc can handle 11000 psi in a shear application
8 screws would give me just under a safety factor of 2, but I still didnt trust it lol. yes I agree will definitely go with less screws next time.
Dont know where you got those numbers but 11000 psi seems a little or actually alot far fetched....
Nice. Needs better ammo than lemons though, does a soup tin fit in the barrel? An empty one could make a good sabot...
Posted: Sun Mar 17, 2013 12:41 pm
by Velospud
jackssmirkingrevenge wrote:
Nice. Needs better ammo than lemons though, does a soup tin fit in the barrel? An empty one could make a good sabot...
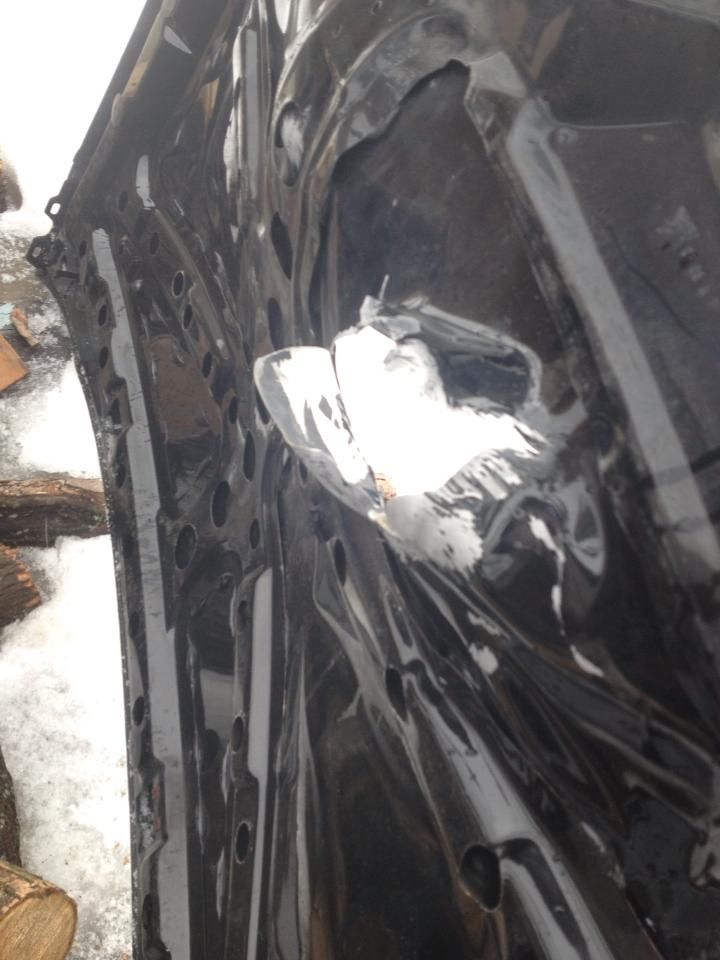
I did a can of pumpkin pie filling, it was weak sauce though, I was shooting 3" diameter by 6" long chunks of oak wood in that video. No lemon is about to go through a steel hood lol.
Posted: Sun Mar 17, 2013 1:46 pm
by jackssmirkingrevenge
You'll be amazed what fruit through if fired fast enough.
That clean hole in a 1/4" thick reinforced glass window was made with a high velocity orange from 100 yards away
Posted: Sun Mar 17, 2013 9:30 pm
by Technician1002
Even a marshmallow will cause damage.
Posted: Sun Mar 17, 2013 10:26 pm
by jackssmirkingrevenge
You forgot the picture
Posted: Sun Mar 17, 2013 10:43 pm
by mobile chernobyl
if you have a 3" barrel I highly suggest going to the discount food store nearby and stocking up on shitty soup! The fit is near perfect, requiring almost no wadding. The destruction potential is much greater!
Here's my 3" barreled pea shooter shooting random stuff - soup cans included!
[youtube][/youtube]
Posted: Mon Mar 18, 2013 12:46 am
by Velospud
mobile chernobyl wrote:if you have a 3" barrel I highly suggest going to the discount food store nearby and stocking up on shitty soup! The fit is near perfect, requiring almost no wadding. The destruction potential is much greater!
Here's my 3" barreled pea shooter shooting random stuff - soup cans included!
[youtube][/youtube]
Your video is great I was geeking out the entire time. I am running a 3" barrel I shot a can of pumpkin pie filling earlier this week. Definitely making a trip to our local ghetto's SaveAlot this week.
Btw what kind of camera were you using and did you have a different mic on it? Because I cant get good sound quality and all my videos make the gun sound super quiet.


