build log and...pneumatic C:B ratio question

Show us your pneumatic spud gun! Discuss pneumatic (compressed gas) powered potato guns and related accessories. Valve types, actuation, pipe, materials, fittings, compressors, safety, gas choices, and more.
User avatar
lockmanslammin
Specialist
Specialist
Posts: 152
Joined: Sun Feb 10, 2008 3:22 pm
Location: Sioux Falls, South Dakota

Sun Sep 28, 2014 10:59 pm

Hello all,
here is a pic of the build, up to the point that I'm at...
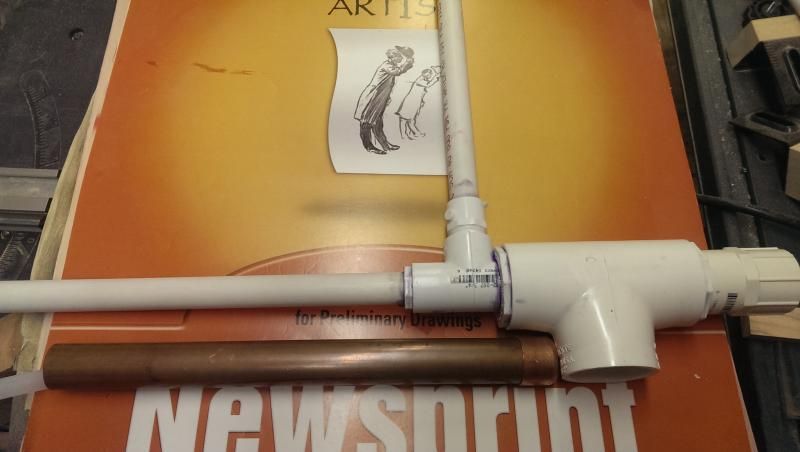
Image

so now I need to know what you guys think would be optimal chamber to barrel volume ratio.

Here are the particulars...

1) It is shooting mini marshmallows through 1/2" pvc, so there is a bit of a loose fit, just a tad over .6" diameter on the barrel and a reported .5" projectile, that is likely to tumble, and seal off and on throughout its journey down the barrel.

2) there will be a gravity fed tube magazine, just after the piston valve, where several inches of shmallows will be waiting to fly onward, increasing the barrel volume that has to be pressurized during the launch, theoretically, more so as the magazine empties (as there will be less marshmallows taking up space). The top of the magazine will obviously be sealed.

3) The cannon will be using a 1.5"... "T", containing a piece of 1" pvc with a 1" barrel sealing piston valve inside of it, and on the bottom/chamber side will be using 1.5" pvc with end cap glued on for a chamber. If I were to make the chamber volume variable(with a threaded connector or union) this question would be pointless, but i want efficiency without giving up performance, and i want a simple chamber (pipe and end cap) for a comfortable grip.

4) there will be a 3/8" gap between the piston tube and barrel end, not sure if that matters, but there ya go.

5) the barrel volume will be 6.896 cubic inches (not including the magazine).

6) There is an on-board floating o-ring pump (the copper tube, with a pumping volume of about 8.25"cubed ) that will be used to pressurize the chamber, so I would rather not have the chamber larger than absolutely need be... the entire reason for the post.

7) the goal is a quick 3 or 4 pumps to get to 30 or 40 psi, and BANG! I haven't talked about the trigger/pilot system, but I will figure that out later.


So, what do you guys think???

I was originally thinking 1:1, but taking into consideration the loose fit of the projectile and the air cushion of a magazine I might be leaning more towards 1.5 chamber to 1 barrel?...but that might make for more pumps.

I want to be able to hand this weapon over to children without it being annoyingly difficult to use.

Thanx for any insight,

Chris
Last edited by lockmanslammin on Fri Oct 03, 2014 1:22 pm, edited 1 time in total.
User avatar
Technician1002
Captain
Captain
Posts: 5189
Joined: Sat Apr 04, 2009 11:10 am

Mon Sep 29, 2014 7:25 am

Generally marshmallows don't magazine feed well for several reasons. Weight, shape, and compressability. If the magazine becomes compressed, the flow of air into the magazine will relocate the marshmallows. The change in pressure will change the marshmallow"s size. Expect frequent magazine jams. Magazines work only for low pressure and high volume machine gun launchers running under 3 PSI.

Without a magazine, lower pressure but high chamber volume works best where there is high blow by.
User avatar
lockmanslammin
Specialist
Specialist
Posts: 152
Joined: Sun Feb 10, 2008 3:22 pm
Location: Sioux Falls, South Dakota

Mon Sep 29, 2014 10:34 am

Tech, I was kind of worried about the magazine feeding well, it's just that I wanted a kid to be able to use it for smallow fights, so it needed to be as quick as possible for the heat of battle. The other option was a coupler with handle and two o-rings to slide over a hole in the breech for loading singles.

Maybe the answer is to just put a threaded adapter on the bottom of the tee for chamber size experiments. As far as pressure goes it will be as high or low as one wants I guess.

I could always shrink the magazine if need be and make an easy to use stopper on the top of it for single loading.

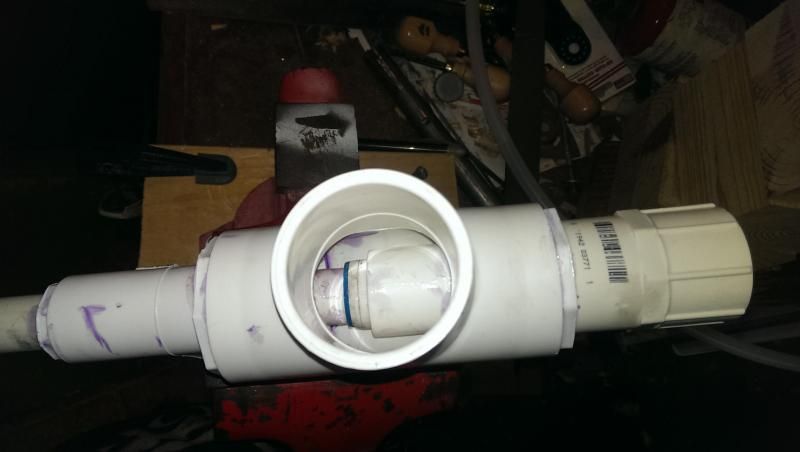
Here is a look at the inside of the piston valve.

Image

This is probably old news to most of you, but I found it interesting that that 3/4" tee fit right into the 1 1/2" x 1" bushing in the valve. Handy for getting the projectile as close as possible to the piston.

Chris
Last edited by jrrdw on Mon Sep 29, 2014 3:17 pm, edited 1 time in total.
Reason: Double post.
User avatar
lockmanslammin
Specialist
Specialist
Posts: 152
Joined: Sun Feb 10, 2008 3:22 pm
Location: Sioux Falls, South Dakota

Mon Sep 29, 2014 10:17 pm

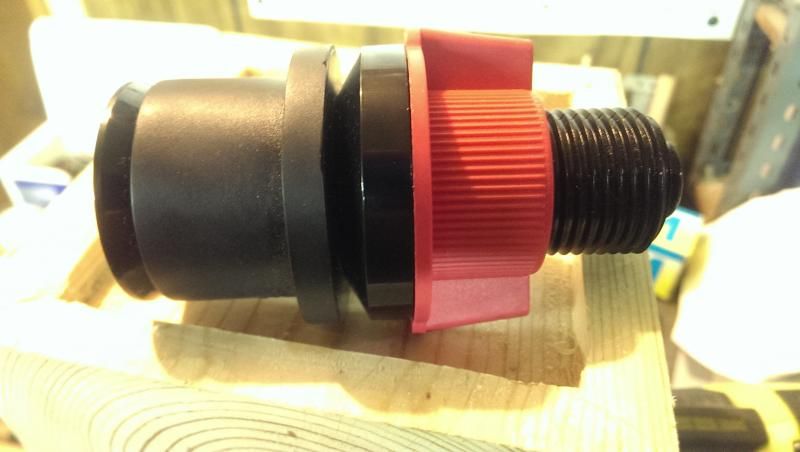
I have found a way to test different chamber volumes.

Image

Called a test plug. I just have to shave the wings and flanges off and make a wrench out of some one inch pvc to tighten and loosen it inside the chamber. Then when I find the right spot I can just cut the pipe off and cap it. Should work pretty slick.

Chris

Edit: in case anyone is curious, it didn't state a pressure rating on it, but I downloaded the spec sheet from the manufacturer's website and it states 40 psi for the inch and a half one and 30psi for the two inch. It gets increasingly wimpy the bigger it goes. I doubt I will be running this gun over 40, but I bet they have some safety factor built in to that rating.

I will post a pic of the completed mods and diy wrench when I finish it.

Chris
User avatar
lockmanslammin
Specialist
Specialist
Posts: 152
Joined: Sun Feb 10, 2008 3:22 pm
Location: Sioux Falls, South Dakota

Wed Oct 01, 2014 12:30 am

Ok, I have finished the variable chamber volume plug

Image

Just trimmed off the flange on the rubber part with a sharp blade, and then cut a very short piece of 1.5" pipe off to draw a circle on the flat part of the red nut, and ground it down carefully on a belt sander till it fit nice in the chamber. The black washer part I just eye balled on the belt sander till it fit good.

I got lucky finding out what would work for a wrench. Found a scrap of 1 1/4 EMT that worked perfect. Just needed to cut the two slots for the wings on the nut.

Now I suppose you could come up with a way to hold the center from turning while you tighten the nut,but all I do is tighten it in the end of the pipe until it has some good resistance and shove it to the needed depth and crank it down.

To get it out you just overly loosen it and push it in a little which breaks it free and it will fall out with gravity.

Hopefully someone might find this helpful.

Now I just have to decide what would my maximum chamber volume need to be for the testing so I can glue/weld a piece of pipe into the tee.

Chris
User avatar
lockmanslammin
Specialist
Specialist
Posts: 152
Joined: Sun Feb 10, 2008 3:22 pm
Location: Sioux Falls, South Dakota

Fri Oct 03, 2014 1:56 pm

Well I edited the topic on this post because it's turning into a build log anyhow so there ya go.

I have a couple more progress pics.

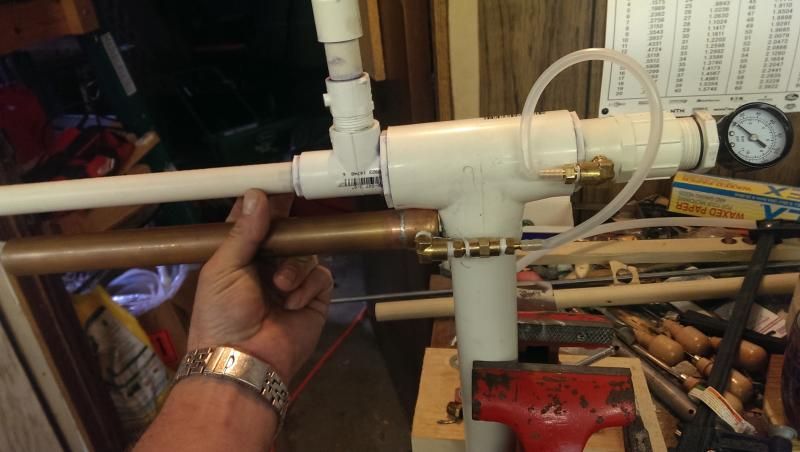
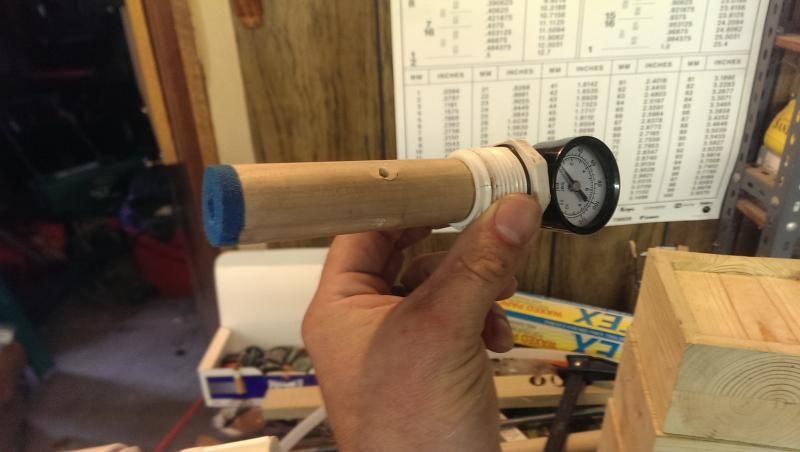
First pic is the entire cannon so far. I have the pump and check valve done. I have fine tuned the piston fit and put a double layer of rubber on the front of the piston to help it seal easy at this low pressure. Also rigged up a jig to sand the barred end perfectly square and smooth for a good piston seal. I will have to re-do the pump connecting tube once I get the pump mounted properly. I also cut the magazine and glued the top cap on so it will hold 6 marshmallows.I figured less marshmallows would lead to less jamming.
Image

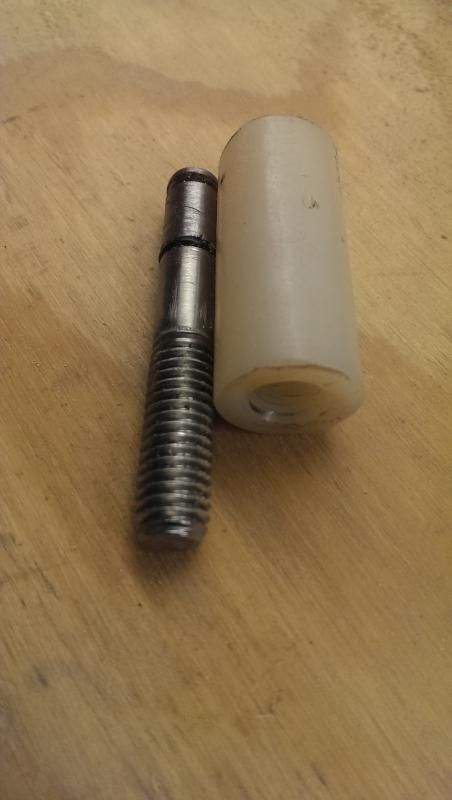
Also I have modified a piece of hardwood dowel to take up all the dead space and act as a piston bumper. There is a machine thread screw in the bottom of the piston tube that protrudes a little into the tube and acts as a key for the dowel. There is a keyway in the dowel to keep it indexed properly with all of the airways, and prevent it from sliding forward with the piston.
Image

Next is attaching the pump to the valve/barrel so I can start working on a pilot/trigger assembly. I am hoping to get it set up so the action of pumping it also resets the pilot/trigger somehow.

Chris
User avatar
lockmanslammin
Specialist
Specialist
Posts: 152
Joined: Sun Feb 10, 2008 3:22 pm
Location: Sioux Falls, South Dakota

Sat Oct 04, 2014 3:38 pm

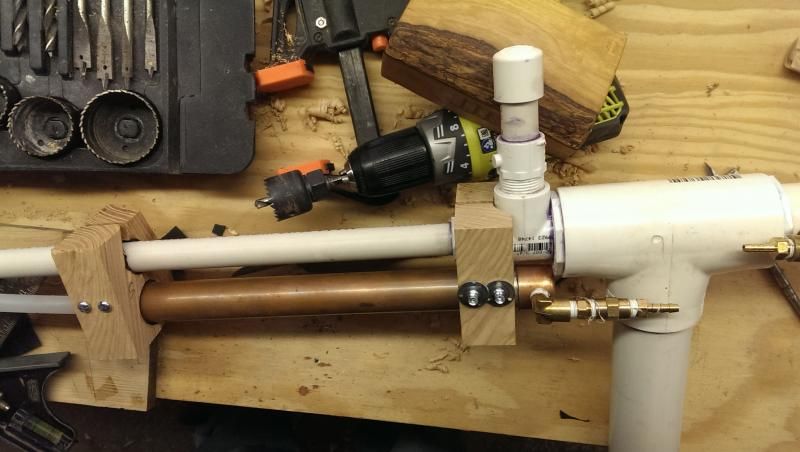
Alright, more work done. I really just didn't want to use band clamps on this one, so had to figure something else out. Had some oak pallet scrap laying around so I slapped this together today. Still needs some counresinking done, some grinding on the t-nuts and general smoothing and shaping but it is functionally complete. Now I have to start working on the piloting/trigger mechanism.

Image

Chris
User avatar
lockmanslammin
Specialist
Specialist
Posts: 152
Joined: Sun Feb 10, 2008 3:22 pm
Location: Sioux Falls, South Dakota

Tue Oct 07, 2014 2:03 am

A couple of things I have been pondering on this project.

#1: if I were to cut the end of the barrel off at an angle where the top of the barrel would be longer than the bottom would that impart a kind of hop up spin to the marshmallow? I'm thinking the air rushing out under the shmallow first as it exits the barrel might give it the required spin upon exiting... Just a thought.

#2: I plan on using this...

Image

Or a similar variant, where there will be a close nipple going through the outer body so that when the center is inserted it lines up between the two o-rings. Then via some sort of spring loaded trigger activated mechanism, it is pulled out so the air behind the piston valve is piloted.

So what I'm thinking is I can rig up a push rod assembly that is activated by the pump handle that pushes the assembly back into the sealed and cocked position. The tricky part will be ensuring that when the pump is in the fully pumped position, that this push rod assembly doesn't prevent the pilot valve from moving.

Any thoughts?

Chris
User avatar
lockmanslammin
Specialist
Specialist
Posts: 152
Joined: Sun Feb 10, 2008 3:22 pm
Location: Sioux Falls, South Dakota

Sat Oct 25, 2014 11:48 pm

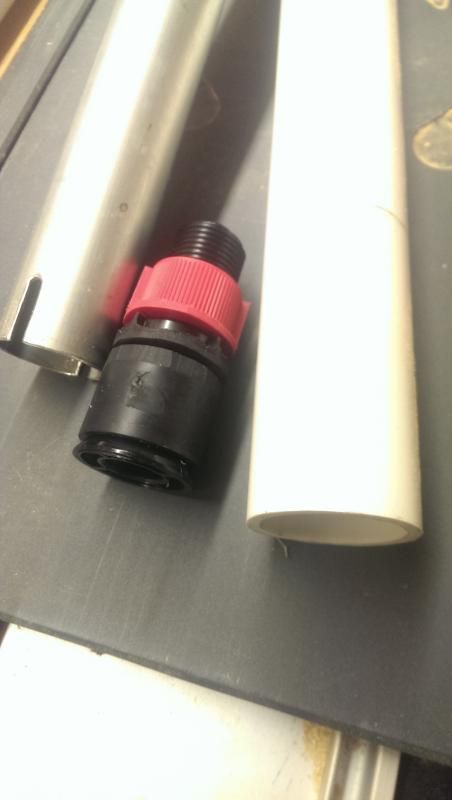
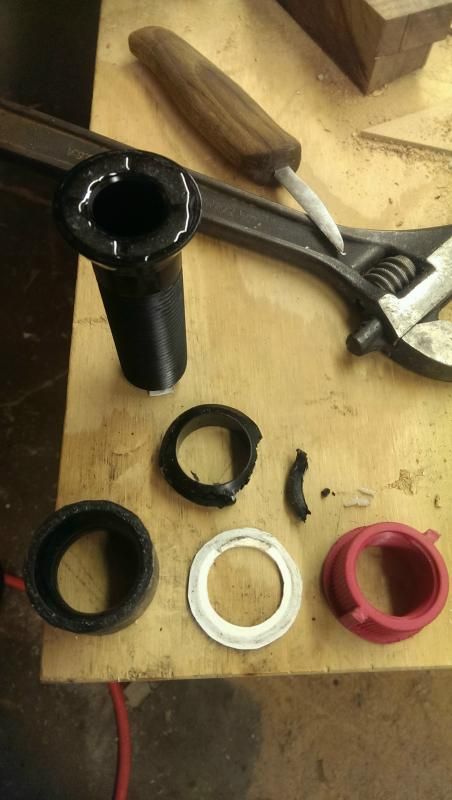
A little update on the variable volume chamber plug. I don't quite know why , but I think I might have been over tightening it when I put it in the chamber. I never made any sort of a leverage handle on the wrench tube, but I guess I got too good of a grip on the wrench tube anyhow. Both the bushing/washer that goes between the red nut and the rubber piece and the end of the main threaded part started cracking apart.

I made a new washer for the red nut with a scrap of thin pvc, and filled in the hollow area of the main body with epoxy. I also plan on using a very thin layer of synthetic grease or a dry film lube on the ramped portion of the main threaded body, and using a little less torque when I install it.

Here is a photo of the parts...

Image

Chris

<edit>,I'm not getting very far, very quick on this project because I have 4 month old twins at the moment, and because I'm kind of stuck in a brainstorming session as far as how I'm going to pilot it in an ergonomic self resetting way. I'm working on it though... I really want it done.

Chris
Post Reply