Remotely Activated Gun
Parts:
1) Cheap 1 channel R/C car ($15 at KB Toys)
2) 5v relay Something like this should work
3) Sprinkler valve (with solenoid)
4) A standard diode This will work
5) Two 9v battery clip (go to radio shack or take them from broken stuff)
6) Assorted batteries
7) Antenna wire (I used 20ft of enamel coated 26 gauge because it was green and blended well)
8) Assorted bits of wire
Tools:
Dremel, Wire cutters, Multi meter (this is absolutely essential), Soldering iron
....Part One : Disassembly....
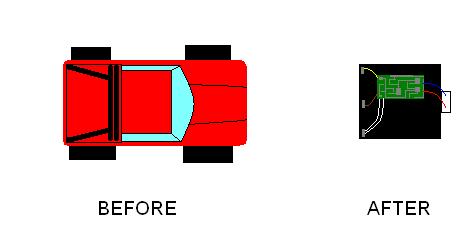
Take off the R/C car body, then use the dremel to cut the forward section of the car off. Next, remove the motor from its housing and unsolder the two wires going to it. Now, cut off the rear section of the car using the dremel. All that should remain of the car is the battery compartment, a small switch, and the circuit attached to the battery box. A diagram of the before and after of this step is provided below.
...Part Two : Re-wiring....
- Note: I have written this part assuming you have acquired the same or very similar model R/C car as I used*
If you are using the same model car as I am then you will notice as soon as you turn on the car it should start moving backwards in circles, if we do not fix this as soon as we turn on the "detonator" the device will fire becuase any voltage forward or reverse can activate the relay. This is why we need the diode (Diodes only allow current to flow in one direction). Before we solder the diode, we are going to need to know which of the motor leads to solder it to. This is very simple to determine. Turn on the R/C car, but do not touch the remote. Use the multi meter to measure the voltage coming out of the wires which are used to supply power to the motor. If there is a minus sign on the screen, switch the multi meter leads until it disappears. Then, solder the diode (backwards) to the positive lead. Turn the car off (When the multi meter is reading a positive voltage, it would be the wire the red lead is touching). While you were reading the voltage of the motor, you should have noticed that the voltage output is only 3v. This will not activate our 5v relay (for obvious reasons). This is also very easy to fix. If you look at the battery box, you should see that there are three sets of wires connected to it (instead of the usual two). Find the positive 3v wire and connect it to the positive 5v lead on the box (Again, you need to use the multimeter, but you do not need the car to be on). After this is done, there should only be two sets of wires connected to the battery box.
...Part Three : Wiring....
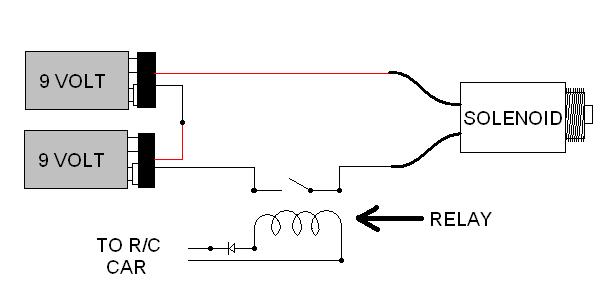
Most of the tedious work is done now; all we need to do is connect the relay and 9v batteries. First, locate the wires that you removed from the motor's terminals. Solder them to the coil side of the relay. Next, solder the 9v battery leads in series, then connect one of the wires to the switch side of the relay, and the other to the solenoid. Lastly, connect the other solenoid wire to the remaining switch lead on the relay. All that is left to do is to mount the antenna, and you are done. Here is a basic diagram of how your final result should appear.
...The Remote...
The remote in its stock form will work just fine. The only reason I put mine in a cell phone was to give it that "terrorist effect". It was designed to be used in airsoft games, and I am known for using AKs (considered a "terrorist weapon" by most), so I thought it fit nicely. To get the remote to fit in the phone, I shaved off part of the circuit using a dremel, then wired the forward button to the end button on the cell phone key pad. Lastly, I modified the circuit to accept power from a car key fob battery; which is significantly smaller than a standard 9 volt.
...Other Info....
This is a very basic R/C circuit, and is thus prone to picking up interference. This system was designed to be used in the woods; acting as a remote detonated mine. You must remember that this cannot be used in a modded sprinkler valve unless you bough a separate solenoid valve to pilot the sprinkler valve (such as a small 1/4 NPT solenoid valve or similar). If the device goes off as soon as you turn on the power switch, the diode was inserted in the wrong direction. This is simple to correct. Simply unsolder the diode, then turn it 180 degrees and solder it back in place. The R/C receiver is relatively poor in quality, and in my mine it is paired with about 20ft of antenna wire, which would normally be wrapped around a nearby tree to give it an effective range of over 100ft. If you plan on using this underground (in the case of my mine), encase all of the electronic components in hot glue to prevent them from being damaged by water. Lastly, if the device seems to detonate randomly, and external radio interference is determined to not be the culprit, the issue is likely the antenna. Ensure that the antenna wire is not making contact with any metal components of the circuit board.
This was the method used to make my anti-personnel mine.

