Page 1 of 40
long range ammo MiniBoy Mark I
Posted: Sat Apr 09, 2011 12:41 pm
by LeMaudit
Following
this discussion, I am building a long range ammo using my
Sherline lathe and mill.
Here's the plan that I am following:
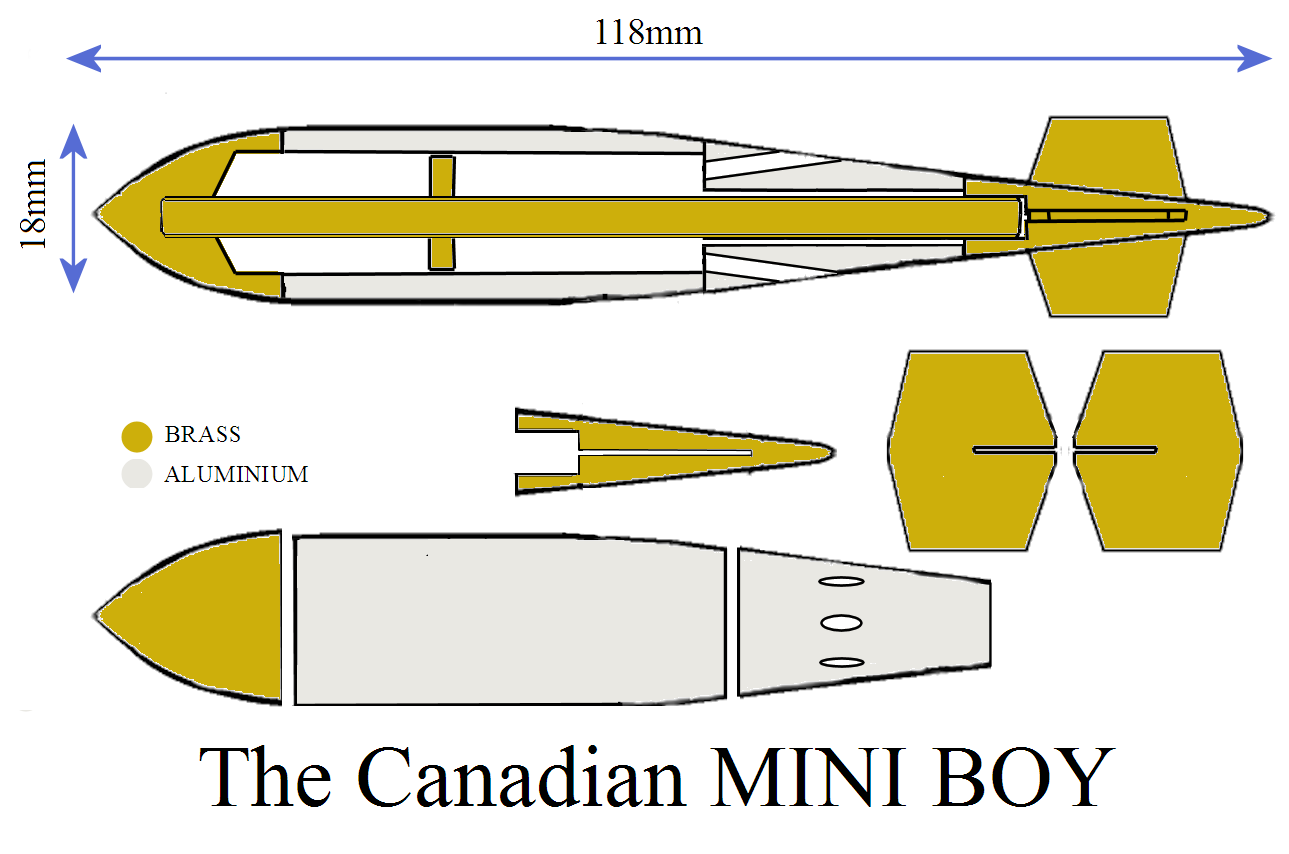
And what's already done

If people manifest some interest to learn about how it is done with a machine that can be used on a kitchen table, just let me know and I'll be happy to post detail photographs of the whole process.
[edit] I'm wrinting a howto at the same time
here
Posted: Sat Apr 09, 2011 1:42 pm
by jrrdw
I you want to, do a 'How To' and member's can work with what tools they got off of your plan/How To. Looking real good so far.
Posted: Sat Apr 09, 2011 3:11 pm
by dewey-1
LeMaudit;
Looks great so far!
I started a 3D version of your original drawing as you can see attached.
I did a paper cutout to determine the CP (Center of Pressure).
For stability in flight, the CG should be about 1 caliber (18 mm) ahead of the CP point. This CG must have any payload included.
Posted: Sat Apr 09, 2011 3:28 pm
by mark.f
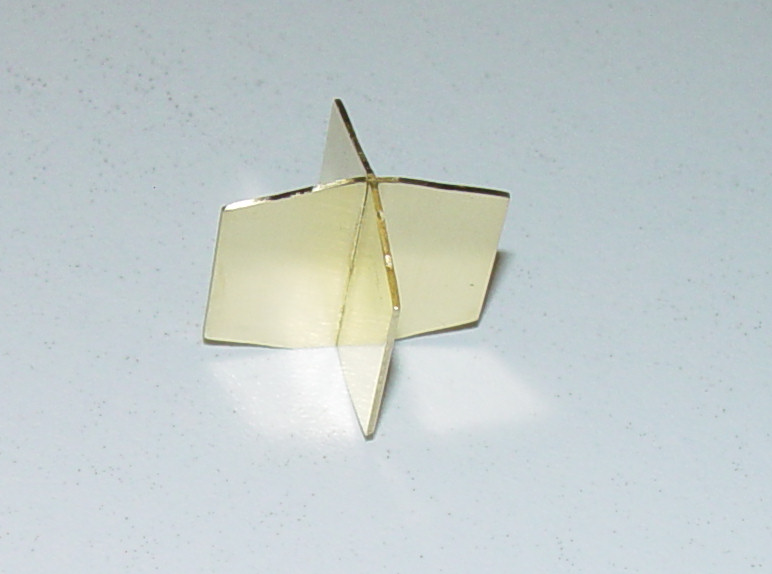
The fins are interesting. I realize you can do shapes not cylindrical on a lathe (like cubes, etc.), but I'm not seeing how you did the fins. Care to enlighten me?
Posted: Sat Apr 09, 2011 3:45 pm
by LeMaudit
I you want to, do a 'How To'
That's a good idea

I started a 3D version of your original drawing
Drawing was not mine really, a copy/paste of the technical drawing JSR posted about the real Tall Boy bomb.
That's interesting! I'll provide weight and exact dimensions of the final missile (I didn't try to do absolutely exact dimensions, more respect and overal shape). So far the diameter is 19mm, I might reduce it when I machine the central part. I'm sure MrCrowley will be interested as he'll be the one that fill the nose and body with weight, as the nose is partially hollow. I made it in brass just to be able to withstand the final hit (hopefully)
The fins are interesting. I realize you can do shapes not cylindrical on a lathe
I made them with 2 brass plates that interlock together like the drawing... using the mill
I know... I cheated...

I will prepare a How To and post there at the same time so people interested can see the machining process, without clutering this thread with a gazillion pictures

[edit] it's done in
this thread
Posted: Sat Apr 09, 2011 6:52 pm
by LeMaudit
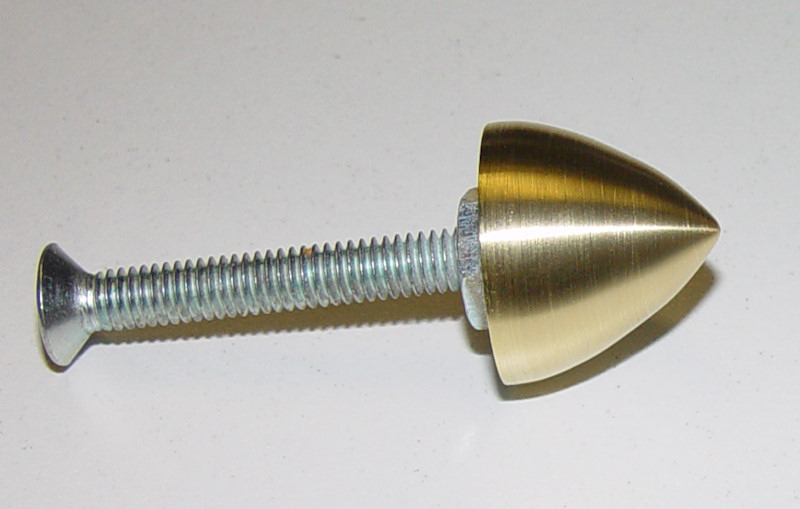
Another piece of the puzzle is done
Posted: Sat Apr 09, 2011 10:05 pm
by MrCrowley
Posted: Sat Apr 09, 2011 10:28 pm
by Insomniac
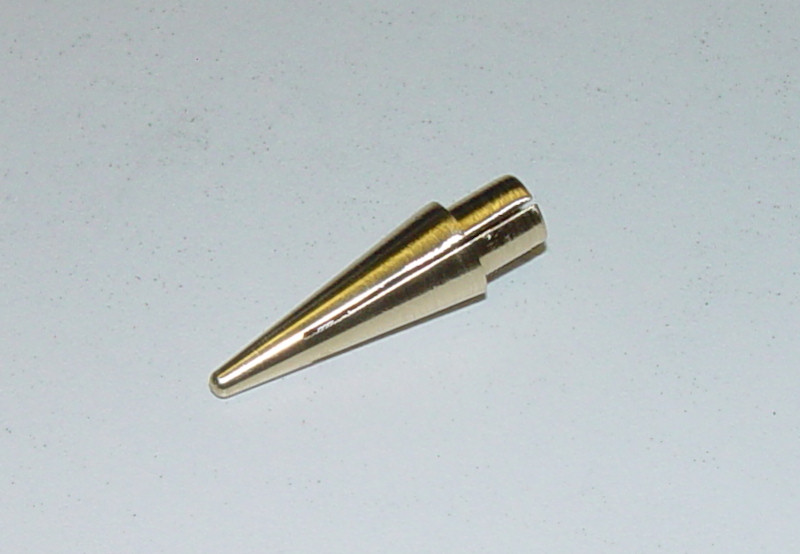
You absolutely MUST give this thing a once-over with a polishing compound... It looks good enough to be a desk ornament or paperweight!
Not to mention the reduction in drag...
Posted: Sat Apr 09, 2011 10:29 pm
by MrCrowley
Would it be worth beveling the edges of the fins to reduce drag?
Posted: Sat Apr 09, 2011 11:48 pm
by dewey-1
You definitely want to have a slight radius or chamfer on the fins to reduce any drag.
If you look closely at my 3D drawing you will notice the radius on the fins.
Posted: Sun Apr 10, 2011 6:36 am
by jrrdw
If you beveled one side of the fins leeding edge it would give it enough spin to eliminate any cross wind wobble that might devolop if flight. Accuracy means you'll get it back to shoot again...
Posted: Sun Apr 10, 2011 6:56 am
by al-xg
In that case do the trailing edge on the same side also, make each fin an airofoil, lift induced spin
Posted: Sun Apr 10, 2011 8:20 am
by LeMaudit
Just to be sure I understand, you suggest to do something like that to induce rotation? No problem
Which side? Like the picture or the other side? Maybe it's not important, but I'm not sure...
(to anticipate some sarcastic remark
, the thingy is not 100% symetrical, one end flat is larger than the other)
Posted: Sun Apr 10, 2011 8:26 am
by ilovefire
do it like that at the front but have the bevel on the other side at the back of the fin
Posted: Sun Apr 10, 2011 8:56 am
by LeMaudit
Really!

But it will not spin like that, or is it? I'd like very much to understand