Thunderbess, Edit: Major Update!

Show us your pneumatic spud gun! Discuss pneumatic (compressed gas) powered potato guns and related accessories. Valve types, actuation, pipe, materials, fittings, compressors, safety, gas choices, and more.
User avatar
Big-E
Specialist
Specialist
Posts: 129
Joined: Tue Feb 24, 2009 3:07 pm
Location: Somewhere in Wisconsin

Sat Apr 17, 2010 7:43 pm

*Major Update to this project, scroll down through this thread to see the latest revision! Now with a damage vid added!*

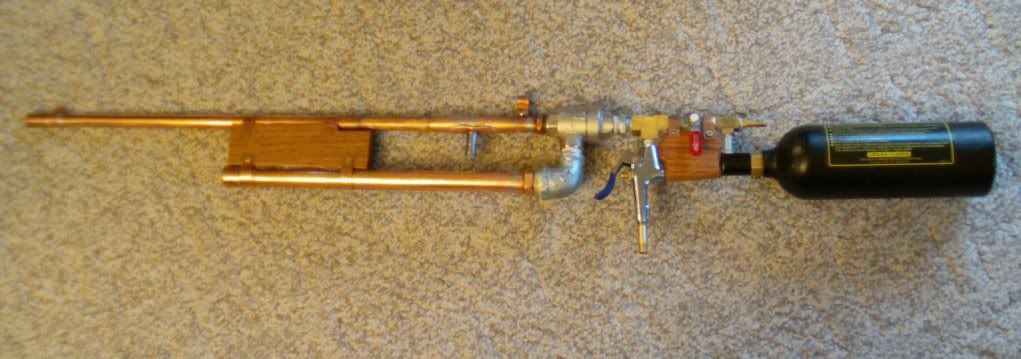
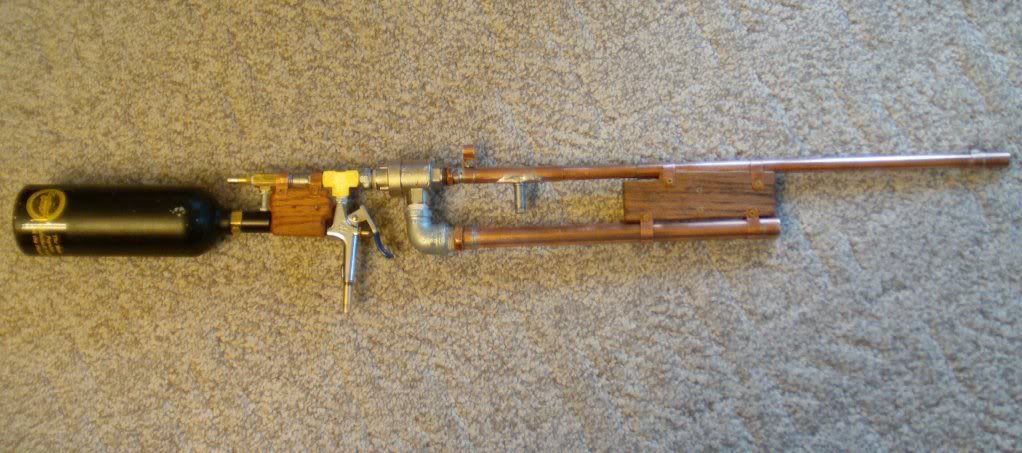
Well, it's been a long time coming. Here's the latest cannon; Thunderbess:
A.K.A. The Devil's Pitchfork (it reminded me of a pitchfork when I was building it)

I recycled the breech barrel some wood and part of my chamber from Koperbess, It now features a 1/2" QEV with a blowgun pilot. I also have a ballvalve and a CO2 Tank receiver on it, I usually just pressurize it with air though. So far, I've run it at 250 psi, and it's awesome! I have a schraeder just above the tank. If you close the ballvalve between shots, the pilot area is quite small. open and close the valve, and the chamber is pressurized again. all the small threaded nipples (1/4" and smaller) are steel, as I learned from my pump build, sometimes close fit nipples made from brass fail over 200 psi, so I stayed away from those.
Image
Image

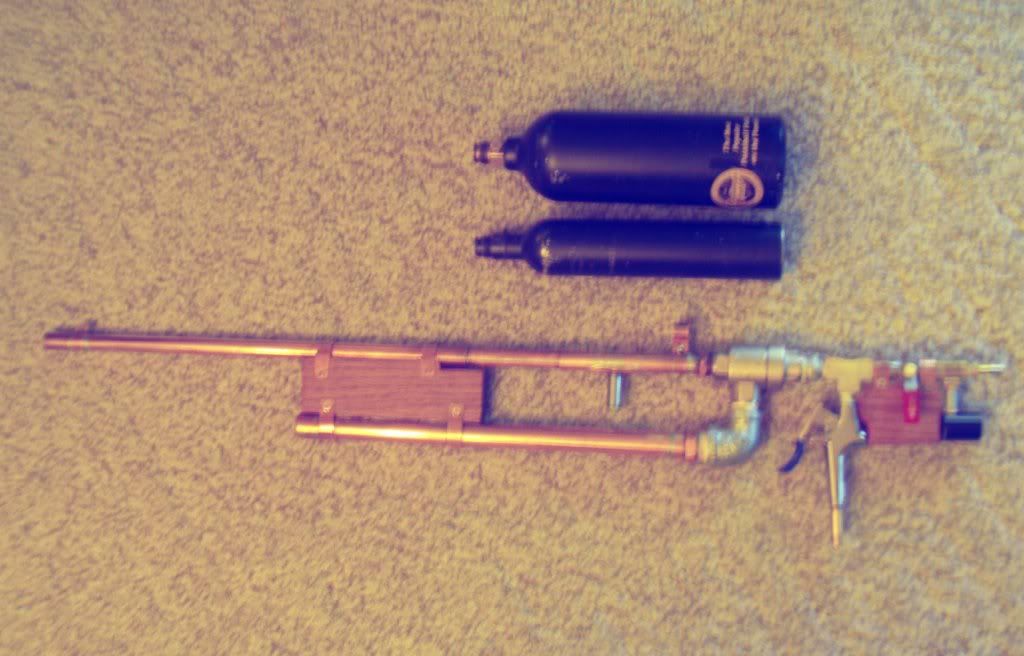
Please excuse this next pic, it came out cruddy...
Image

The CO2 tank holds enough air for 6 good shots or so, about three on the smaller tank. If I buy a remote and regulator setup, it will hook right up to co2. I used my experience experimenting with Kopperbess to design this one. So far, I'm loving it. It's way more powerful!

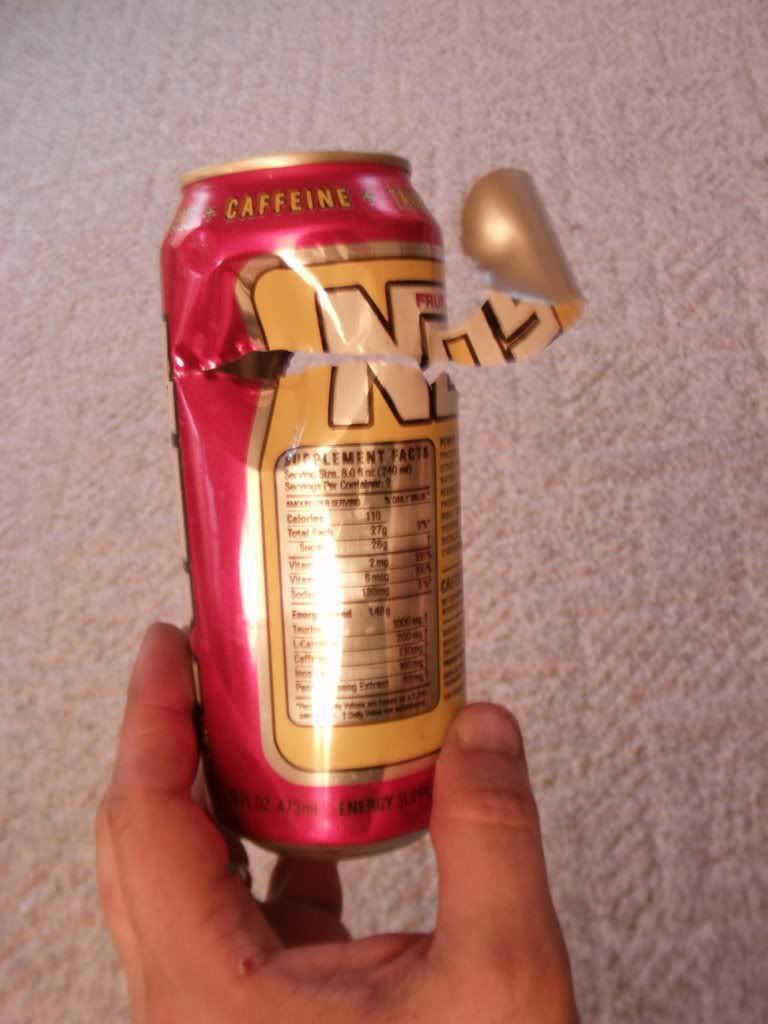
This can was filled with water, and shot with a marble at about 15 feet and around 50 psi:
Image

Next on the plan is to buy a co2 tank buttcap to make it serve better as a stock like this one:
Image

Hopefully I can post some vids soon. I hope you like this one better, I sure do. Let me know what you think.
Last edited by Big-E on Wed Oct 13, 2010 2:59 pm, edited 4 times in total.
-Speed is a question of money; How fast do you want to go?
User avatar
chinnerz
Specialist 4
Specialist 4
Posts: 470
Joined: Mon Dec 28, 2009 8:08 am

Sat Apr 17, 2010 8:31 pm

NICE WORK MATE!!

yeah those stock attachments look cool! cant wait to see it fully finished

but i have to say the stock isnt as cool as your last one :P
Last edited by chinnerz on Sat Apr 17, 2010 8:48 pm, edited 1 time in total.
Image
User avatar
Patto
Private 4
Private 4
Posts: 96
Joined: Wed Jan 20, 2010 7:08 pm

Sat Apr 17, 2010 8:31 pm

Man Right on the money !! 8) Great idea for multiple shots , good style , and looks good! .. and co2 with a reg will be good too !!

Do you know what your C:B is ? what diameter is your barrel ? what are you shooting ?

Now im only thinking out load (please correct me anyone if im wrong so i know) but you really only need 1:1 -1.5:1 so you could probably shorten your chamber and get more shot per tank ?? (depending on barrel size)
User avatar
mark.f
Sergeant Major 4
Sergeant Major 4
Eritrea
Posts: 3628
Joined: Sat May 06, 2006 11:18 am
Location: The Big Steezy
Has thanked: 52 times
Been thanked: 53 times
Contact:

Donating Members

Sat Apr 17, 2010 8:53 pm

Looks good. Not much to nitpick about. :wink:

Patto, those ratios are for combustion launchers. Pneumatic chambers can be as large as you like, although you're wasting air at a certain point.
User avatar
deathbyDWV
Corporal
Corporal
Posts: 576
Joined: Sat May 16, 2009 4:02 pm
Location: Owasso, OK

Sat Apr 17, 2010 9:12 pm

Yep looks good. Nice work...
Life's too short to mark off the items on your wish list...
User avatar
Big-E
Specialist
Specialist
Posts: 129
Joined: Tue Feb 24, 2009 3:07 pm
Location: Somewhere in Wisconsin

Sat Apr 17, 2010 9:27 pm

The chamber to barrel ratio is about 1:1, the chamber tubing is 3/4" copper, the breach barrel is 1/2" copper. I can always change chambers out, as it's threaded.

I also made a quick connect adapter that screws into the tank receiver; I just put it in place of the tank, click on my air line, and I can run it off my compressor in the garage for testing purposes.

The other cool thing is I can keep cylinders pre pressurized, so when Thunderbess is empty, I just close the ball valve and swap the tank for a pressurized one. It's perfect for getting in more shots between pumping sessions.

The receiver and plug fitting on the quick connect adapter are from a basic remote setup I had left over from my early days of paintballing.

Kopperbess had about 1/3 the power of Thunderbess, by my guestimation :D
-Speed is a question of money; How fast do you want to go?
User avatar
Patto
Private 4
Private 4
Posts: 96
Joined: Wed Jan 20, 2010 7:08 pm

Sat Apr 17, 2010 9:45 pm

Patto, those ratios are for combustion launchers. Pneumatic chambers can be as large as you like, although you're wasting air at a certain point.
Exactly Sorry all im saying is Big E is already getting 6 shots from 1 tank which i think everyone has wanted at some point, i know thats what i want so RIGHT ON !! :D

Do you know what would be a good min. C:B ratio for a Pneumatic cannon, so you could try to get as many shots as possible while maintaining a constant pressure/Fps ??

@BigE .. nice i like that your getting more shots out of 1 tank and you can refill on the go which leads to longer sessions etc. c:b - 1:1 sweet :lol: thats what i was thinking. nice work
User avatar
Big-E
Specialist
Specialist
Posts: 129
Joined: Tue Feb 24, 2009 3:07 pm
Location: Somewhere in Wisconsin

Sun Apr 18, 2010 10:19 am

From my tinkering (and by no means am I the authority on the subject) I have come to the conclusion that you need about a 1:1 C:B ratio for a decent pneumatic at lower pressures, in other words, you need as much air space in your chamber as your barrel. you can make the chamber diameter larger than the barrel, but it must have the same volume as your barrel (after the breech)

Now, a smaller chamber is fine if you're running higher pressure, like, .5:1 would be fine for pressures about 200 PSI and up. you'll definitely get more shots, and decrease the sound levels when firing. Your best bet is to try different lengths of chamber, and go with the one that works best. 1:1 ratios seem to work best for a good mix of power to efficiency. Oversized chambers tend to waste air, unless you're running lower pressures (think around 50 psi)

The trick is to think of your chamber more like an air spring, it should hold as much air as your barrel, and the more pressure you put in your chamber, the more potential energy you're loading into that spring, so, while you will bring the power up going from 50 psi to 150 psi, if you put about 300 psi in the thing, all that extra energy is possibly wasted once the projectile leaves the barrel. Almost any chamber length will work; the key is knowing how much energy should be stored in it, too much pressure, and you just waste air and make it louder. not enough, and it won't even push your ammo out the barrel. you can always tune the pressure you put in rather than the chamber.

any reserve air chamber should have greater volume than your main chamber; at least 3 times the size, if you want multiple shots (unless you go with co2 and a regulator, then reserve size isn't much of an issue)

also, when I charge Thunderbess, (at around 200-250 PSI) i usually close the ballvalve and put another 50-100 psi in the tank before disconnecting the shrader to give me an extra shot in reserve. something to keep in mind
-Speed is a question of money; How fast do you want to go?
User avatar
Maj. Tom
Private
Private
Posts: 4
Joined: Thu Oct 29, 2009 3:10 pm

Tue Sep 07, 2010 10:14 am

I am trying a similar setup using sprinkler valve trigger and a CO2 tank as a reserve.

and I don't know what kind of regulator to buy.

I'd like to control the output pressure so I can vary my range. I also need to buy a valve so I can see the pressure i'm adjusting in my chamber.

My operating pressure I think is somewhere a little below 100 psi.
I need a low level gauge, preferably one that sits flat against the system instead of the ones that stick up.

Can somebody help me?
User avatar
Big-E
Specialist
Specialist
Posts: 129
Joined: Tue Feb 24, 2009 3:07 pm
Location: Somewhere in Wisconsin

Mon Sep 20, 2010 3:04 pm

Maj. Tom wrote:I am trying a similar setup using sprinkler valve trigger and a CO2 tank as a reserve.

and I don't know what kind of regulator to buy.

I'd like to control the output pressure so I can vary my range. I also need to buy a valve so I can see the pressure i'm adjusting in my chamber.

My operating pressure I think is somewhere a little below 100 psi.
I need a low level gauge, preferably one that sits flat against the system instead of the ones that stick up.

Can somebody help me?
Well, Since nobody else is replying:

I am doing this to thunderbess, I will be adding a regulator between the tank and the valve. I will be using the type that is used with air tools, supposedly, they can be fed up to 300 PSI or so, but most manufacturers rate it at 220 PSI or so, which is right about where I need it. The regulator can output 0-160 psi, give or take, depending on the model. this will make the shots more consistent, and by adjusting the regulator, you can adjust the power of the shot.

You can just as easily run the pressure low enough, just make sure to dial the reg all the way down prior to shooting, slowly adjust the pressure to where you want, and possibly add a relief valve on the chamber so you don't have any accidents if the reg is turned up too high or fails for some reason.

I already made a longer barrel, and I will be adding the regulator and finishing the stock and exterior, as well returning the red dot sight along with a short rail mount. I'll be posting photos in this thread when it's done in a week or so; You'll hardly recognize it.

BTW; Pardon my absence. Been busy lately :)
-Speed is a question of money; How fast do you want to go?
User avatar
Big-E
Specialist
Specialist
Posts: 129
Joined: Tue Feb 24, 2009 3:07 pm
Location: Somewhere in Wisconsin

Mon Sep 27, 2010 9:54 am

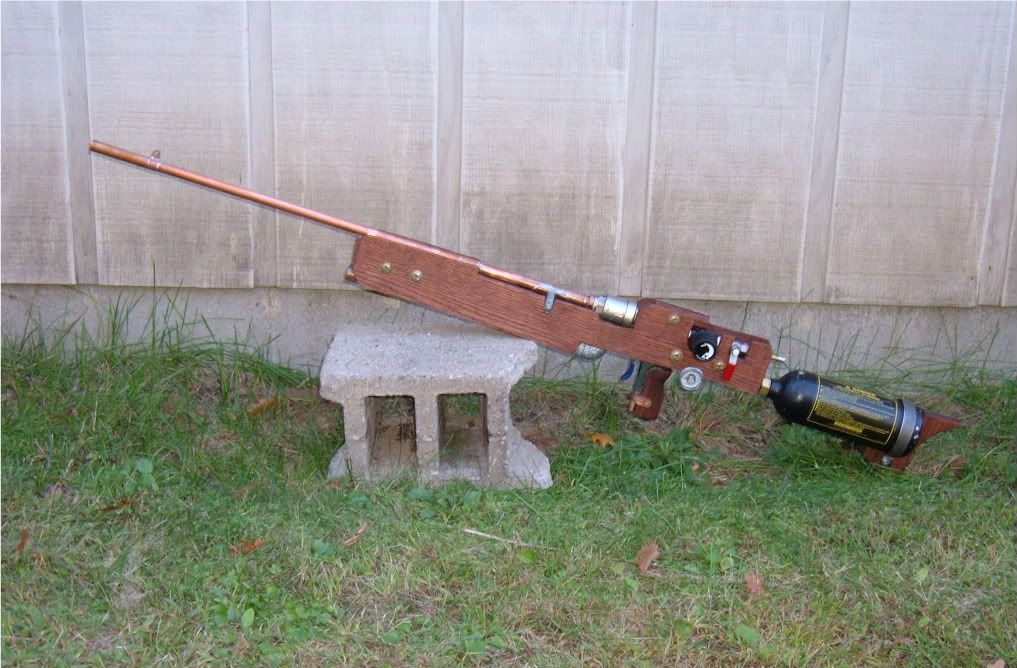
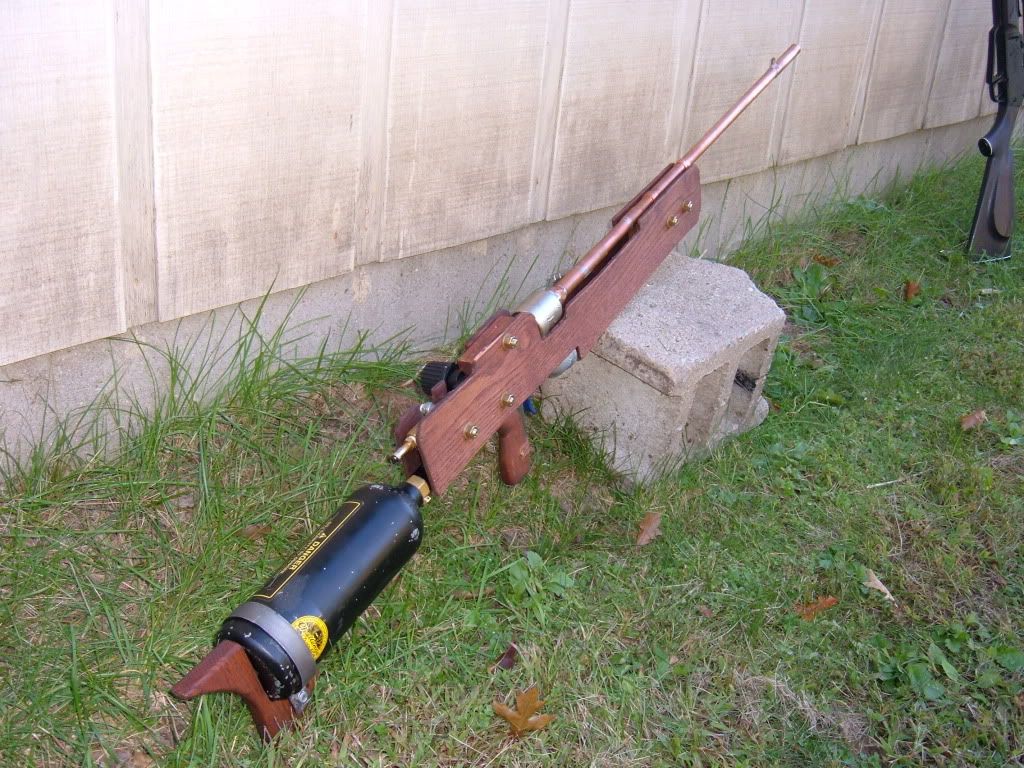
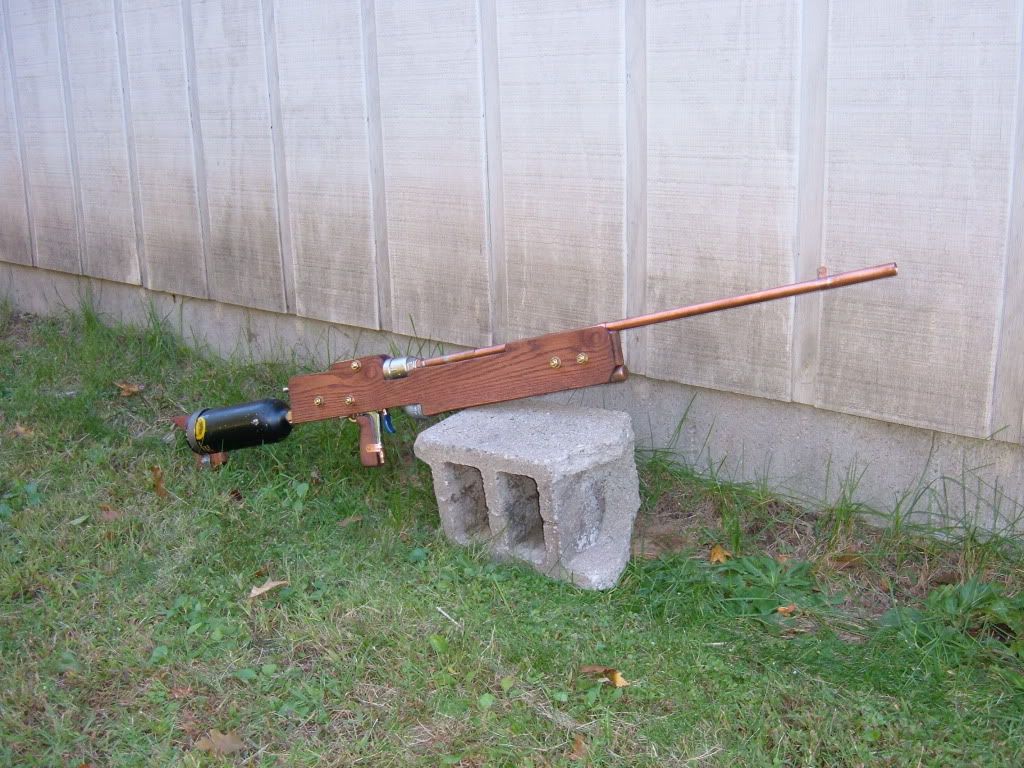
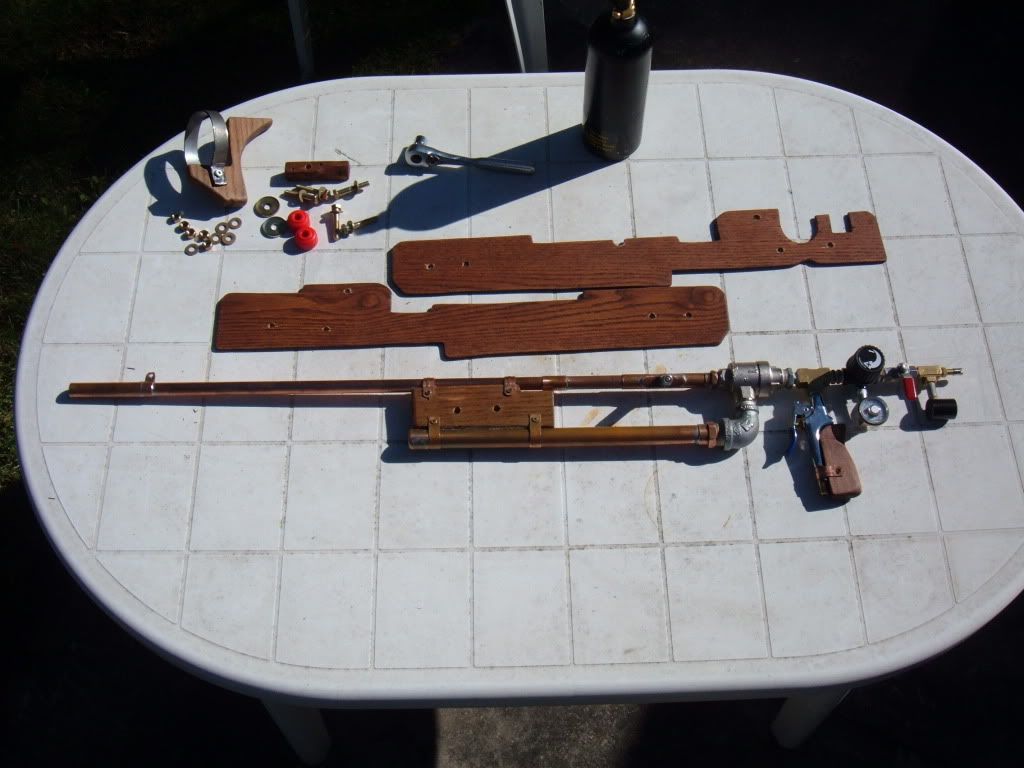
well, It's finally done for the most part. I finished the design and added some new features. I humbly submit for your enjoyment Thunderbess Mk II

Image

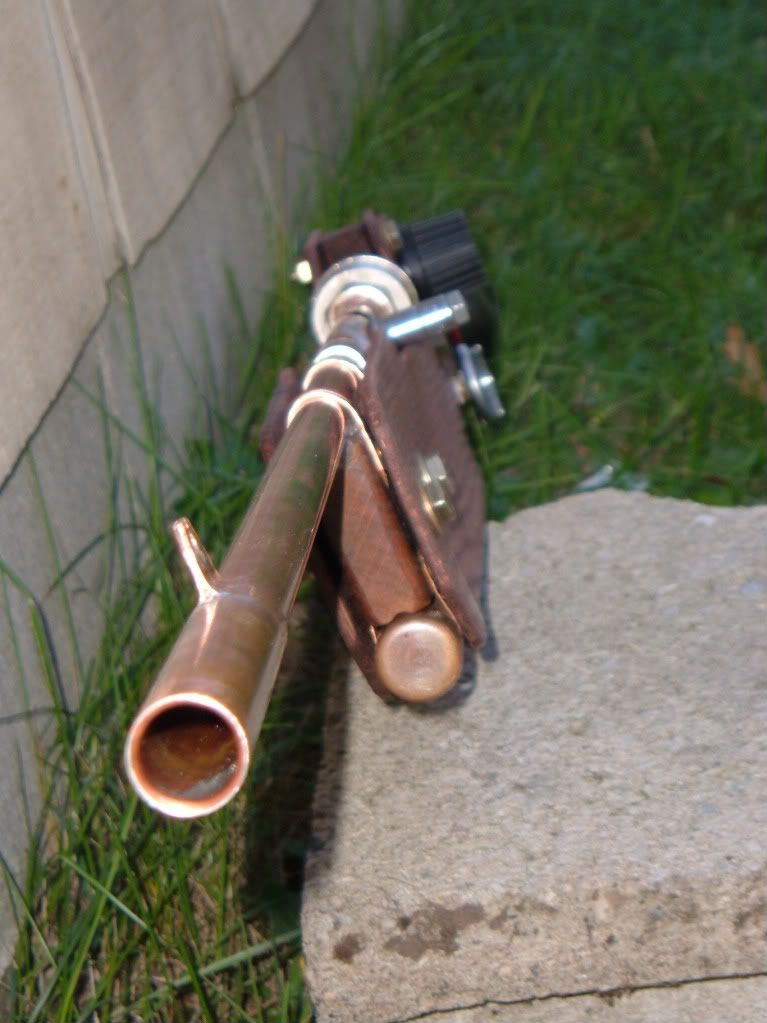
I made a longer barrel, but recycled the breech slide coupling. the breech opening itself is shorter now:
Image
Image

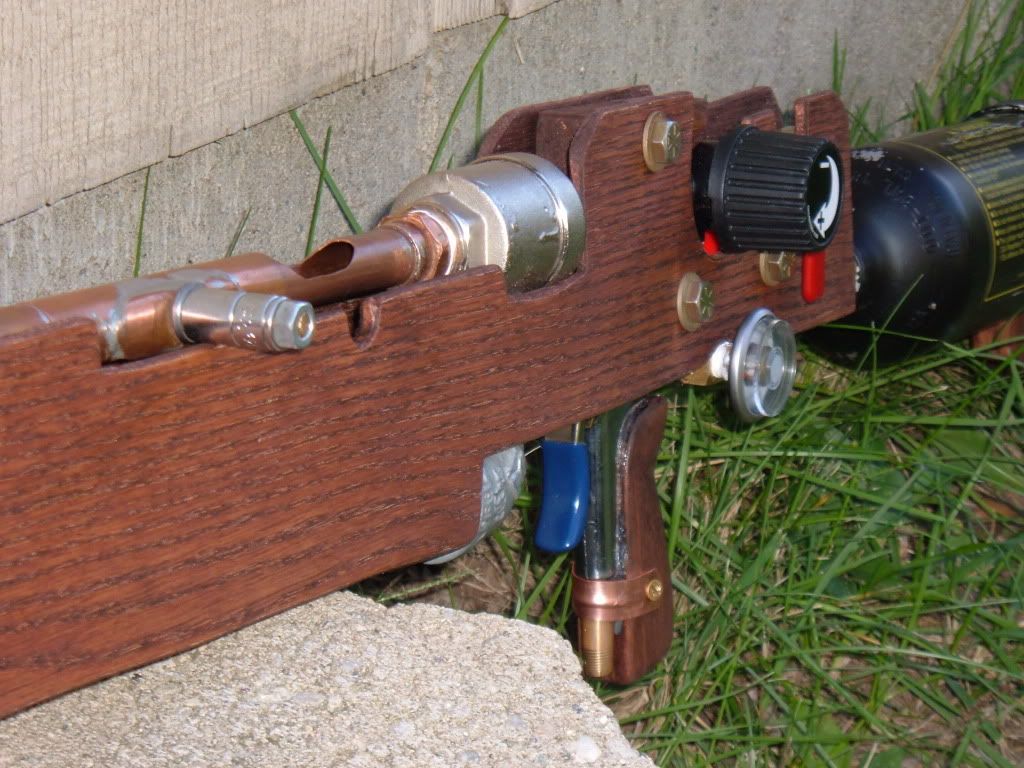
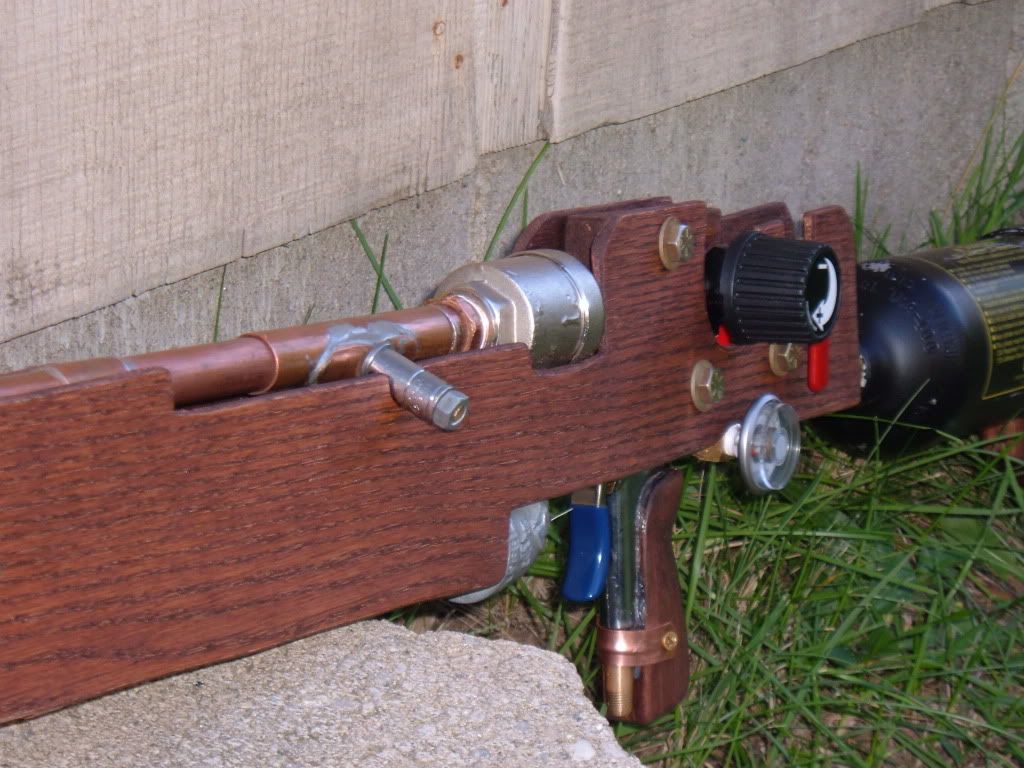
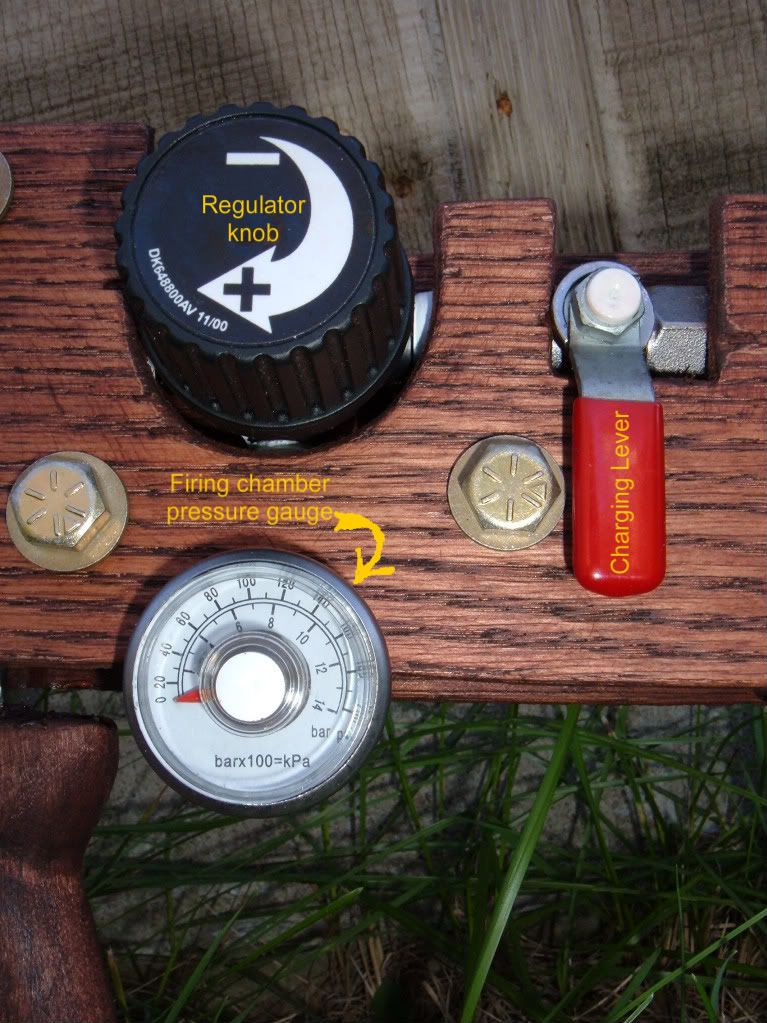
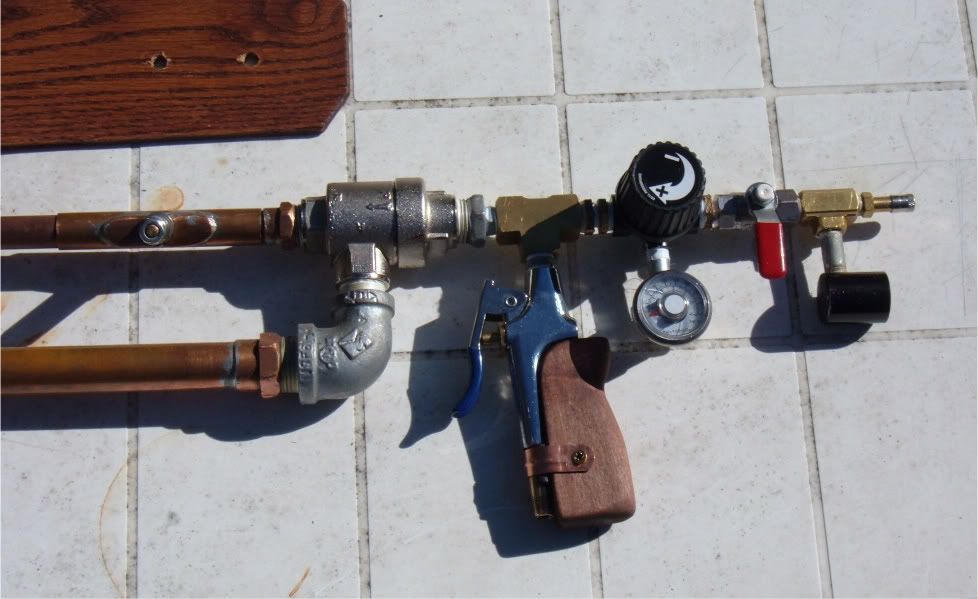
I added a regulator and gauge, to make the shots more consistent, and to make the reserve last longer, not to mention that it also makes it really easy to adjust the power level of the shots as well. at 50-80 PSI, I get about 15 shots or so, at at the max (200 PSI) I get 3 full power shots before I have to dial the pressure down. If you crank it up too high, you can reduce the chamber pressure, but it will bleed off the extra pressure in the chamber to atmosphere, so before I shoot, I preset the regulator knob, and the shots remain consistent until the pressure in the reserve tank drops below the regulator setting. You still use the ball valve to charge each shot. I fill the tank to 220 PSI (max rating on the reg, and generally the pressure I use in it anyway).

Image

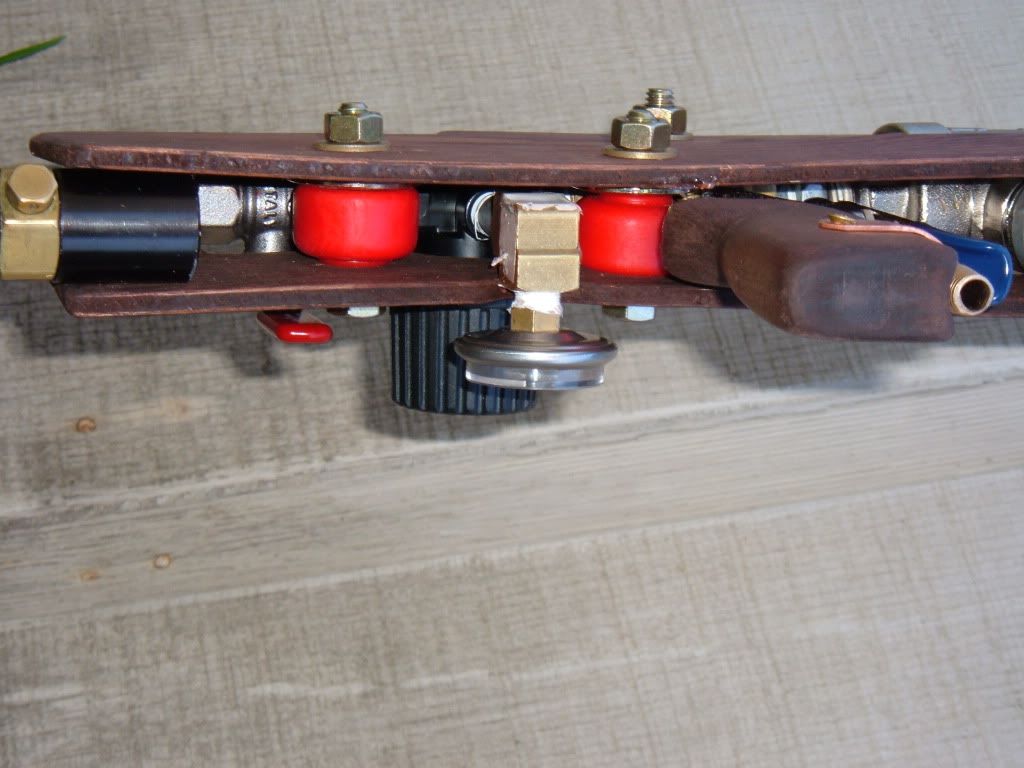
I also bodied the thing with wood, I also used some Poly bushings in the mountings to help dampen vibration, and I added a grip to the blowgun. I made a buttcap for my big tank with some red oak and leftover steel (Which used to be part of the triggering mechanism from Kopperbess) The result is a bit heavier than the last incarnation, but it's rock solid and feels awesome to shoot now.
Here are some other views of the project, as well as an exposed view of the assembly.
Image
Image
Image
Image
Image
Image

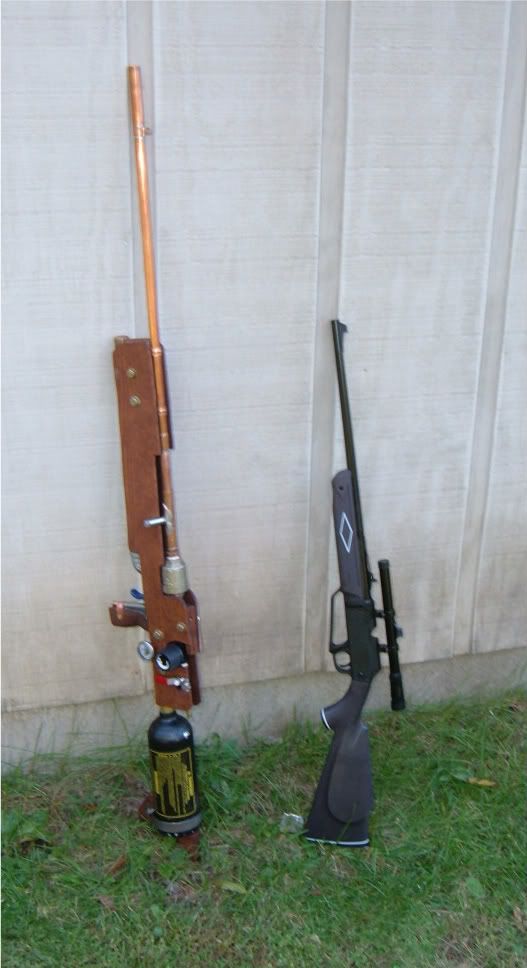
Here is a side by side comparison to a Daisy Powerline 880 air rifle for size comparison:
Image

Thanks for checking it out. I'll try to get some damage pics or video up as soon as I'm able, and I have the sights all worked out; I had the red-dot on it, but I was disappointed with it. I'm working on an open rear sight for it. Feel free to leave feedback. :)
Last edited by Big-E on Tue Sep 28, 2010 5:44 pm, edited 1 time in total.
-Speed is a question of money; How fast do you want to go?
User avatar
JDP12
Staff Sergeant 5
Staff Sergeant 5
Posts: 1943
Joined: Fri Mar 30, 2007 8:34 pm

Mon Sep 27, 2010 10:54 am

Lookin pretty good. Personally I think it would benefit from a remote line to get the tank off the gun but it's your gun.

Looks really clean and ordered, like it!
User avatar
jackssmirkingrevenge
Five Star General
Five Star General
Posts: 26183
Joined: Thu Mar 15, 2007 11:28 pm
Has thanked: 547 times
Been thanked: 326 times

Donating Members

Mon Sep 27, 2010 11:18 am

Not quite "steampunk" but very well put together and should be capable of plenty of power so looking forward to the damage pics :)
hectmarr wrote:You have to make many weapons, because this field is long and short life
User avatar
Lockednloaded
Staff Sergeant
Staff Sergeant
United States of America
Posts: 1566
Joined: Thu Sep 03, 2009 9:38 pm
Location: Texas, USA
Been thanked: 6 times

Mon Sep 27, 2010 3:40 pm

The regulator is very interesting, is it just a stock one you get at homedepot with a new higher pressure gauge?
I love lamp
User avatar
Big-E
Specialist
Specialist
Posts: 129
Joined: Tue Feb 24, 2009 3:07 pm
Location: Somewhere in Wisconsin

Tue Sep 28, 2010 8:15 am

Lockednloaded wrote:The regulator is very interesting, is it just a stock one you get at homedepot with a new higher pressure gauge?
Honestly, it's similar, but seems to have a higher pressure rating too. Most air tool regulators seem to go to around 0-60 psi or 0-125 psi or so. this one came with a bigger gauge, and upon looking into it, it supported more pressure than the average ones, and fit the build nicely.

The one I'm using came from the local True Value hardware store, it's made by Campbell Hausfeld, it's a 1/4" regulator rated to 220 PSI, and the gauge that came with it was a 200 PSI gauge. I have run pressures through it from 20 PSI up to 200 PSI. it works pretty good. model number is GR0017AJ and is available all over the internet. Generally it will cost you about $25.

Image

Home Depot sells a version of this regulator branded as husky, although the gauge is different. Looks like the same reg, so you may be on to something there:
http://www.homedepot.com/webapp/wcs/sto ... rketID=247

Different air tools require different pressures: Example, a HVLP paint gun runs lower pressure, it requires better flow control, whereas a roofer will be running a pancake compressor and higher pressures through his tools. the application of the regulator determines how much pressure it can accept, and how much pressure it can regulate to the output. Sort of like how paintball regs vary based on the gas you run the marker off of (HPA being 3000 PSI and CO2 being about 800-1000 psi) the regulators are all different depending on the application.

The regulators like the one I'm using are considered compressor regulators, meaning they normally go tank-side on portable compressors rated to 200 PSI or so.
-Speed is a question of money; How fast do you want to go?
Post Reply