How-to: rifle metal barrels
Posted: Mon Jul 13, 2009 2:34 am
Everyone wants a nice rifled barrel don't they? This will work better on softer materials, such as aluminum. You will need a file, vice, welder, steel rod longer than your barrel and a lot f patience. You will also need to head down a hardware store to by a bolt.
This was inspired by the guy on spudtech who did something similar
Firstly go down your hardware store with a small piece of tubing the same size as your barrel (if they sell it, use some of theirs). Now go and look through the arrangement of bolts and find one with a hex head a good size for your barrel.
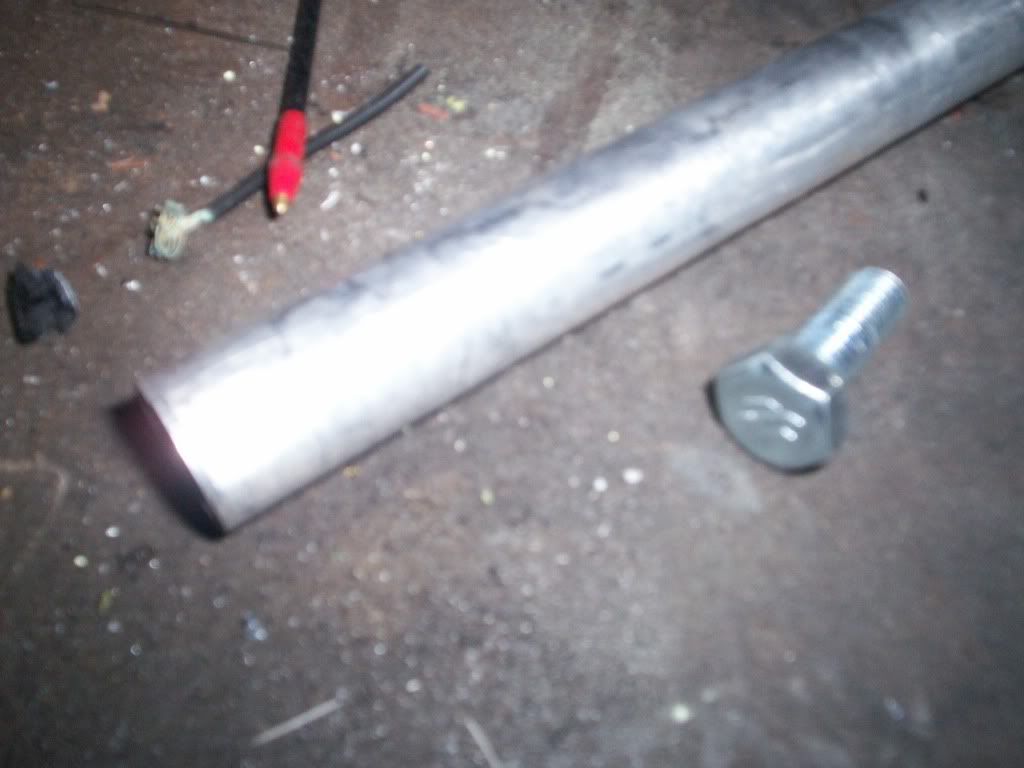

A good guideline would be that when centered in the barrel the ends of the hex head protude perhaps halfway into your barrel material (assuming you have a thinwalled aluminum or copper barrel).
Now you have selected your bolt, protect the threads with some tape and put it in your vice. Firstly, create an angle on the bolt head to make cutting easier. Leave the back of the bolt head basically intact.
Next, use your file to cut at an angle across the hex head that you want your rifling to be at. Keep it the same way the whole way around, and dont make it too steep. Cut it on the either side of each bolt head and file the end tip of the bolt to be sharp.
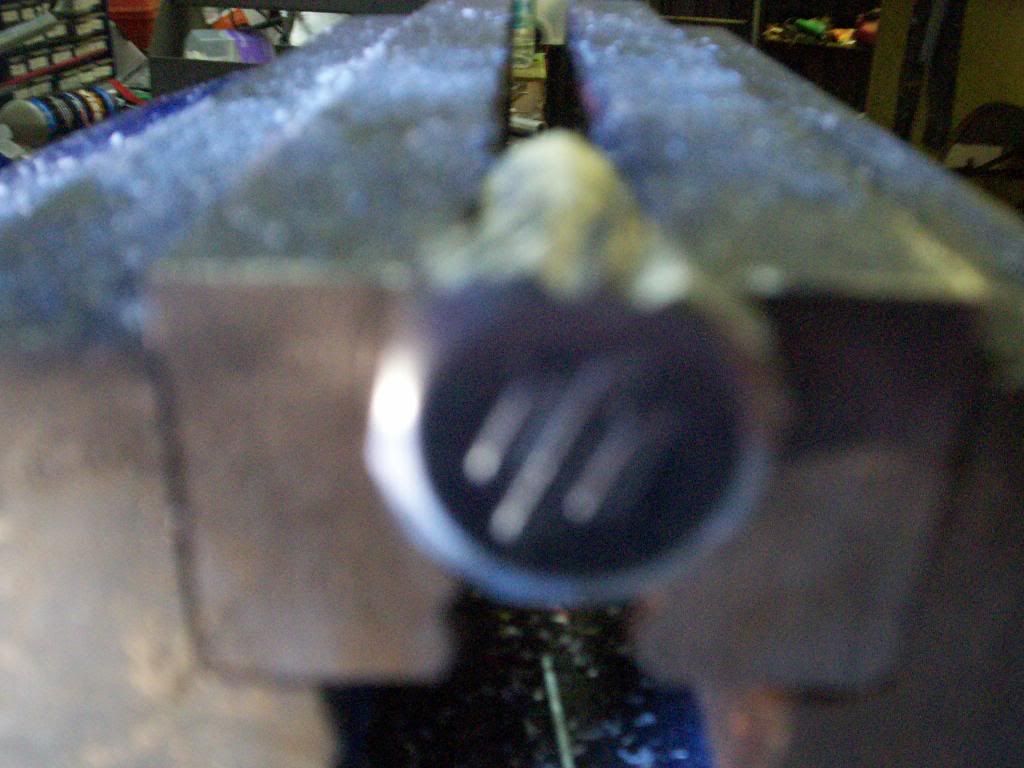
And once complete..
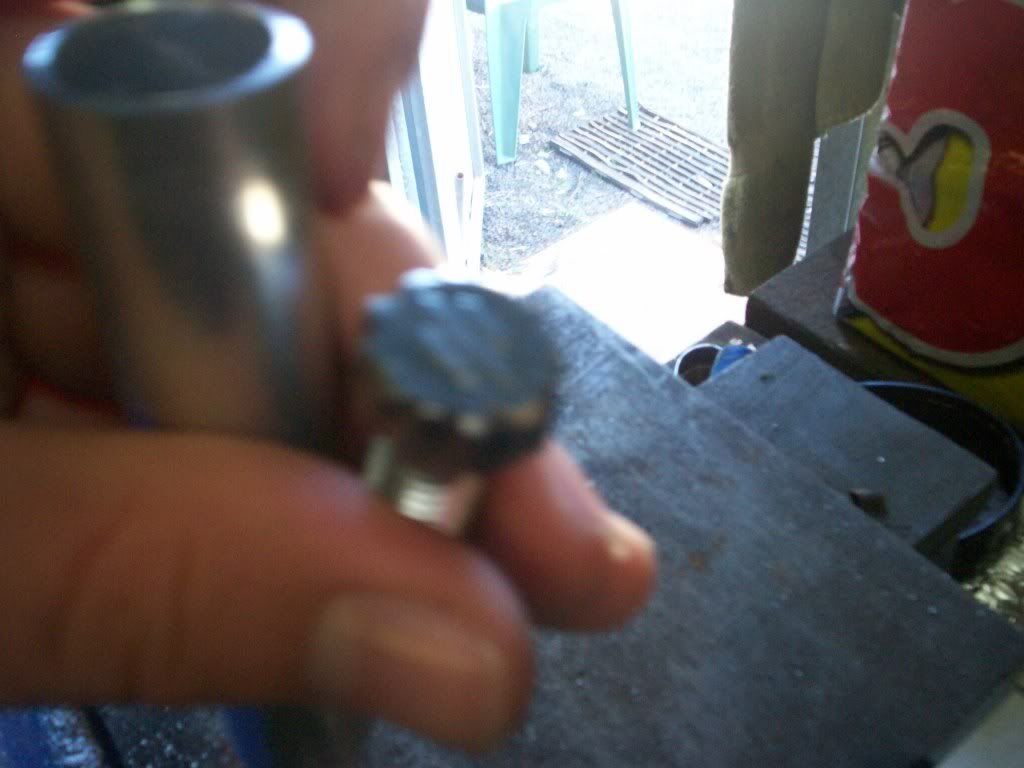
Then just weld it onto a steel rod and you're away!
It may take several tries to get a good final product. Chances are, because it's done by hand the depth of each cut will differ slightly. Once the first row of riflings are cut, rotate the tool and cut again until they are all a consistent depth.
This tool basically pulls itself along.
After rifled, first spin sandpaper on a rod (using a drill) inside your barrel to smooth it off, then insert a rag with an abrasive or buffing compound, such as jif for cleaning saucepans. After that, use some clean cloth and spin it with the drill until polished.
More pictures will be up tonight
This was inspired by the guy on spudtech who did something similar
Firstly go down your hardware store with a small piece of tubing the same size as your barrel (if they sell it, use some of theirs). Now go and look through the arrangement of bolts and find one with a hex head a good size for your barrel.
A good guideline would be that when centered in the barrel the ends of the hex head protude perhaps halfway into your barrel material (assuming you have a thinwalled aluminum or copper barrel).
Now you have selected your bolt, protect the threads with some tape and put it in your vice. Firstly, create an angle on the bolt head to make cutting easier. Leave the back of the bolt head basically intact.
Next, use your file to cut at an angle across the hex head that you want your rifling to be at. Keep it the same way the whole way around, and dont make it too steep. Cut it on the either side of each bolt head and file the end tip of the bolt to be sharp.
And once complete..
Then just weld it onto a steel rod and you're away!
It may take several tries to get a good final product. Chances are, because it's done by hand the depth of each cut will differ slightly. Once the first row of riflings are cut, rotate the tool and cut again until they are all a consistent depth.
This tool basically pulls itself along.
After rifled, first spin sandpaper on a rod (using a drill) inside your barrel to smooth it off, then insert a rag with an abrasive or buffing compound, such as jif for cleaning saucepans. After that, use some clean cloth and spin it with the drill until polished.
More pictures will be up tonight
