PVR-31mm "The 2-Hour Cannon"

Show us your pneumatic spud gun! Discuss pneumatic (compressed gas) powered potato guns and related accessories. Valve types, actuation, pipe, materials, fittings, compressors, safety, gas choices, and more.
Killjoy
Sergeant
Sergeant
Posts: 1052
Joined: Sun Nov 12, 2006 12:51 am
Location: New Mexico

Mon Nov 12, 2007 1:45 am

Well I decided to try my hand at a piston valve again. As I usually do, I wanted a challenge, so I wanted to see the shortest time in which I could build it, as well as using no glue or epoxy to seal anything, just good old pvc cement.
I took roughly 2 hours to build it, but I unfortunantly screwed up the hole for the fill valve and had to use epoxy to seal in the hex nipple.

PVR-31mm
Piston Valve Rifle-31 mm bore.

AKA: "The 2-hour cannon"
(Because it took two hours to build).

Specs:
40" long 2" sch 40 PVC diameter chamber
39" long 1 1/4" sch 40 PVC barrel
Piston valve with a 1 1/4" opening
Accessed through a 1"-2" threaded bushing with O-ring
1" sprinkler valve as pilot valve
3/8" ball valve as trigger for sprinkler valve
125psi+ operating pressure

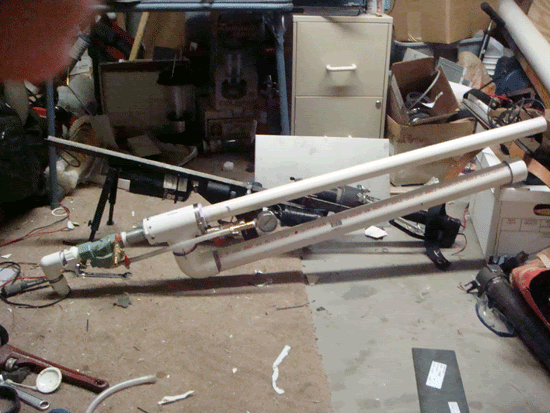
The Finished Product
Image

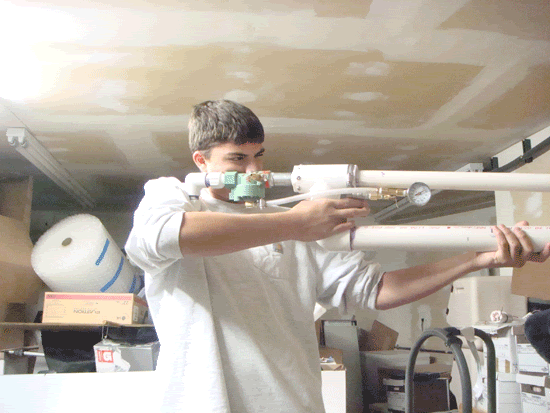
Firing Position
Image

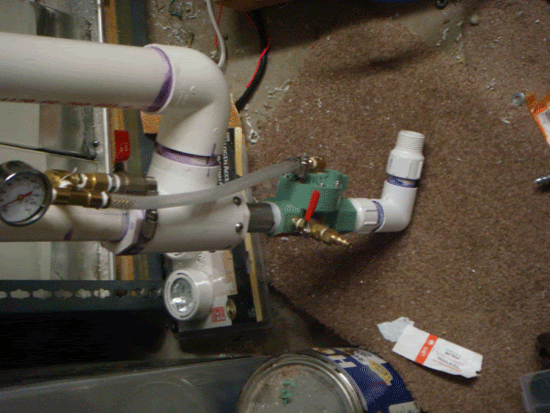
Pilot Set Up and Stock
Image

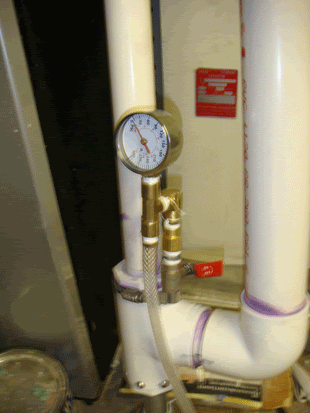
Ball Valve Trigger
Image

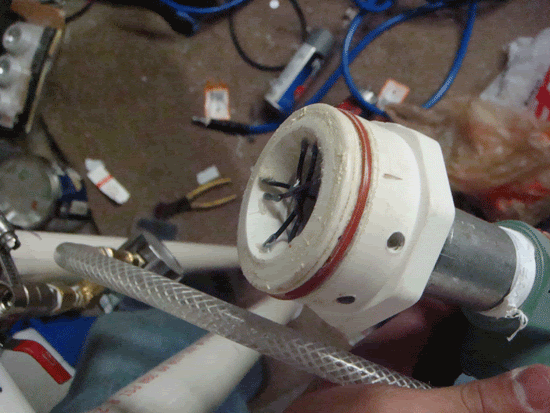
The Piston Guts
Bumber is just high density packing foam, and piston is a 1 1/2" hex plug cut smooth and wrapped in duct tape.
Image

The Plug
Was a 2"-1" threaded bushing which I threaded onto a 1" threaded plug attached to my drill press. I cut of some of the bottom to shorten it using a saw, and then used a razor blade and careful hands to cut the o-ring groove while it spun on the drill press, and sand paper to smooth everything (got the idea and modified it from Unisonmind here http://www.spudfiles.com/forums/the-sta ... 10049.html)
The black wire is to prevent the foam bumper from being sucked into the sprinkler valve.
The entire thing is held intot he 2" tee with 5 1/4" stainless steel screws.
Image

The Damage


The Video
[youtube][/youtube]


Shot Up Cans. Bad aim resulted in side hits instead of dead center ones.
Image

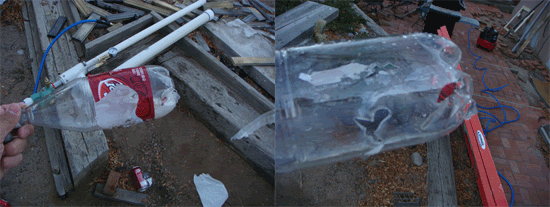
Dr. Pepper Bottle 2 holes made by bearing. Bottom of bottle blew out from impact force.
Image

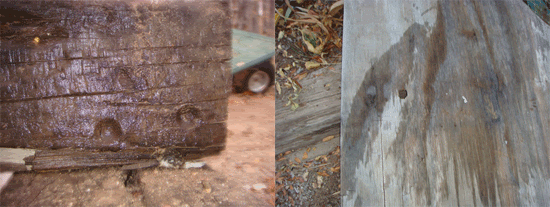
Dents in Railroad Tie Back Stop and hole in 3/4" plywood.
Image
Last edited by Killjoy on Fri Nov 16, 2007 1:12 am, edited 1 time in total.
Stanford Class of 2012

"In the end our society will be defined not only by what we create, but what we refuse to destroy"- John Sawhill
User avatar
hi
Staff Sergeant 2
Staff Sergeant 2
Posts: 1619
Joined: Thu Feb 01, 2007 9:28 pm

Mon Nov 12, 2007 1:57 am

As I usually do, I wanted a challenge, so I wanted to see the shortest time in which I could build it, as well as using no glue or epoxy to seal anything, just good old pvc cement.
I took roughly 2 hours to build it, but I unfortunantly screwed up the hole for the fill valve and had to use epoxy to seal in the hex nipple.
sorry that doesnt cut it, rebuild it please. :)


just kidding. it looks really nice, it probably would have taken me a weekend to build. it really is a good looking gun, my one and only suggestion is that you add a barrel support, but thats just me.


if you had to guess, what do you think the muzzle volocity is?
"physics, gravity, and law enforcement are the only things that prevent me from operating at my full potential" - not sure, but i like the quote

you know you are not an engineer if you have to remind yourself "left loosy righty tighty"
Killjoy
Sergeant
Sergeant
Posts: 1052
Joined: Sun Nov 12, 2006 12:51 am
Location: New Mexico

Mon Nov 12, 2007 2:02 am

just kidding. it looks really nice, it probably would have taken me a weekend to build. it really is a good looking gun, my one and only suggestion is that you add a barrel support, but thats just me.
Yeah I plan to, but i didn't have time or feel like, but it will get one soon...maybe tomorrow..

GGDT says around 350 fps with the 63g bearing, but I'll break out my chronograph tomorow to double check.
Stanford Class of 2012

"In the end our society will be defined not only by what we create, but what we refuse to destroy"- John Sawhill
User avatar
BC Pneumatics
Sergeant
Sergeant
Posts: 1053
Joined: Tue Jan 18, 2005 6:55 pm
Location: Fresno, CA
Contact:

Donating Members

Mon Nov 12, 2007 2:36 am

Looking good, looking real good.
User avatar
unisonmind
Specialist
Specialist
Posts: 118
Joined: Wed Jan 24, 2007 9:25 pm

Mon Nov 12, 2007 6:27 pm

thats a good looking cannon im glad i could help in some way
THE DIFFERENCE BETWEEN A FLOWER AND A WEED IS A JUDGEMENT
User avatar
origin unknown
Corporal
Corporal
Posts: 533
Joined: Sat Apr 14, 2007 2:38 pm
Location: Searcy, Arkansas (college) and Memphis, TN (hometown)

Mon Nov 12, 2007 11:08 pm

Very cool large bore cannon for the amount of time you put in to it. The video was pretty awsome. I like the trigger set up on it and I still can't see how you made your cannon so fast. I am such a compulsive perfectionist that it takes me forever to finish my cannons and make them ready for posting.
Ecclesiastes 1:9 - What has been will be again, what has been done will be done again; there is nothing new under the sun.
Killjoy
Sergeant
Sergeant
Posts: 1052
Joined: Sun Nov 12, 2006 12:51 am
Location: New Mexico

Tue Nov 13, 2007 12:33 am

I like the trigger set up on it and I still can't see how you made your cannon so fastI am such a compulsive perfectionist that it takes me forever to finish my cannons and make them ready for posting.
When I build cannons I get into this "zone", and as long as the parts are in front of me, it takes me very little time to get things done. But I still have the perfectionist thing going on; I have a hybrid that has been done for 2 weeks but I have yet to post it since I want to add a 1/2" barrel and fiz the bipod.
Stanford Class of 2012

"In the end our society will be defined not only by what we create, but what we refuse to destroy"- John Sawhill
User avatar
glass_05
Private 4
Private 4
Posts: 74
Joined: Sun Apr 27, 2008 7:08 pm
Location: Iowa
Contact:

Tue May 06, 2008 11:52 pm

i have some questions if your still on here
User avatar
FordGtMan
Specialist 3
Specialist 3
Posts: 314
Joined: Thu Oct 25, 2007 9:15 pm
Location: southlake Tx

Tue May 06, 2008 11:54 pm

im sure most people on this forum can answer your question...watever it is..
People call me ThunderChunks...I dont even know why...
Got a Gamertag?, mines KillerHedgeHog3, add me :)
User avatar
glass_05
Private 4
Private 4
Posts: 74
Joined: Sun Apr 27, 2008 7:08 pm
Location: Iowa
Contact:

Tue May 06, 2008 11:58 pm

ok. i have been looking at designs that use a threaded endcap and an oring to seal. i understand that the threads dont matter, b/c they are just put into the tee. so my question is do you have to put the groove for the oring in place, then somehow glue the oring in the groove. also, when you put the endcap and oring into the tee do you have to clap them together tightly when drilling the holes for the bolts, so that it doesnt leak later?

pretty much i have my plans figured out, except the rear end.
User avatar
FordGtMan
Specialist 3
Specialist 3
Posts: 314
Joined: Thu Oct 25, 2007 9:15 pm
Location: southlake Tx

Thu May 08, 2008 4:52 pm

Oh, sorry, didn't see your post. :oops: You do need an a groove for an o ring and making that groove is very easy. just take a hacksaw blade and shape. :) How i did mine on a piston. Worked pretty well but there are ways that you can do it differently just as easy. The forum is full of ways. That threaded bushing needs to be in there good too and just make those holes line up so the bolts can go through. so i guess "clap" them together would be correct. :)
People call me ThunderChunks...I dont even know why...
Got a Gamertag?, mines KillerHedgeHog3, add me :)
User avatar
glass_05
Private 4
Private 4
Posts: 74
Joined: Sun Apr 27, 2008 7:08 pm
Location: Iowa
Contact:

Thu May 08, 2008 11:22 pm

haha. "clamp" i meant. and thank you. i was just wondering how you got it to seal nice and tight in the back
User avatar
JDP12
Staff Sergeant 5
Staff Sergeant 5
Posts: 1943
Joined: Fri Mar 30, 2007 8:34 pm

Fri May 09, 2008 7:31 am

nicely built for 2 hours, cleaner than a lot of guns that take longer!

keep it up
"Some say his pet elephant is pink, and that he has no understanding of "PG rated forum". All we know is, he's called JSR. "
User avatar
M.J.P.
Private 3
Private 3
Posts: 48
Joined: Thu May 08, 2008 2:36 am

Fri May 09, 2008 8:00 am

Very nice, clean gun. I like the way the ball valve is positioned. It looks like a nice easy position to trigger.

Also, i know you built it just two hours, and its just my opinion, but a camo paintjob would look sweet on this gun.
Never take life seriously. Nobody gets out alive anyway.
Killjoy
Sergeant
Sergeant
Posts: 1052
Joined: Sun Nov 12, 2006 12:51 am
Location: New Mexico

Sat May 10, 2008 2:39 am

wow I thought this sucker was dead.

Just an up date I added two 45 elbows to the chamber to bring the chamber closer to the barrel to make it look better. And I plan on spray painting it matte black, camo, or with this textured paint I have once I get my high school graduation out of the way.

Also I have some sick videos of me pulverizing a tv and shooting a microwave (which I later blew up, pretty crazy video there) with this thing, so I'll try and get those up soon.

@glass,
To seal up the back I shortened a female threaded bushing and then put in on my drill press and used a razor blade and sand paper to cut the groove and smooth it. Then I just marked and drilled for the screws. Pretty simple and worked great.
Stanford Class of 2012

"In the end our society will be defined not only by what we create, but what we refuse to destroy"- John Sawhill
Post Reply