built my first spud gun

A place for general potato gun questions and discussions.
barleydude
Private
Private
Posts: 7
Joined: Mon Oct 19, 2009 11:06 am

Mon Oct 19, 2009 11:19 am

I built my first spud gun this weekend. I've used them in the past but felt like being creative and making my own.

I ended up using

4" pvc (12" long)
2" pvc (36" long)
4" to 2" converter
2 Female couplers
1 female screw cap
A bbq starter
Wired the bbq starter to two screws
Handle for the button and hiding the wiring
Custom camo paint job

I tested it out in the garage with a towel, it was loud and shot. I'll be testing out the distance this week. Here are some pics. Feel free to ask any questions about it. And maybe this will give others some ideas.

Image

Image

Image

Image
spudkilla224
Private 4
Private 4
Posts: 65
Joined: Wed Mar 19, 2008 8:04 pm

Mon Oct 19, 2009 12:42 pm

Very Nice!!! Does it kick alot when you fire it? Also I really like the camo paint job! What did you use for the stencils for the shapes?
User avatar
Ragnarok
Captain
Captain
Posts: 5401
Joined: Tue Dec 19, 2006 8:23 am
Location: The UK

Mon Oct 19, 2009 1:25 pm

For a first, that's damned impressive - neatly built to decent standards (as far as I can tell), and with a good looking paint job.

Kudos.
Does that thing kinda look like a big cat to you?
barleydude
Private
Private
Posts: 7
Joined: Mon Oct 19, 2009 11:06 am

Mon Oct 19, 2009 2:41 pm

Thanks everyone.

It doesn't feel like it kicks too much, but I haven't used potatoes in it yet, just loosely stuffed rags. I'll find out tomorrow night :)

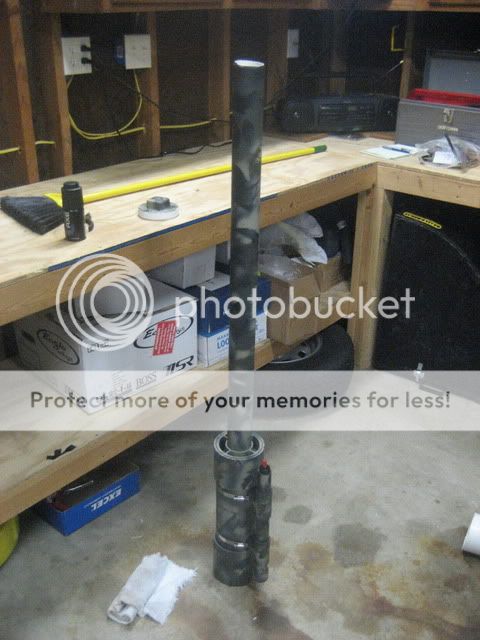
For the paint, I used a sandpaper sponge thing (dont know the technical term) and sanded down the outside. And I just bought some rustoleum spray paint (they a line of camo colors). I used a base paint of flat black. Once that dried, I went in my backyard and picked some leafs, small limbs, and some pine branches. Started with the lighter color and sprayed over the leafs and such. And then used the darker color and did the same thing. It turned out a lot better than I thought it would.

I'm gonna browse around here some more, but is there a list of standards around here?

I tried to take some pictures, but got real focused and forgot. This is about all that I have.

PVC fittings:
Image

Spraypaint:
Image

Putting the trigger together
Image

All taped up. Used some automotive wire loom under the electrical tape
Image

Here you can see the two screws with the wire connected
Image

Here is the trigger
Image
User avatar
jimmy101
Sergeant Major 2
Sergeant Major 2
United States of America
Posts: 3206
Joined: Wed Mar 28, 2007 9:48 am
Location: Greenwood, Indiana
Has thanked: 6 times
Been thanked: 18 times
Contact:

Mon Oct 19, 2009 4:27 pm

Looks great, really like the leaf patterns.

Did you double (or at least outside) bevel the muzzle.
Image
barleydude
Private
Private
Posts: 7
Joined: Mon Oct 19, 2009 11:06 am

Mon Oct 19, 2009 5:10 pm

jimmy101 wrote:Looks great, really like the leaf patterns.

Did you double (or at least outside) bevel the muzzle.
Thanks a lot

Yeah all I had was a hand file, so I spent some time beveling the outside of it. Need to get a dremel :)
User avatar
clemsonguy1125
Sergeant 5
Sergeant 5
Posts: 1485
Joined: Tue Jul 21, 2009 4:00 pm
Location: East Coast

Mon Oct 19, 2009 5:12 pm

Good job on using hose clamps, I hate seeing great guns that have parts attached using only duct tape. Great first gun.
User avatar
Moonbogg
Staff Sergeant 3
Staff Sergeant 3
United States of America
Posts: 1736
Joined: Mon Oct 13, 2008 10:20 pm
Location: SoCal
Has thanked: 165 times
Been thanked: 102 times

Mon Oct 19, 2009 6:51 pm

Very nice. Thats a good, solid spud gun there. I like the camo and I read a study conducted by engineering students that camo actually improves performance.
barleydude
Private
Private
Posts: 7
Joined: Mon Oct 19, 2009 11:06 am

Mon Oct 19, 2009 8:48 pm

clemsonguy1125 wrote:Good job on using hose clamps, I hate seeing great guns that have parts attached using only duct tape. Great first gun.
Thanks. It took me a while to figure out the best way to attach the handle without screws. then saw these gigantic radiator style hose clamps at the hardware store. The only thing is that I'm hoping the slit that I made in the pvc doesnt make it weak and break.
barleydude
Private
Private
Posts: 7
Joined: Mon Oct 19, 2009 11:06 am

Mon Oct 19, 2009 8:52 pm

Moonbogg wrote:Very nice. Thats a good, solid spud gun there. I like the camo and I read a study conducted by engineering students that camo actually improves performance.
Haha, thanks.

Well if thats the case, I'm gonna paint a few other things camo... :D
User avatar
D_Hall
Staff Sergeant 5
Staff Sergeant 5
United States of America
Posts: 1924
Joined: Thu Feb 07, 2008 7:37 pm
Location: SoCal
Has thanked: 8 times
Been thanked: 44 times

Donating Members

Mon Oct 19, 2009 10:10 pm

clemsonguy1125 wrote: I hate seeing great guns that have parts attached using only duct tape.
No such thing. The use of duct tape disqualifies a gun from having the word "great" attached to it.

Regarding the gun in this thread, nicely done!
Simulation geek (GGDT / HGDT) and designer of Vera.
User avatar
D_Hall
Staff Sergeant 5
Staff Sergeant 5
United States of America
Posts: 1924
Joined: Thu Feb 07, 2008 7:37 pm
Location: SoCal
Has thanked: 8 times
Been thanked: 44 times

Donating Members

Mon Oct 19, 2009 10:12 pm

barleydude wrote:Well if thats the case, I'm gonna paint a few other things camo... :D
DON'T. I tried that. The lady always seems to think it's contageous. ;)
Simulation geek (GGDT / HGDT) and designer of Vera.
barleydude
Private
Private
Posts: 7
Joined: Mon Oct 19, 2009 11:06 am

Tue Oct 20, 2009 9:44 am

D_Hall wrote:
barleydude wrote:Well if thats the case, I'm gonna paint a few other things camo... :D
DON'T. I tried that. The lady always seems to think it's contageous. ;)
Haha!! Oh and thanks for the compliments.
barleydude
Private
Private
Posts: 7
Joined: Mon Oct 19, 2009 11:06 am

Tue Oct 20, 2009 9:50 am

Oh and I found a few more pictures on my cell phone.

Before the paint and handle:
Image

Base paint of black:
Image

This was prob the most important part, testing out the sparker a few times before doing it on the actual chamber.
Image
Post Reply