

Here's my very first pneumatic project, following a design JSR was kind enough to help me design and approve.
(guess who's fault it will be in case of failure?)
I'm happy to present you:
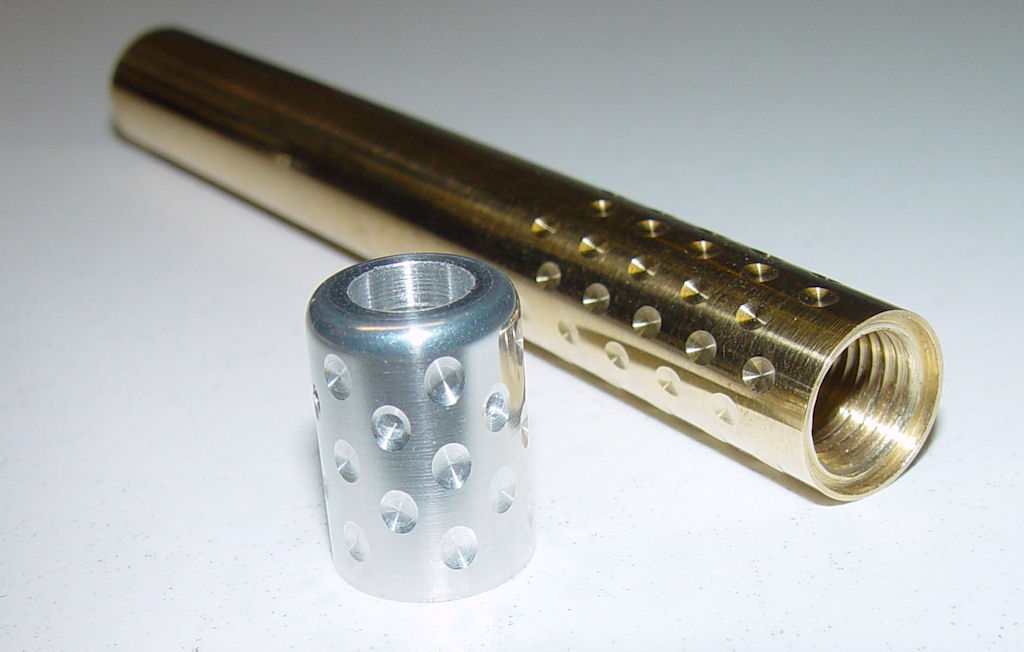
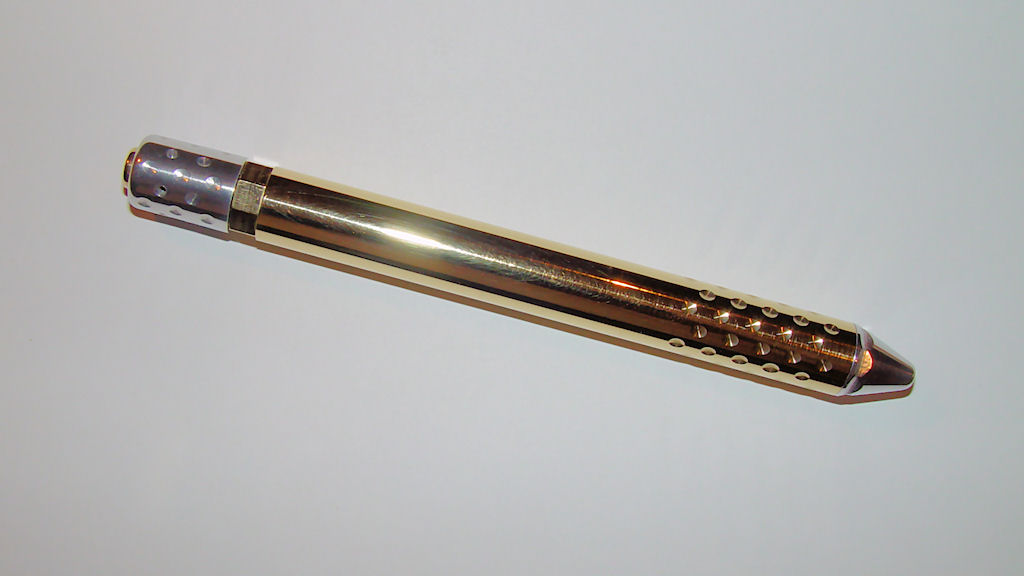
DIMPLY, the over engineered pengun
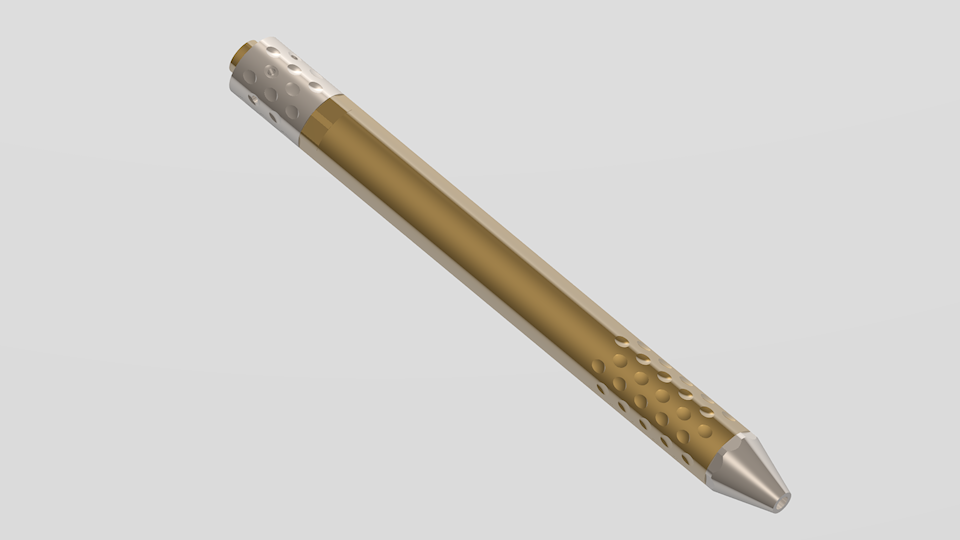
Well, that's the hypothetical and completely virtual 3D goal, of course... need some real work to do now
It will be able to fire 1/8" tiny ball bearings. Hopefully using pressure close to at least 400 psi (my shock pump limit).
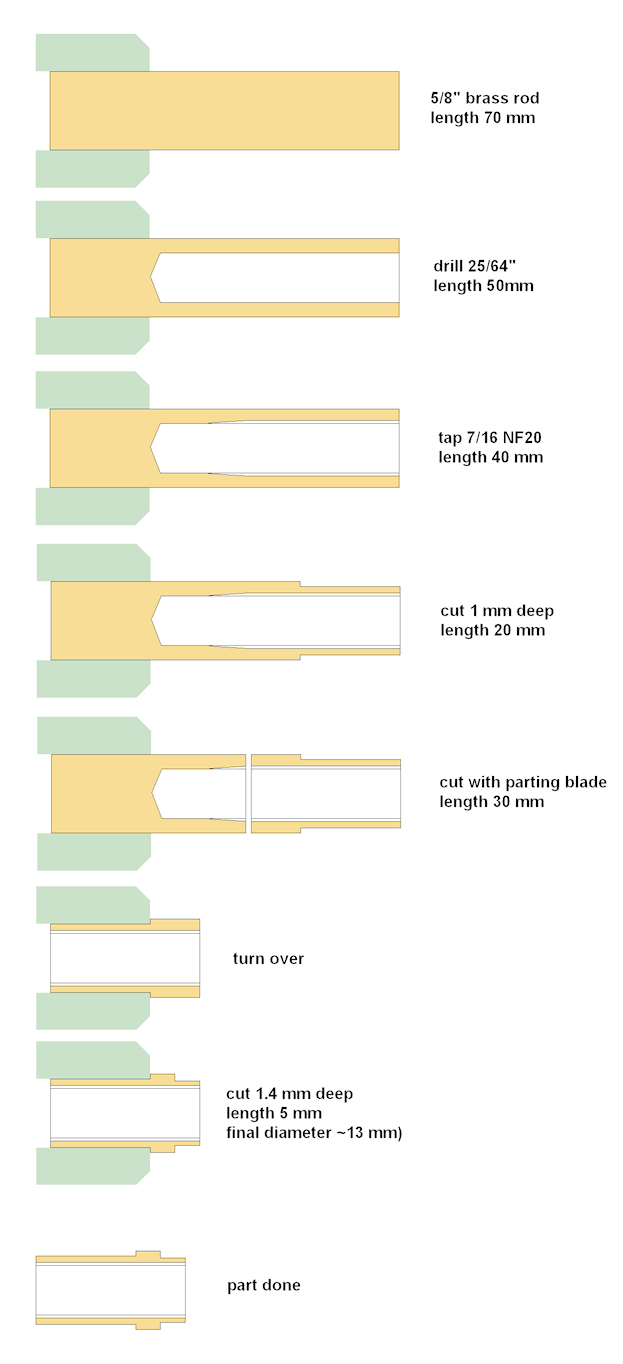
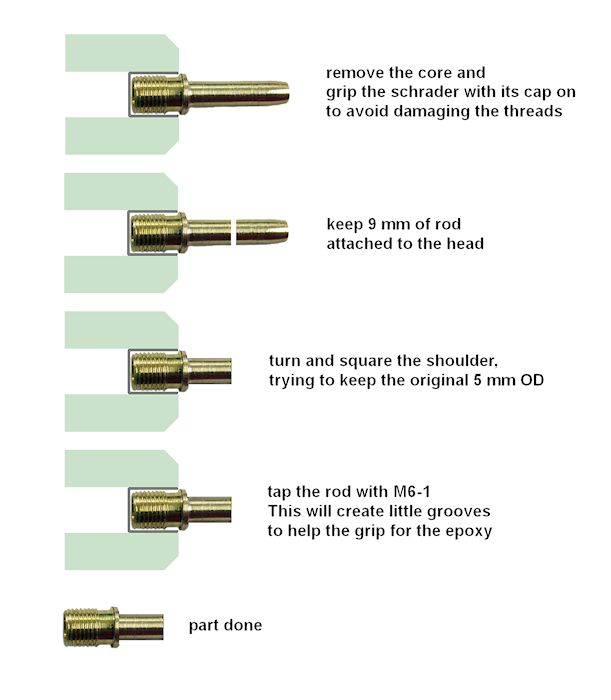
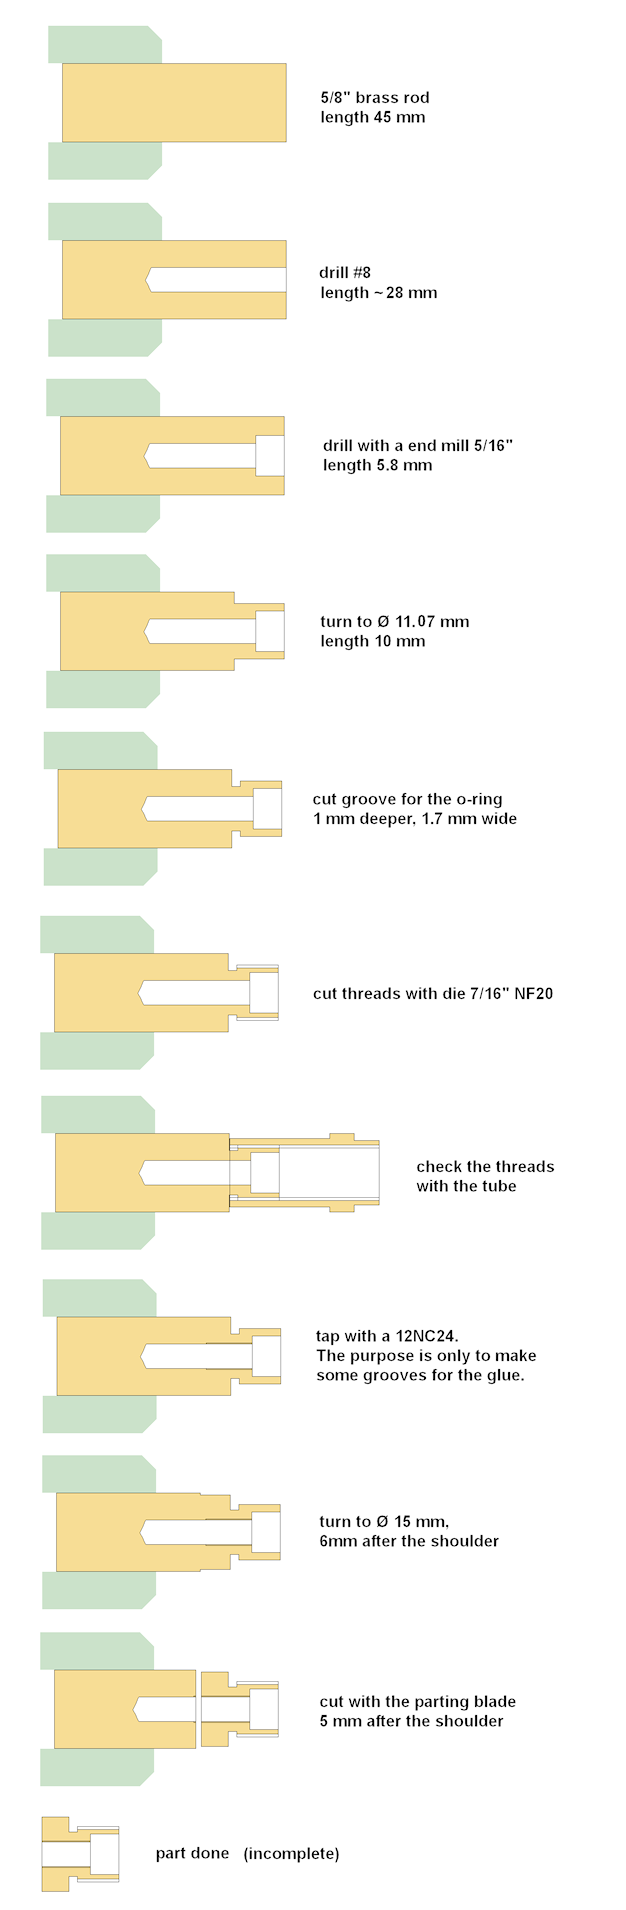
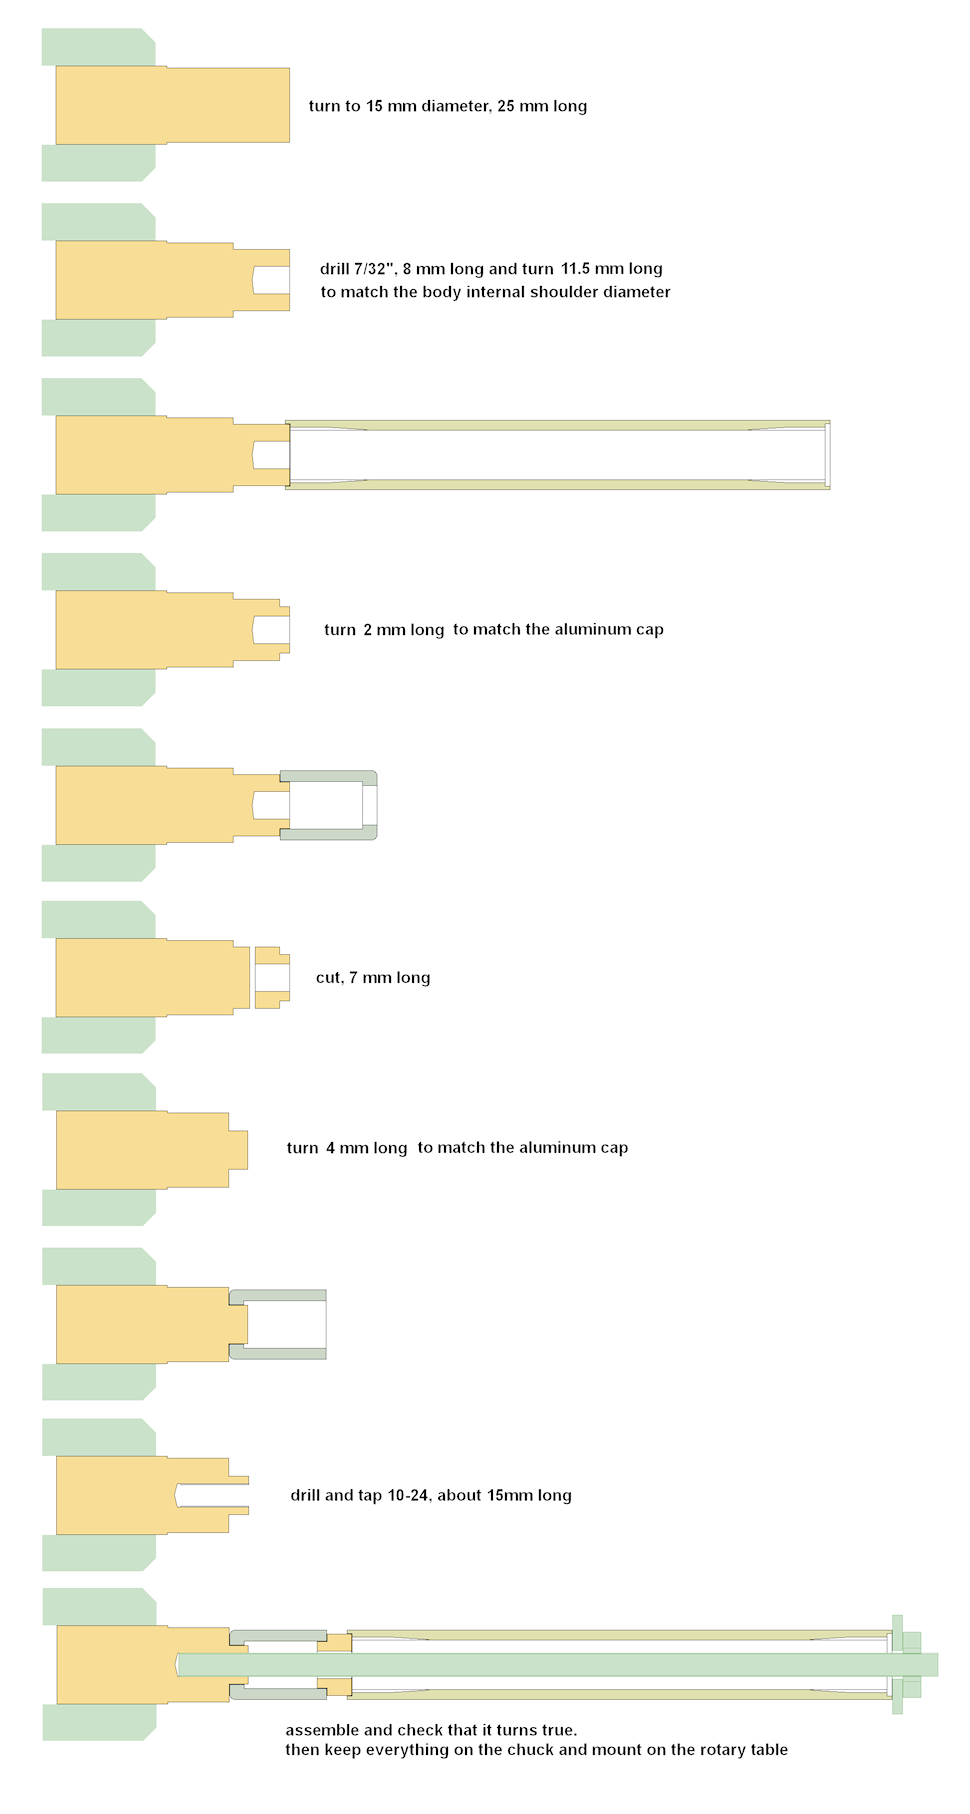
I have also prepared a plan with all the sizes, and I hope dewey1 or any 3D enthusiast will grab the pengun plan by its balls and make a cut drawing from that
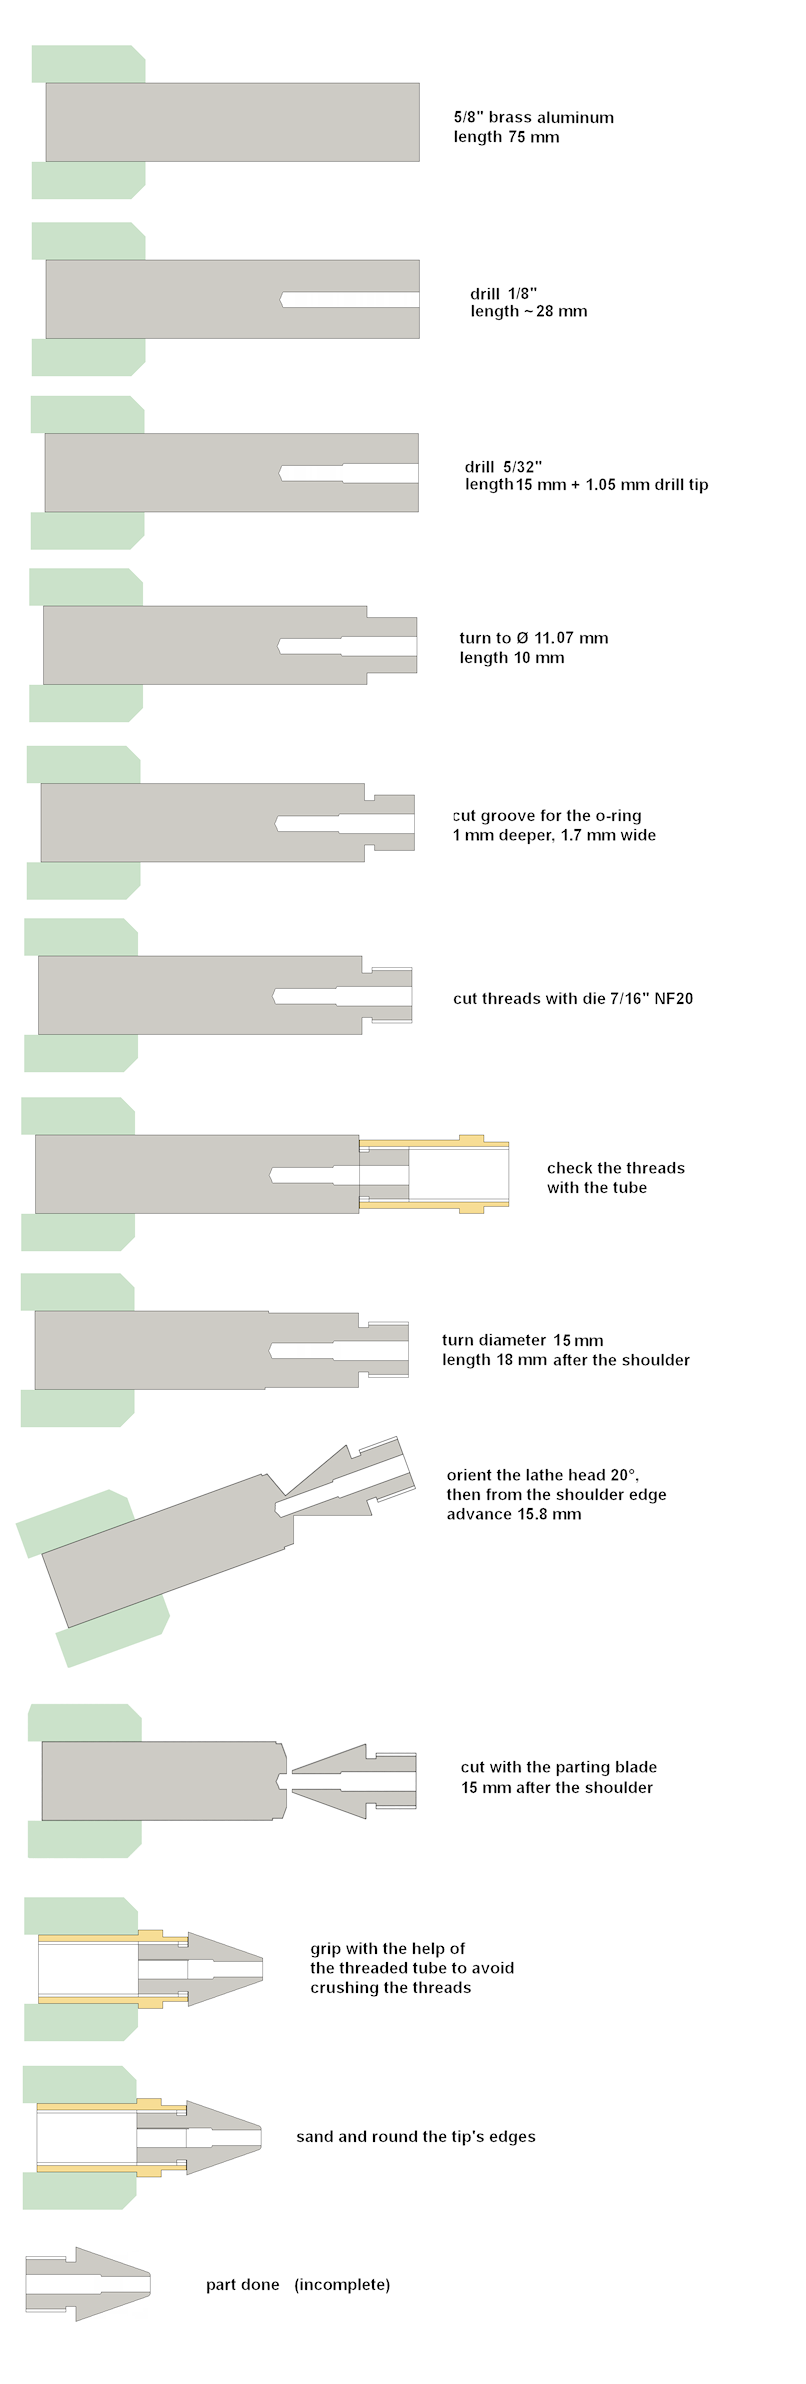
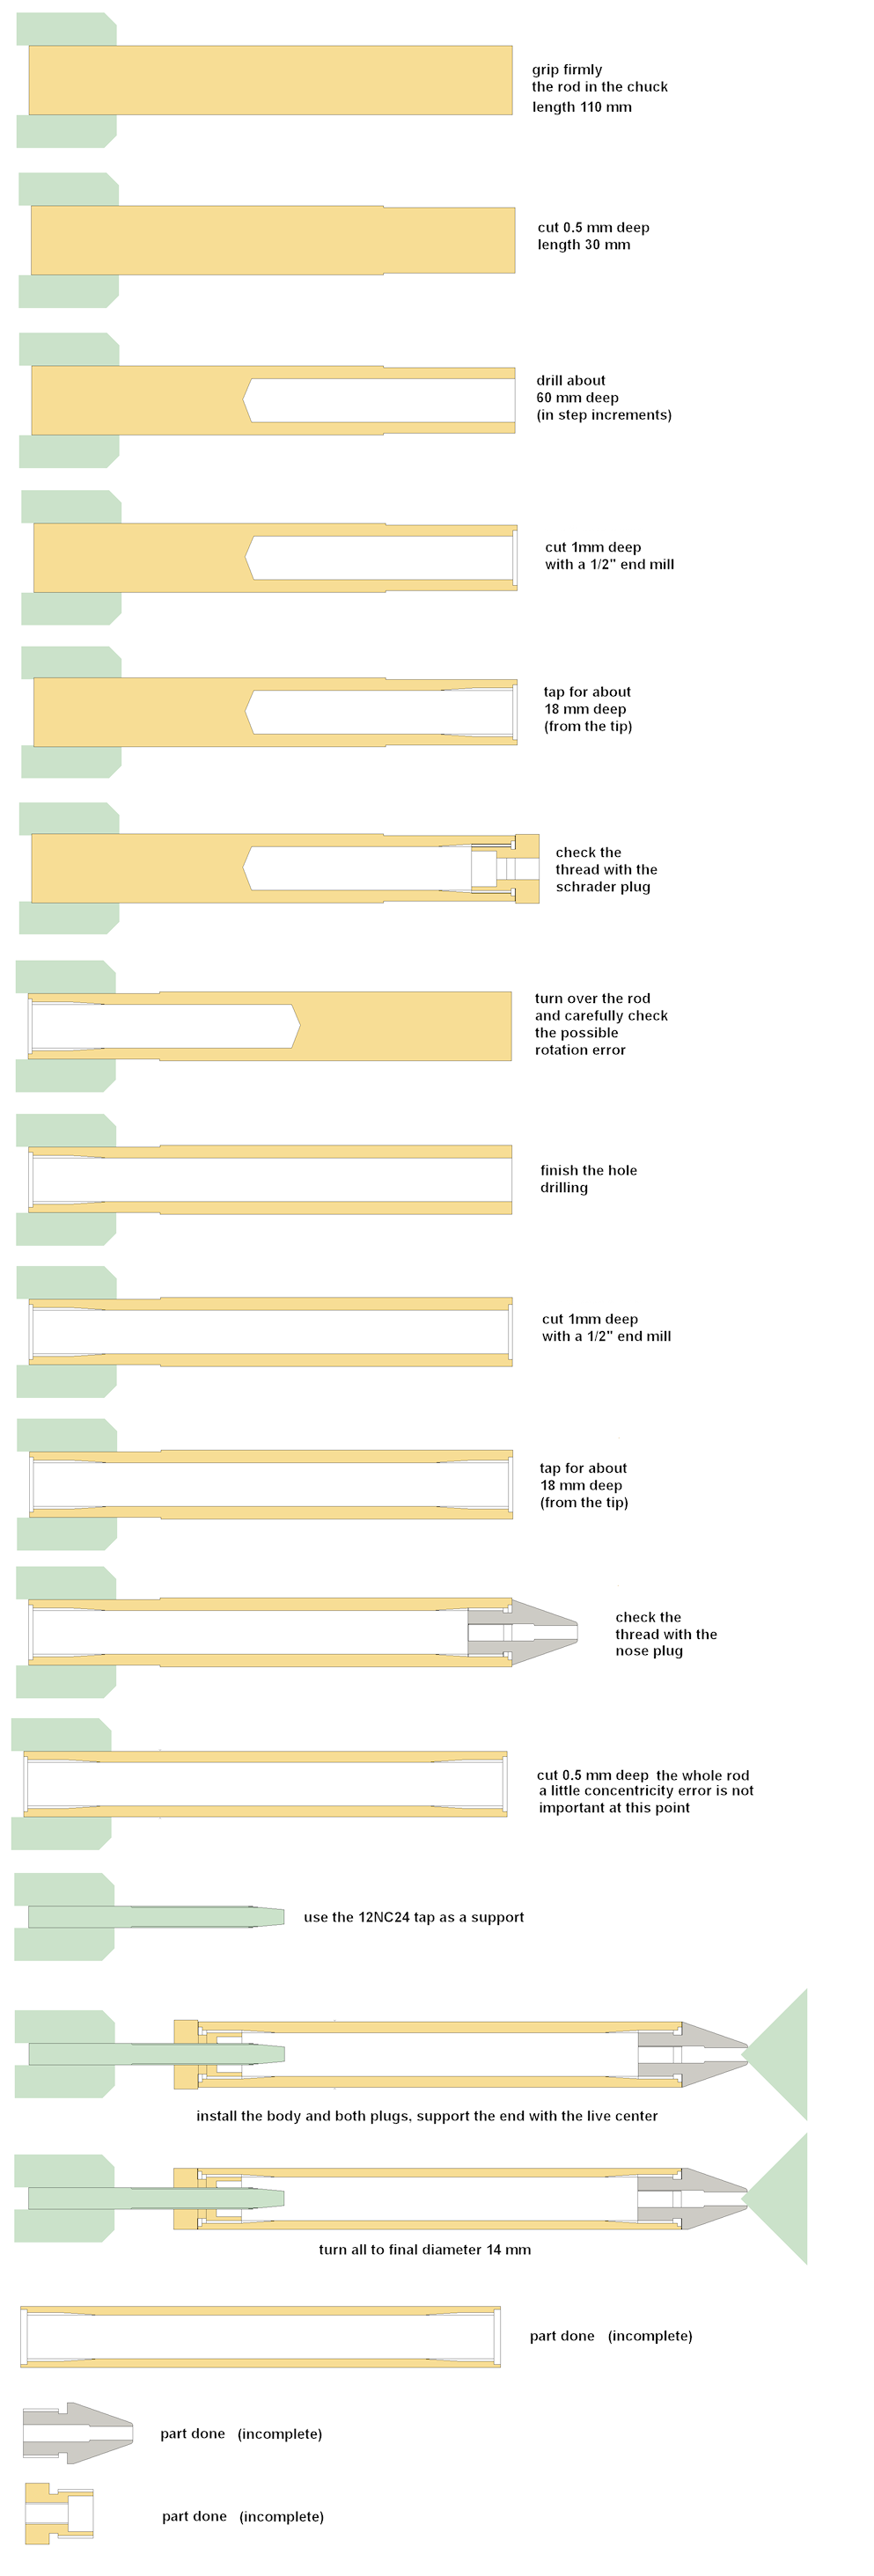
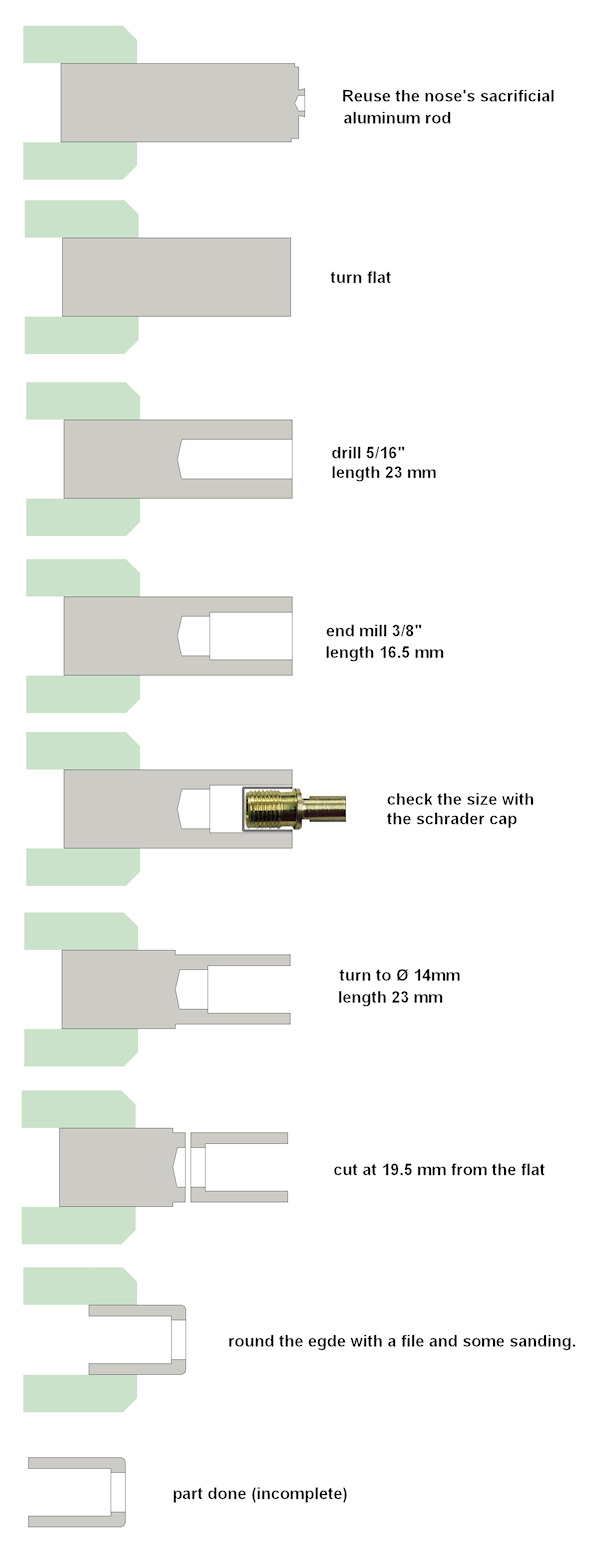
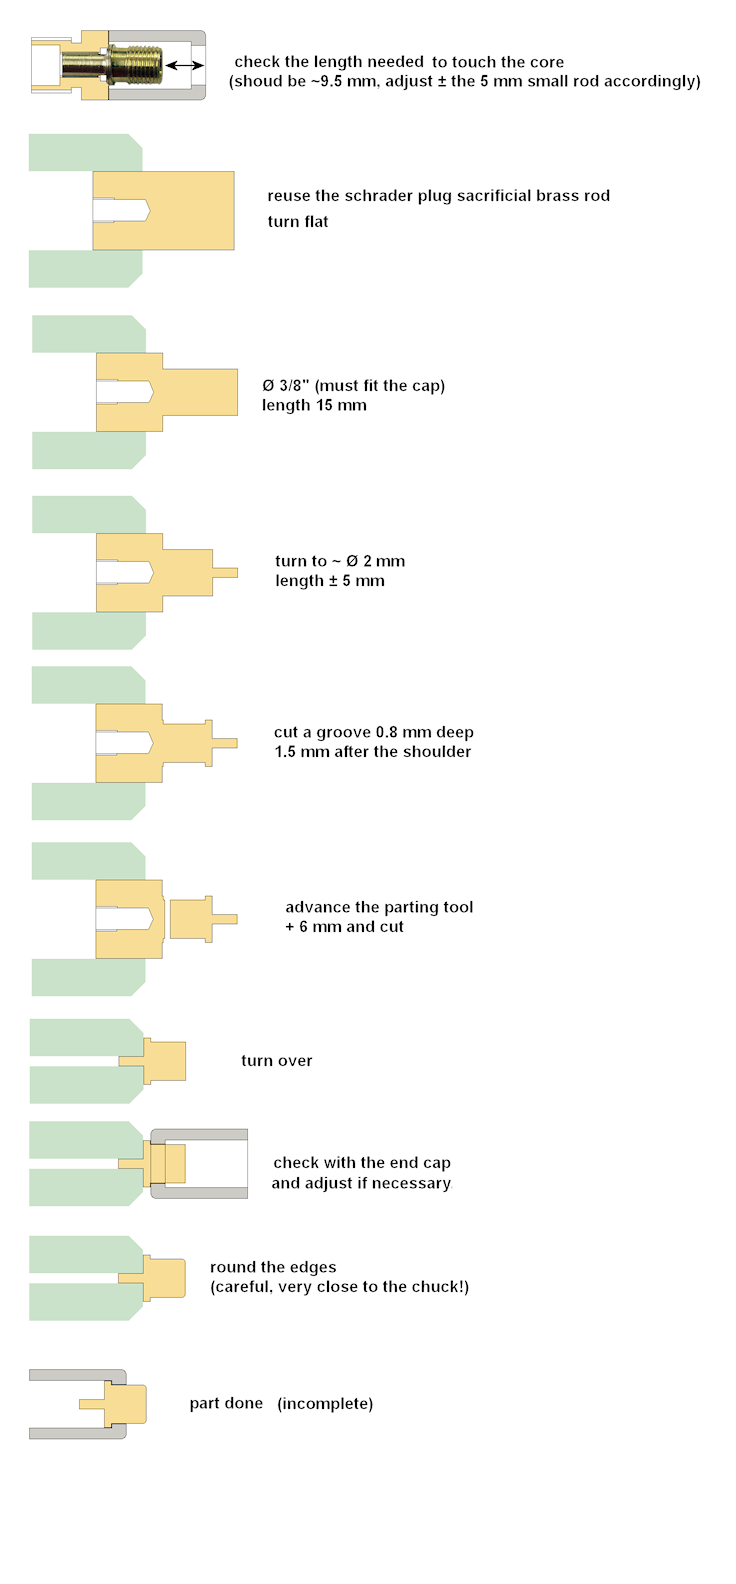
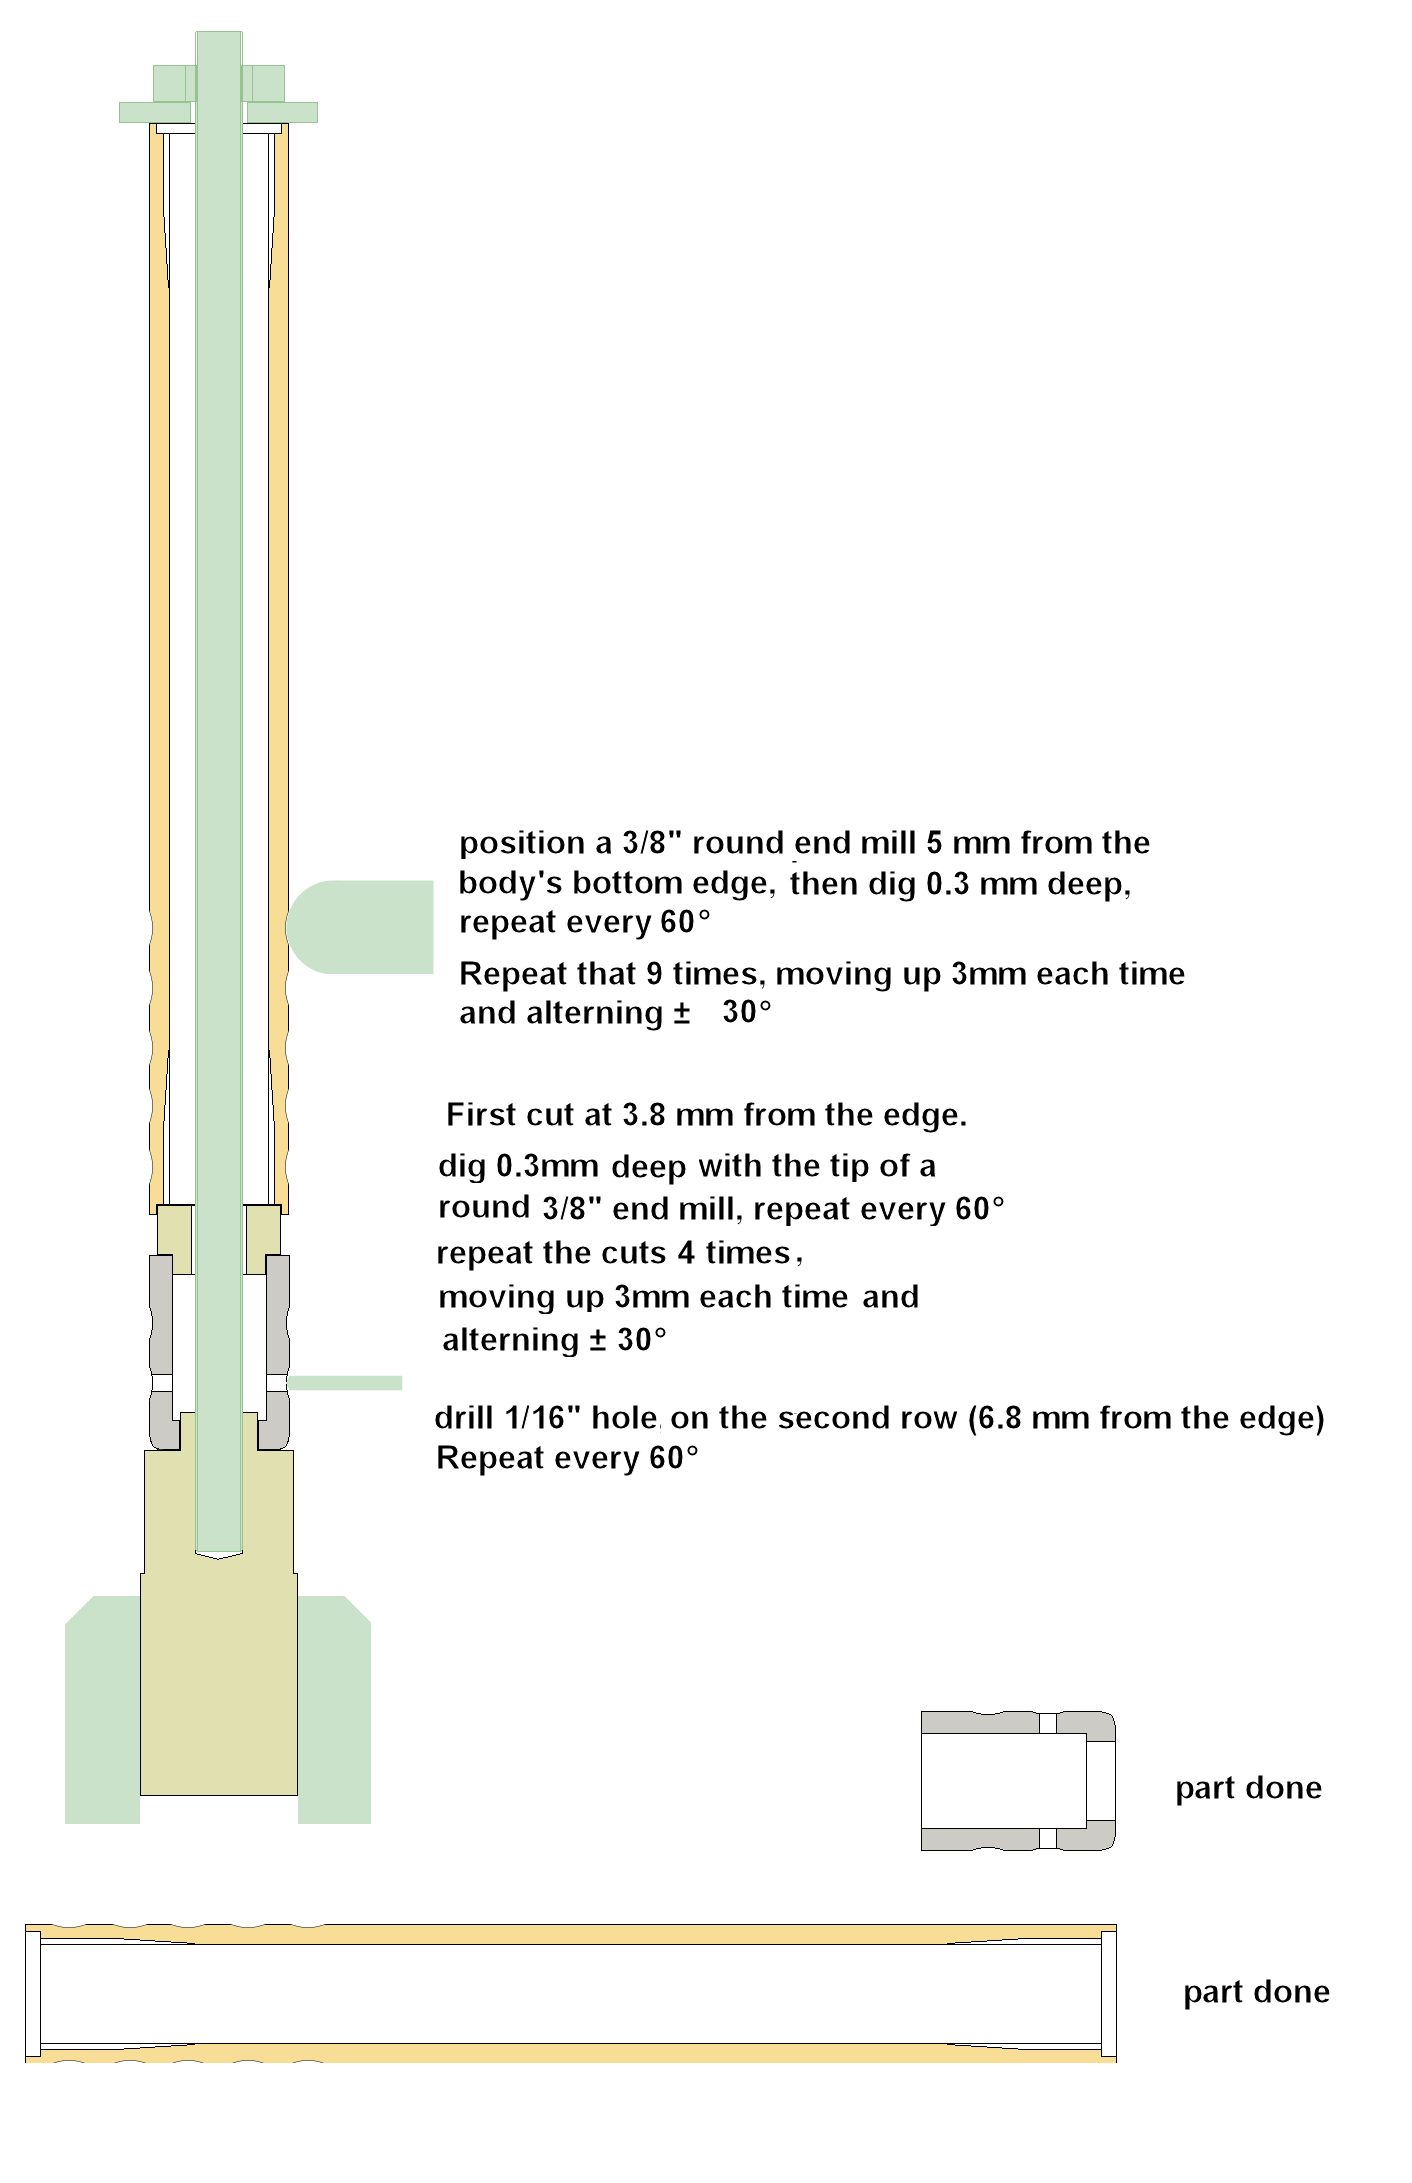
Dimensional plan: 1 pixel = 1/10mm
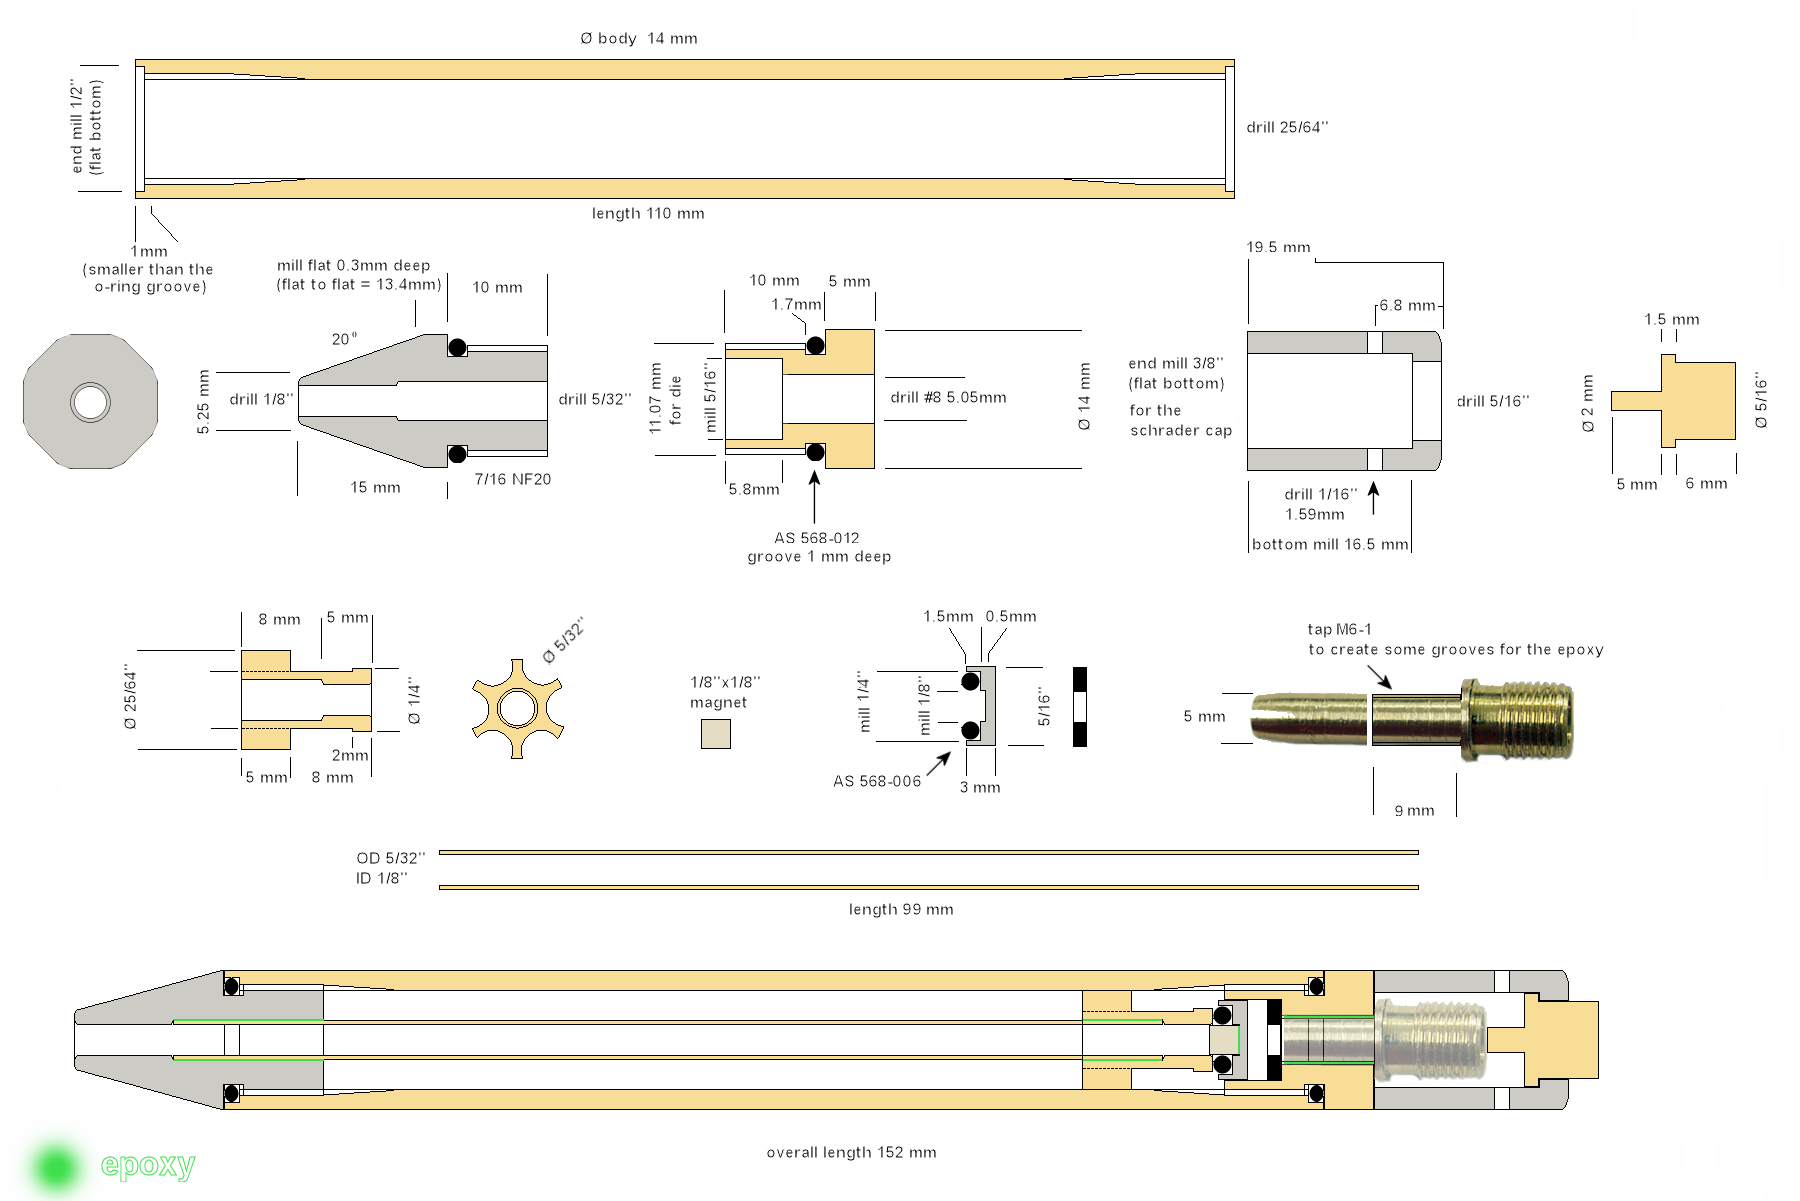
Here's a great sectional view made by dewey1:

My intention is to post both picture results step by step, but also movies on YouTube showing the building process, so if you are curious about how someone that never learned of to machine properly can make a fool of himself right in front of a camera, please subscribe to this thread
I hope you'll enjoy what will follow.
Note: As a respectful homage to The Master, there's tiny amounts of epoxy used
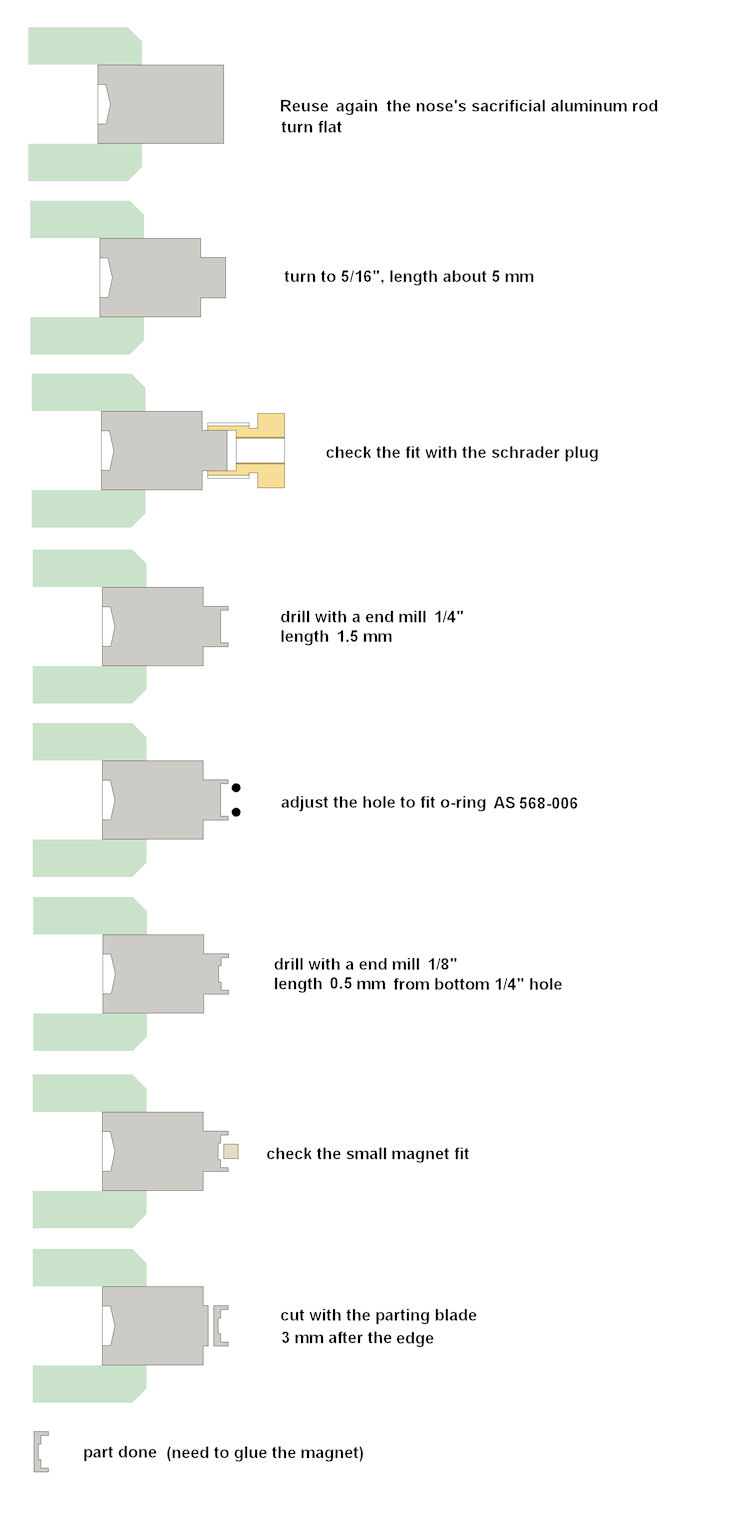
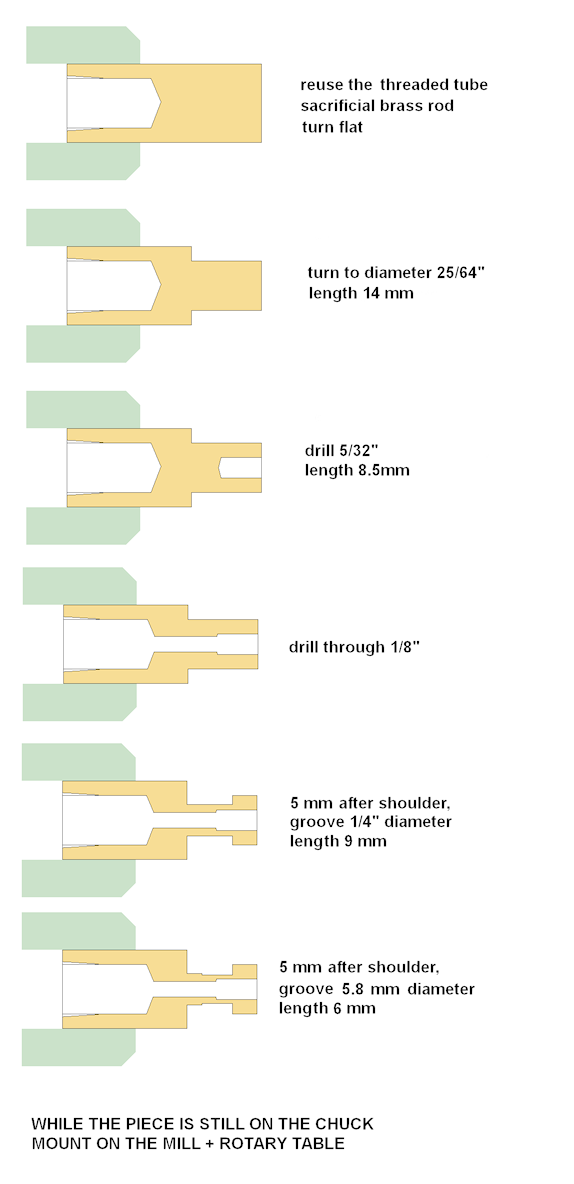
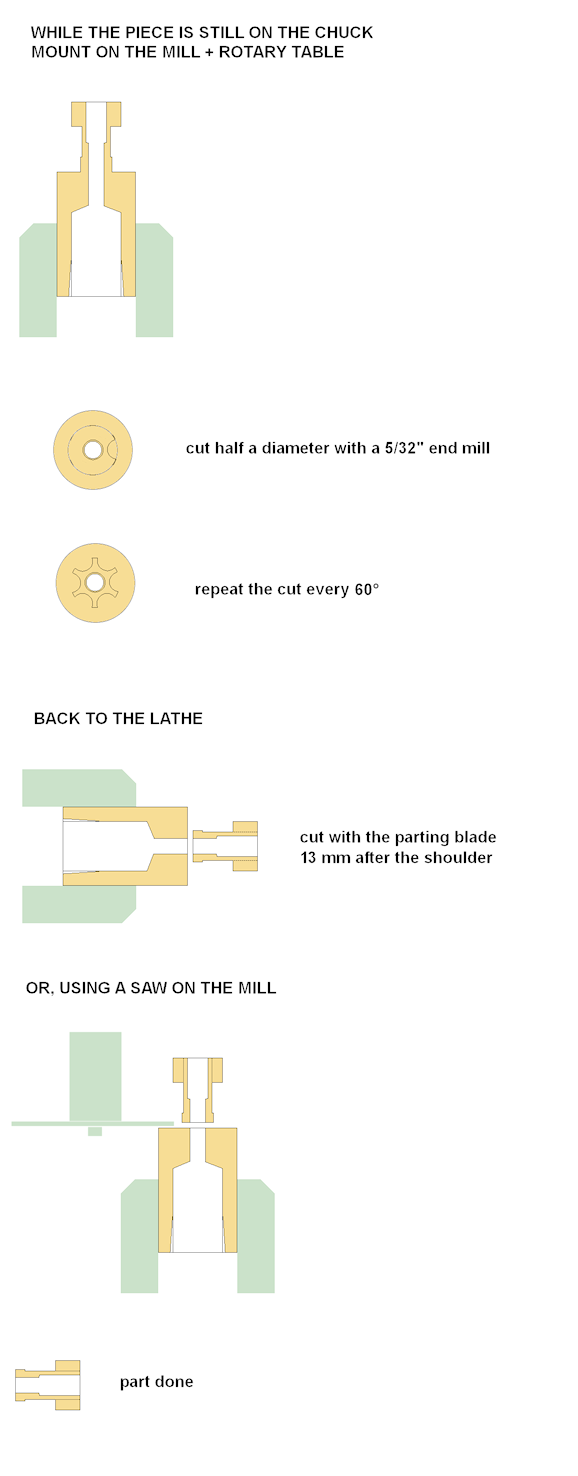
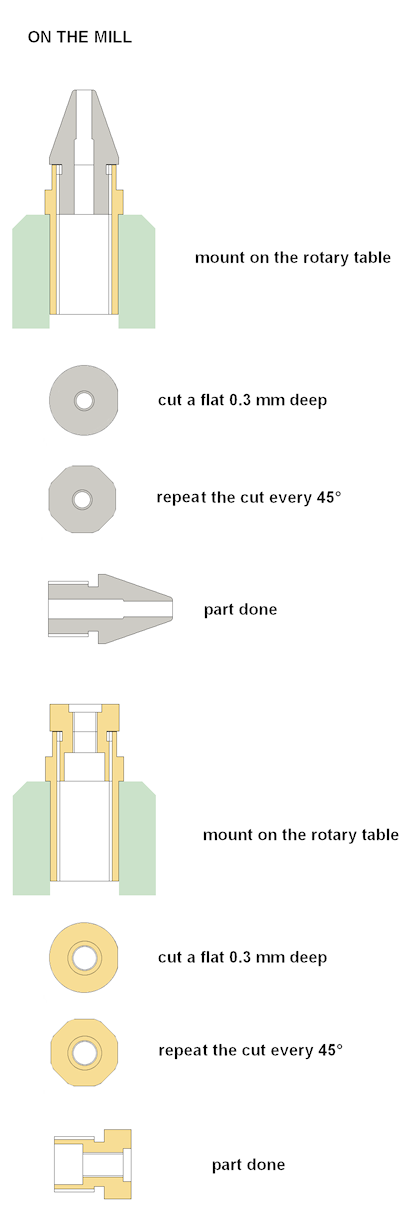
For convenience to group all that I'll post following this thread, here are all the steps, video and cutting plans:
Step1: Video Plan
Step2: Video Plan
Step3: Video Plan
Step4: Video Plan
Step5: Video Plan
Step6: Video Plan

Step7: Video Plan
Step8: Video Plan
Step9A: Video Plan
Step9B: Video Plan
Step10: Video Plan
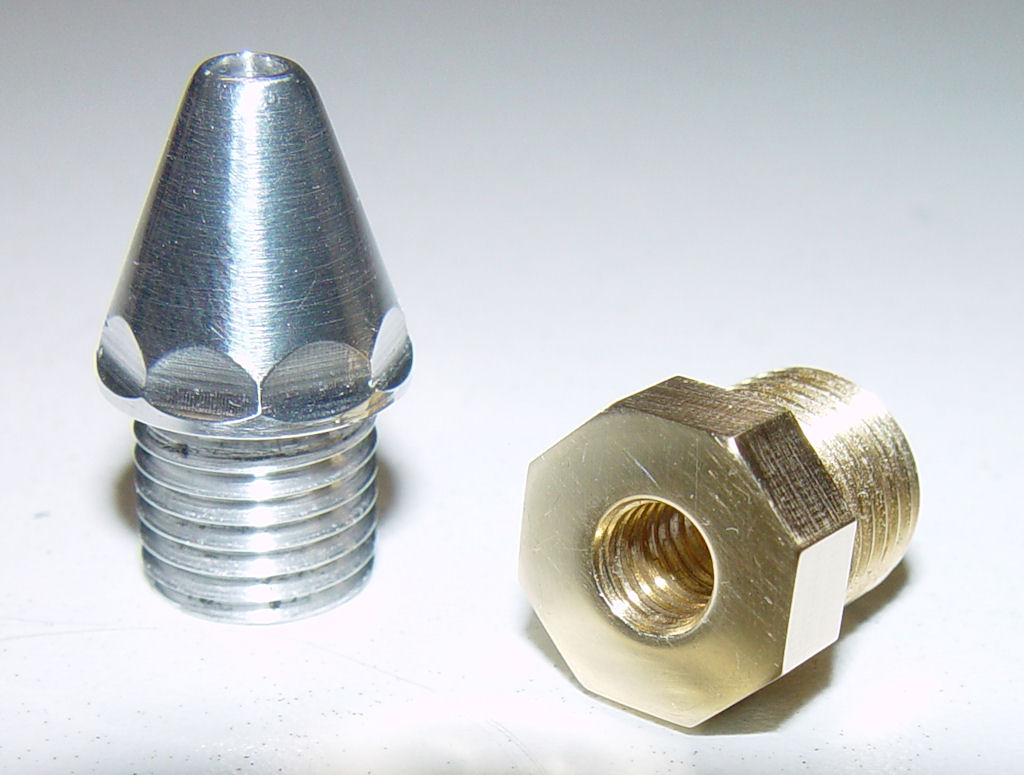
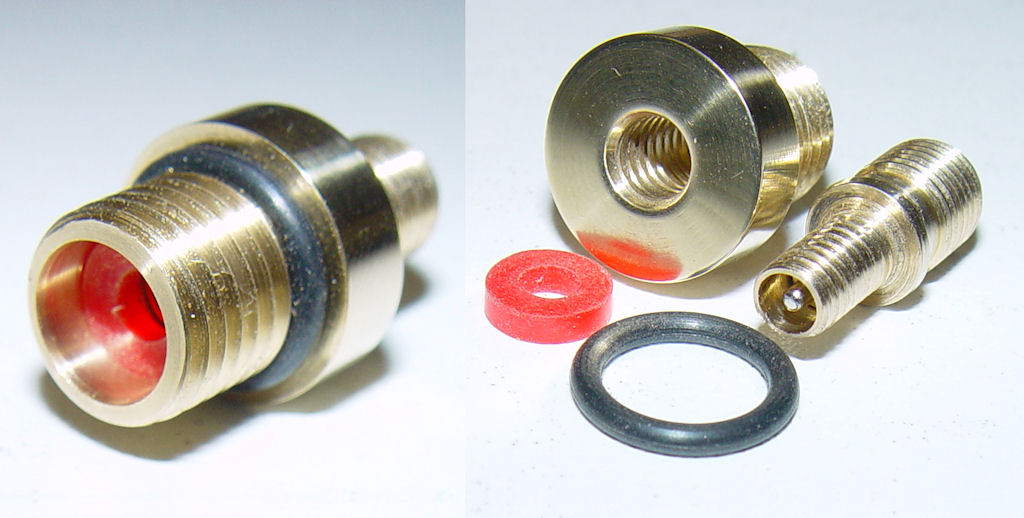
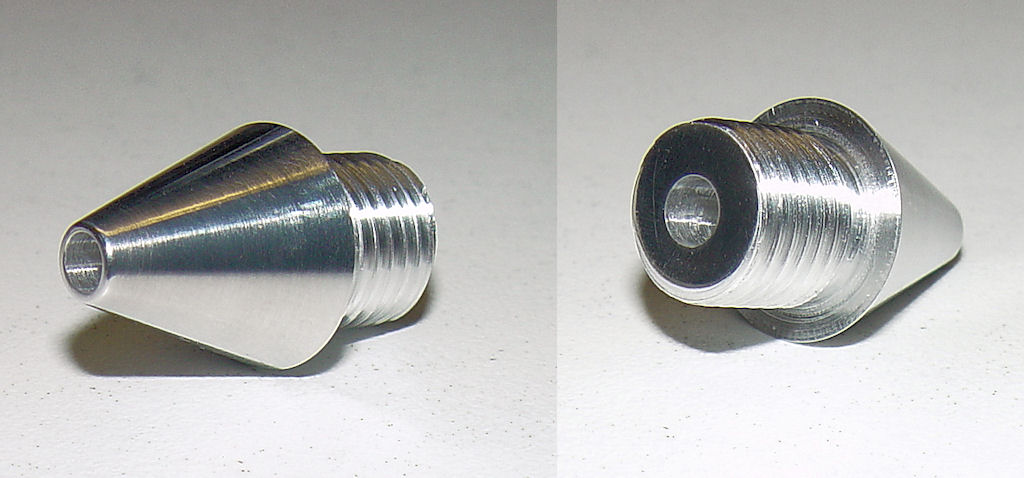
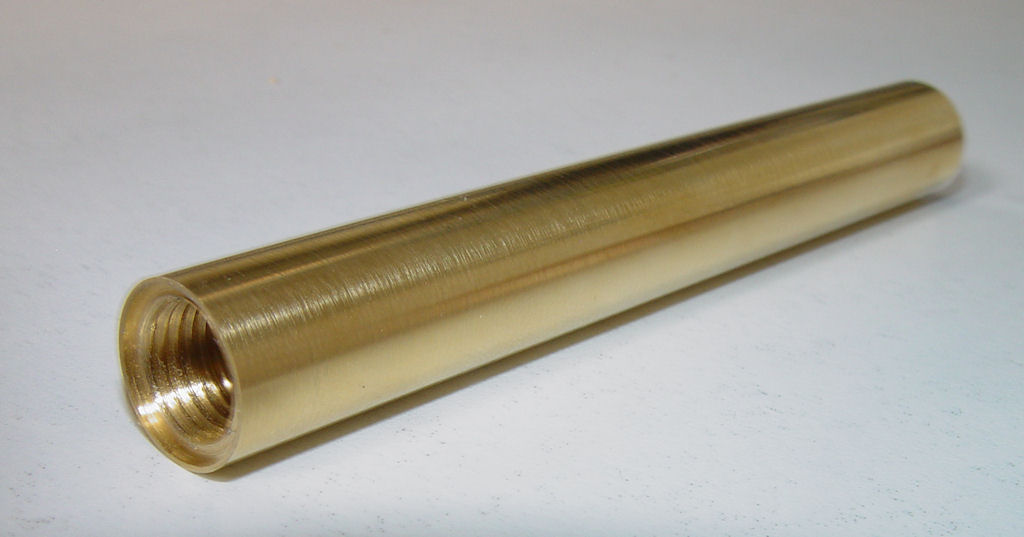
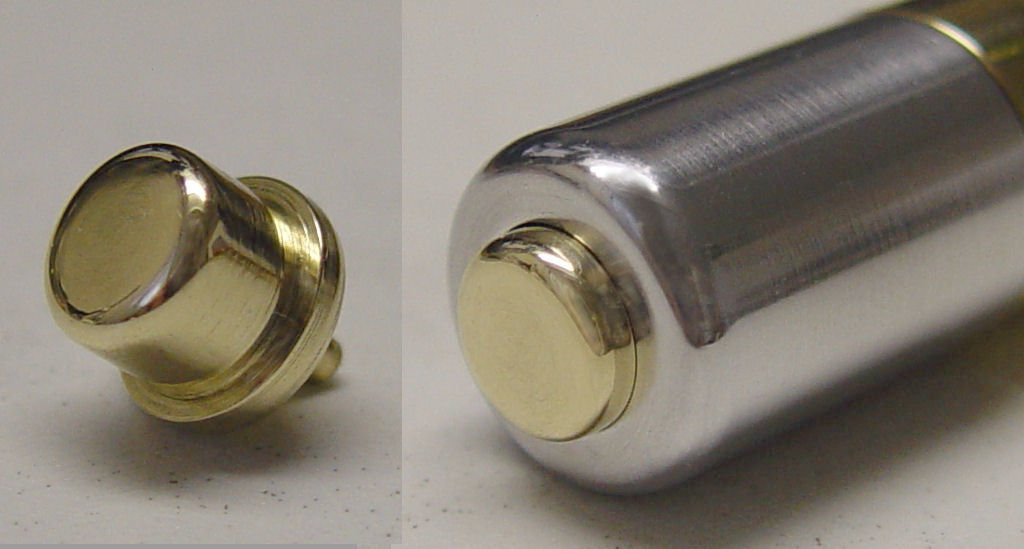
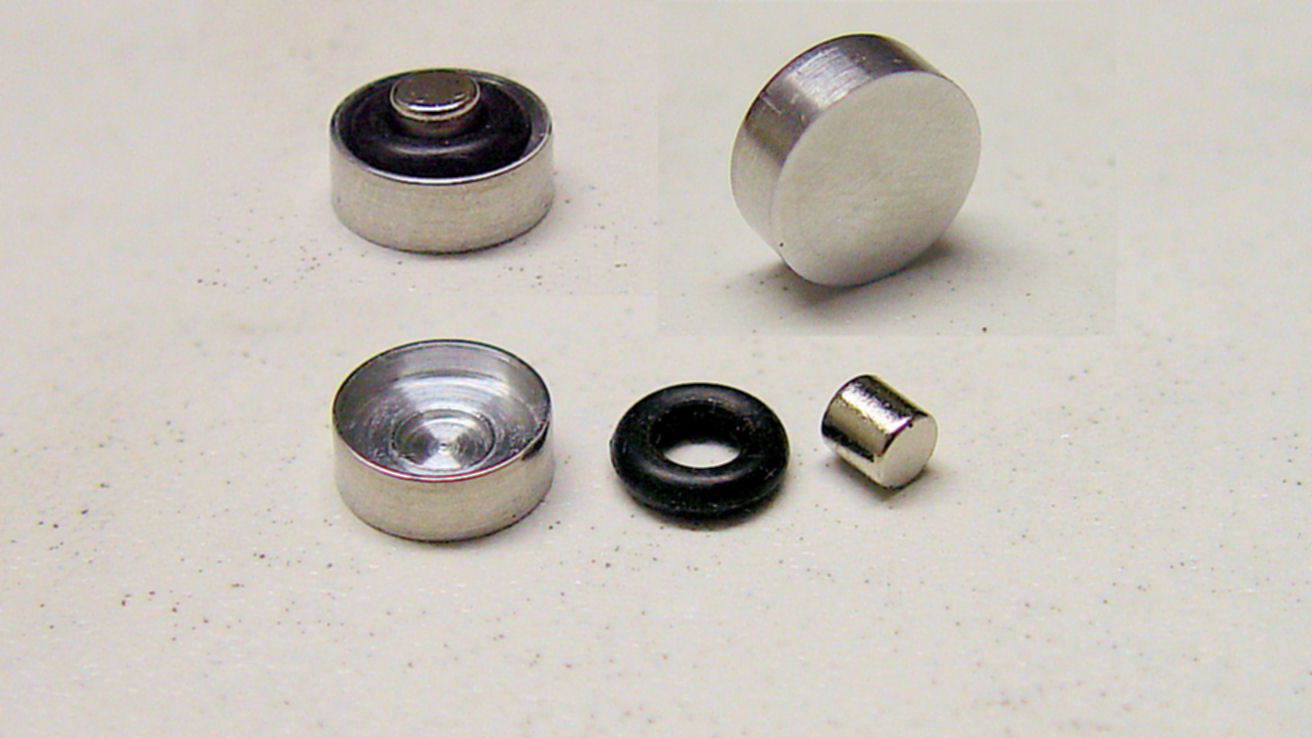
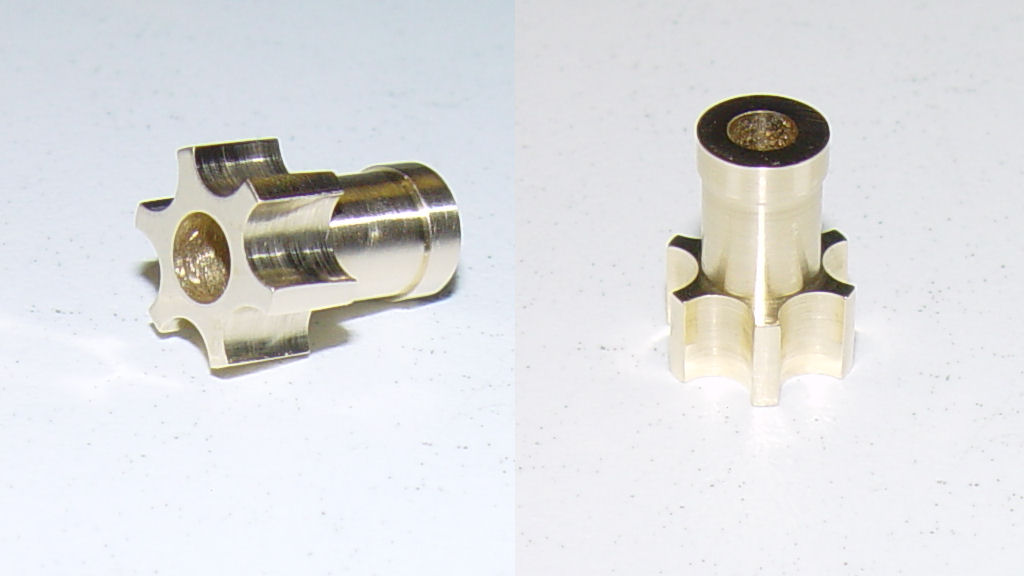
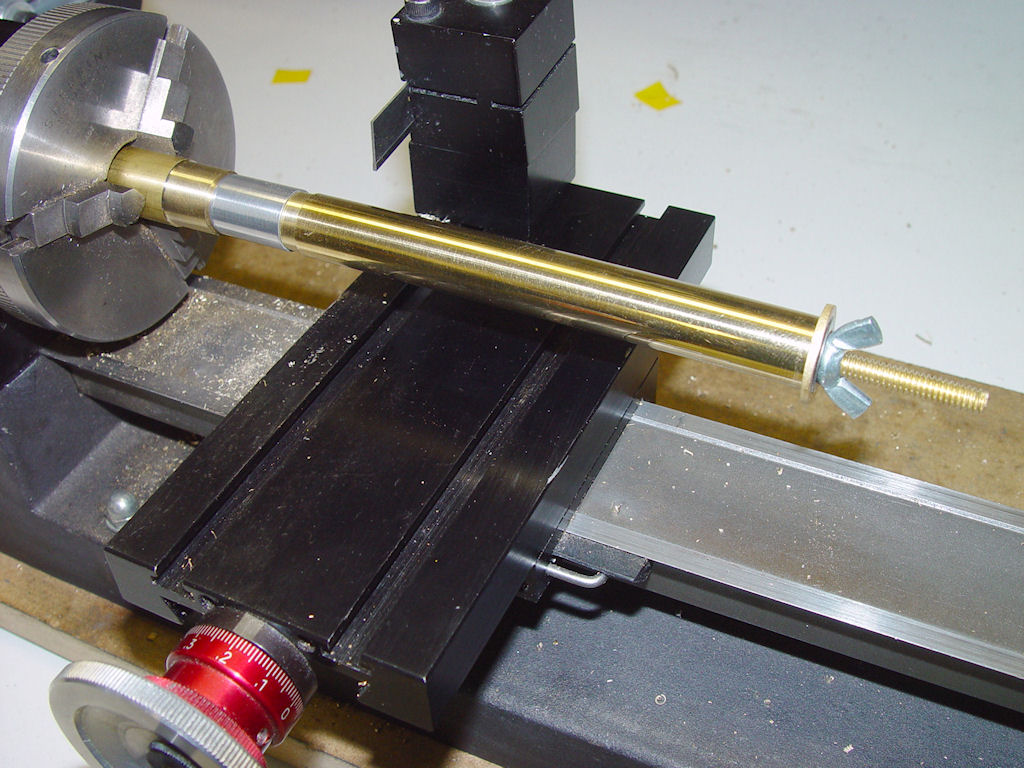
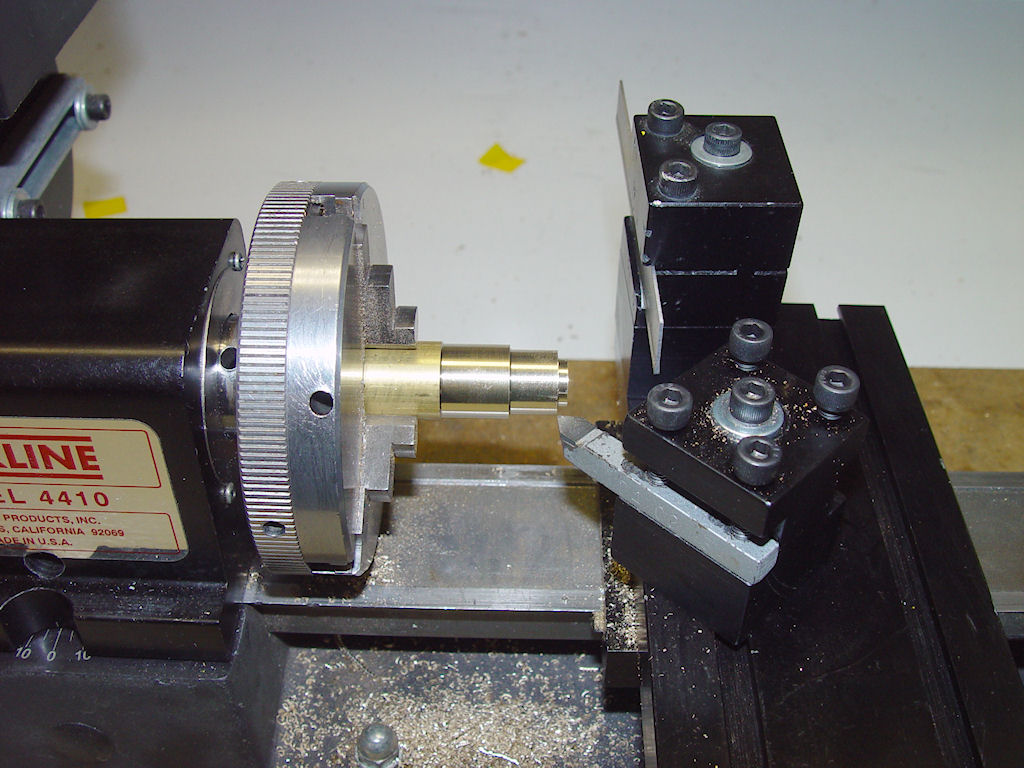
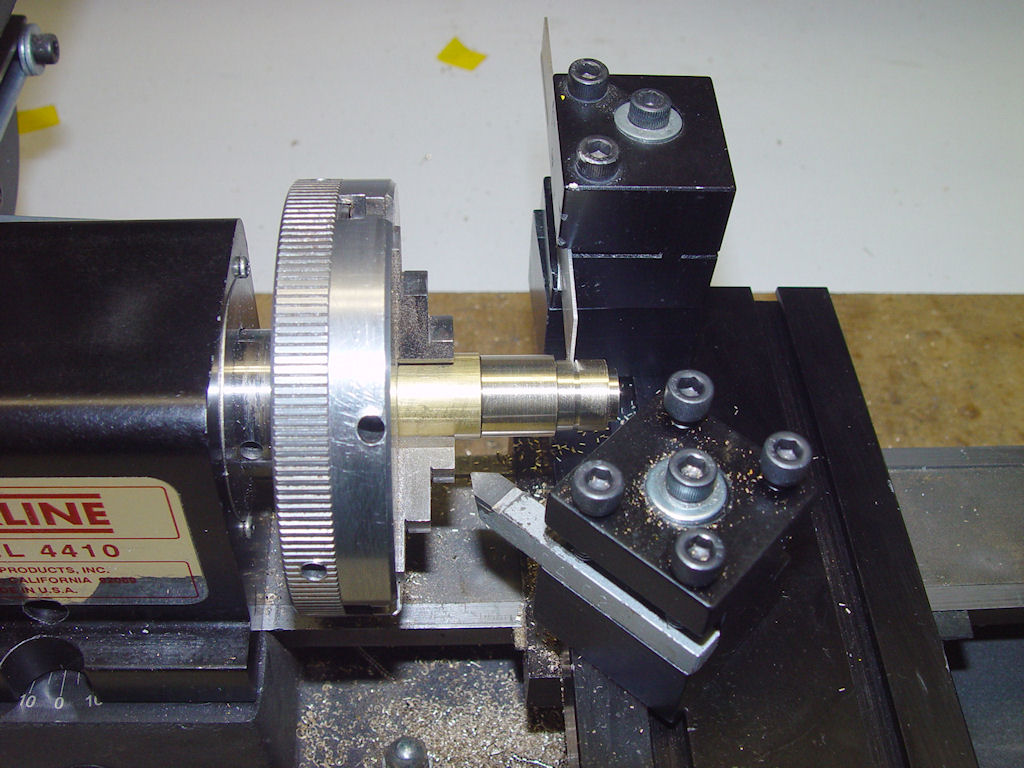
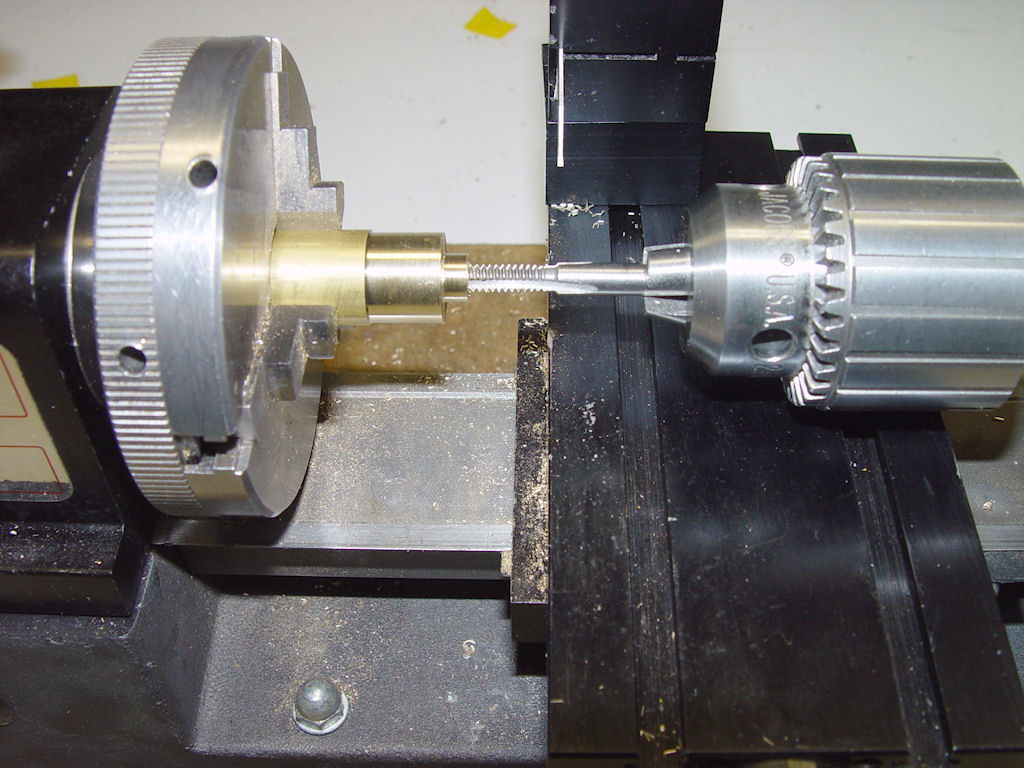
Step11A: Photo1 Photo2 Photo3 Plan
Step11B: Video Plan
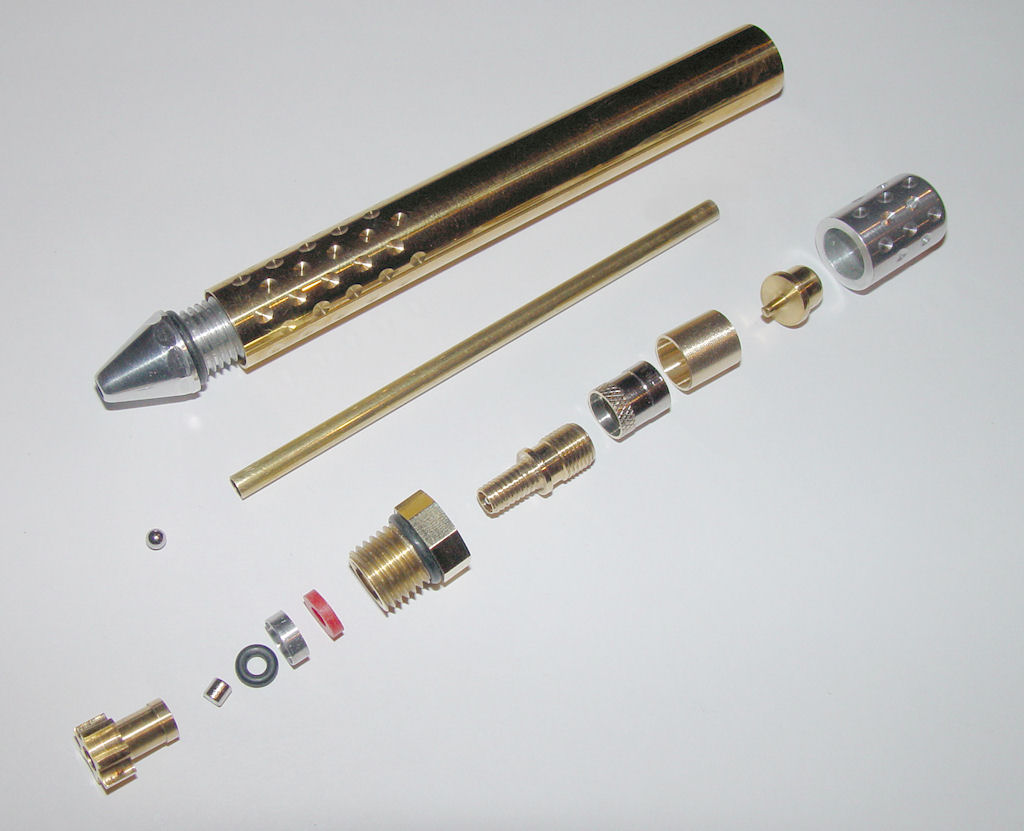
All the parts done
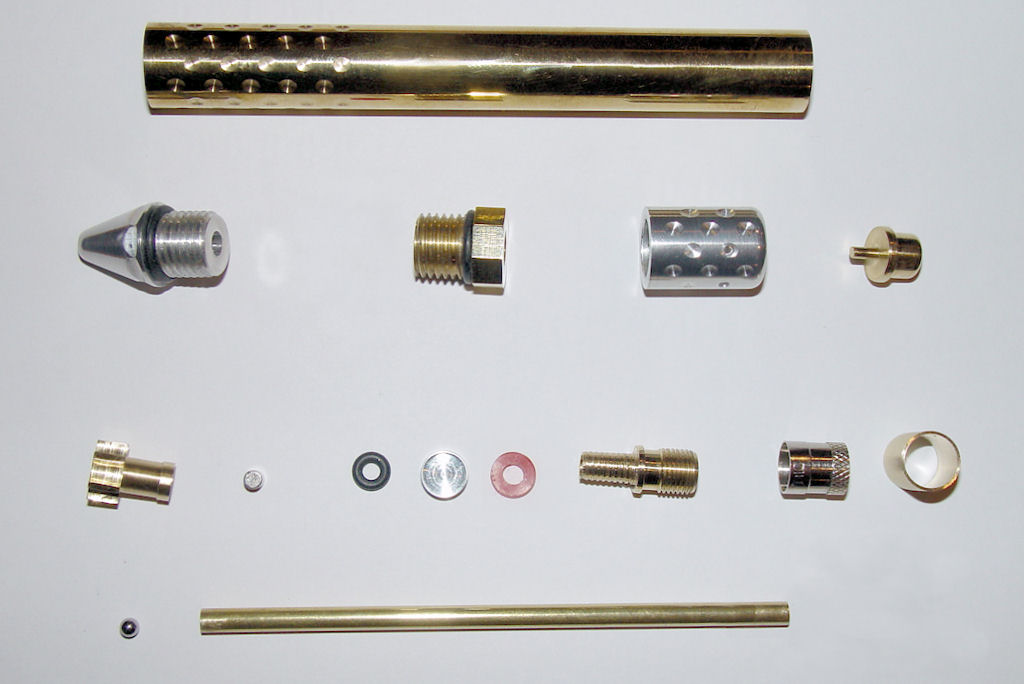
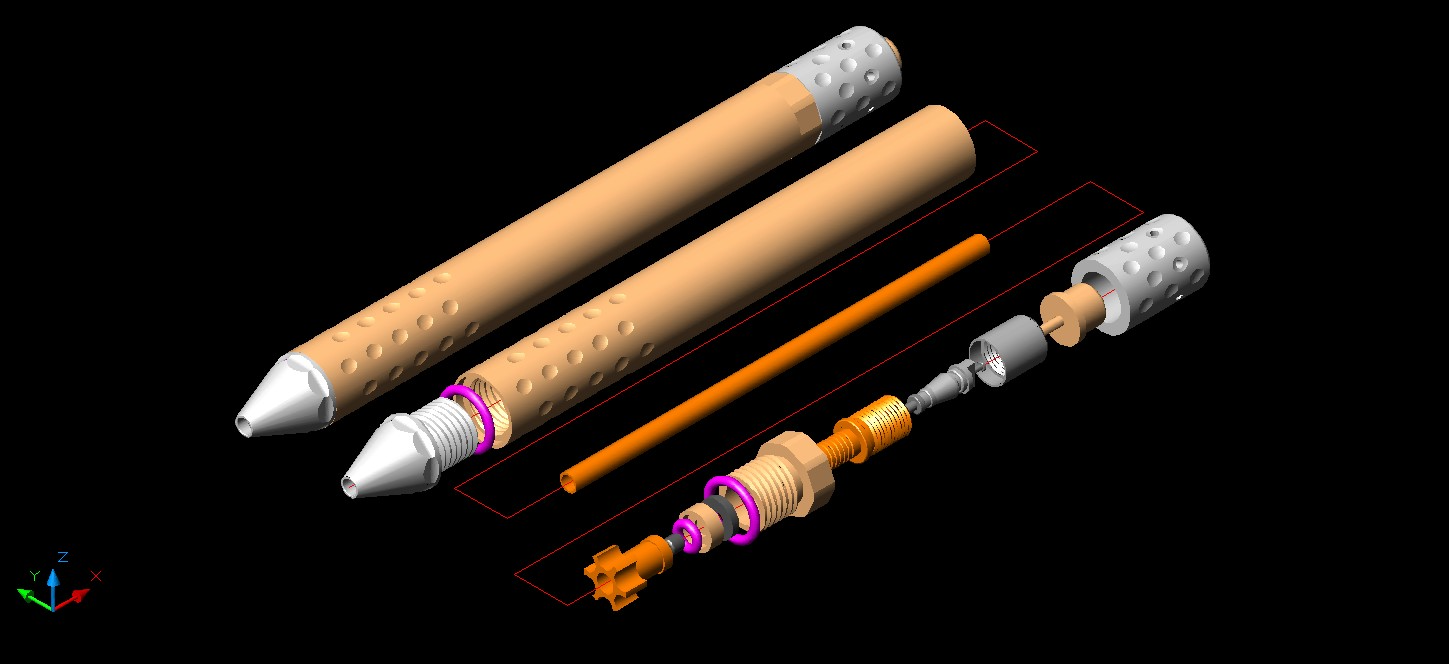
thanks to dewey-1 for the beautiful 3D work!
Step12: Video
Shooting tests Video


